In this NetApp training tutorial, I will cover NetApp Multiprotocol configuration for CIFS and NFS NAS. NetApp Multiprotocol allows both Windows and UNIX based clients to access the same files and folders. Scroll down for the videos and also text tutorial.
NetApp Multiprotocol Video Tutorial

William Mark

One of the best courses I’ve taken. Neil is clear and highly knowledgeable. He explains complex Netapp concepts and breaks them down into digestible easy to understand chunks. I’ve taken NetApp Boot camps that are too fast paced but this is perfect.
Security Style Options
There are four different security styles in NetApp ONTAP:
- UNIX
- NTFS
- Mixed
- Unified (used only on legacy infinite volumes)
We specify the security style when we configure a volume. Different volumes on the same storage system can have different security styles. Security styles can be set at the volume and at the qtree level. By default, qtrees will inherit the security style of their containing volume.
For example, if you create volume-1 with the NTFS security style and add qtree-1 to the volume, qtree-1 will also have the NTFS security style by default. You can override the volume’s security style at the qtree level though – you could configure qtree-1 with the UNIX security style.
Legacy Infinite volumes always use the unified security style and you can't configure or change their security style.
Security Style Operation
Security styles determine the types of permissions that ONTAP uses to control data access and what client type can modify those permissions. The security styles do NOT determine what client types can or cannot access data.
Windows and UNIX clients can both access volumes with any security style as long as they're allowed to by the authentication and authorization settings. UNIX users can access volumes with NTFS style permissions while Windows users can access volumes with UNIX style permissions, as long as multiprotocol is configured correctly.
If the security style is set to UNIX, UNIX permissions are always used on the files and folders in that volume or qtree. You can’t set NTFS permissions on a volume that has the UNIX style.
If the security style is set to NTFS, then NTFS permissions are always used.
If the security style is set to mixed or unified, then either permission style can be used on directories and files. Whichever type of client last modified the permissions that will be the style used.
For example, if a user on a Windows PC created a file in a Mixed security style volume and set permissions on it, then that file will have Windows style permissions. Then if a user on a Linux platform opens the same file, edits and changes the permissions, then that file will now have UNIX-based permissions.
The file doesn’t have both Windows and UNIX style permissions at the same time, it’s one or the other.

Security Style Defaults
UNIX style permissions are used by default on all data in ‘UNIX’, ‘Mixed’ and ‘Unified’ security style volumes. The default permissions are UNIX mode bits 0755. Meaning ‘owner’ gets read/write execute, the ‘group’ gets read and execute, and ‘other’ also gets read and execute.
By default, the effective security style on all data in NTFS security style volumes is (not surprisingly) NTFS. A Windows ACL allowing Full Control to Everyone is applied by default.
You can of course change the permissions on the files and folders in the volume for tighter security.
Data Access from Windows Hosts
If a Windows user tries to access an NTFS security style volume or qtree, it will be tested against NTFS security style ACLs as standard. If a Windows user tries to access a UNIX security style volume or qtree, their Windows username must be mapped to a UNIX UID because a UNIX security style volume will not understand its Windows username.
Data Access from UNIX Hosts
If a UNIX user tries to access a UNIX security style volume or qtree, it will be tested against the UNIX file permissions as standard. If a UNIX user tries to access an NTFS security style volume or qtree, its UNIX user and group must be mapped to a Windows user.

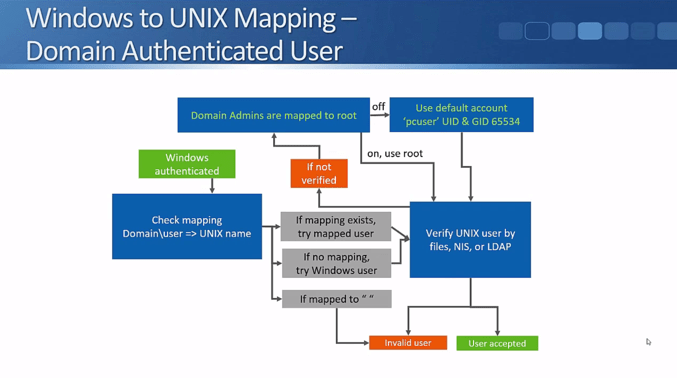
Let’s refer to the above flowchart to see how the authentication of Windows users works. Windows users can either be authenticated by an Active Directory Domain Controller, or by local user accounts on the NetApp storage system.
They will be authenticated if they've entered a valid username and password. In the real world Active Directory integrations are used far more often than local user accounts because they're a lot more scalable and convenient.
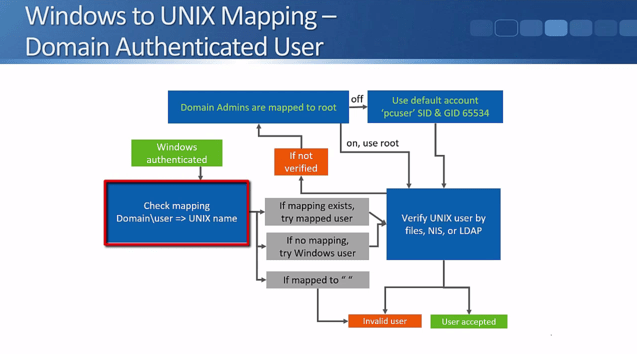
The flowchart above shows what happens when a user is successfully authenticated.
The NetApp administrator can configure a manual mapping from a Windows user to a UNIX user. For example, you could map the Windows username ‘Joe Bloggs’ to a UNIX user ‘JBLoggs’. If a mapping exists the storage system will check to see if the UNIX user has access to the data.
If a Windows user is explicitly mapped to a null string by the NetApp administrator in the mapping rules, they will be regarded as an invalid user (see the next slide below for what happens with invalid users).
If there's no manual mapping for the Windows username in the mapping rules, then the system will try to access the data using a matching UNIX user. Meaning, if the Windows username is ‘JoeBloggs’, it will check to see if there's a matching UNIX user also named ‘JoeBloggs’, and see if that user has access to the data.
The UNIX user will be verified by ‘files’ (local authentication), NIS, or LDAP.
If the user is not verified, the system will check to see if the rule that says that ‘Windows Domain Admin accounts are mapped to UNIX root’ is enabled. This option is enabled by default which means that if the Windows username does NOT match any of the configured mapping rules AND there's no UNIX user with the same name as the Windows user AND if the Windows username is a Windows Domain Admin, they will be mapped to the UNIX root user.
If there's no administrator defined mapping AND their Windows username is not the same as a valid UNIX username with access AND they're not a Windows Domain Admin or the Domain Admin is mapped to root option is turned off, then they will be assigned the default UNIX account. Just like the Domain Admins being mapped to root option, this is also enabled by default. The default UNIX user is "pcuser" with the UID and GID 65534.
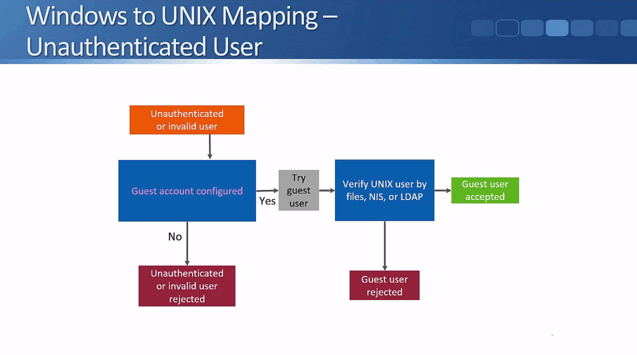
Next, let's consider what happens with Windows unauthenticated or invalid users who are trying to access data in a volume or qtree with a UNIX security style. First, the system checks to see if the guest account has been configured. If not (it is disabled by default) then they will be rejected.
If the guest account has been configured, the system will try the UID that is set as the guest account. The guest account will be verified by files, NIS, or LDAP. Depending on the result, the user will either get access to the data or be rejected.
Data Access from UNIX Hosts
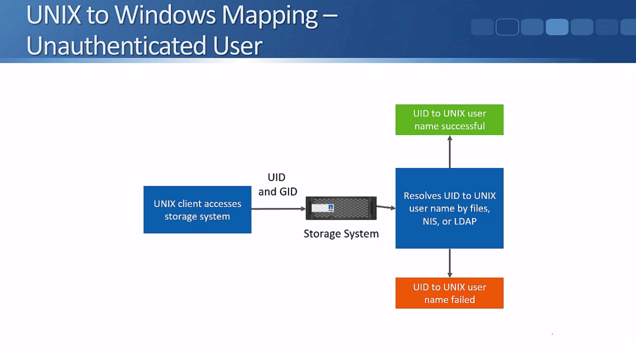
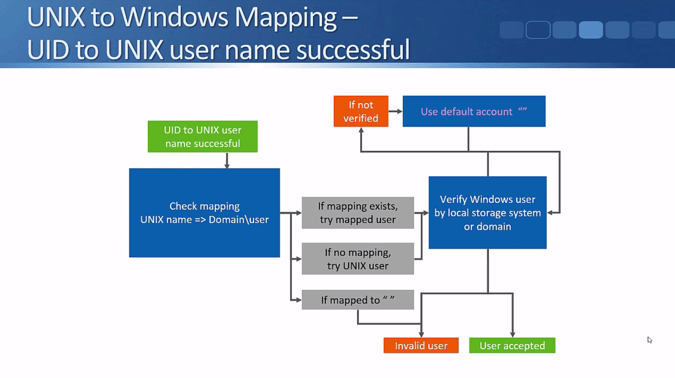
That covers the Windows to UNIX mapping. Next, let's see what happens in the other direction with UNIX to Windows mapping. When a UNIX client accesses a NetApp storage system, the storage system receives the UID and the GID.
The storage system resolves the UID to the UNIX username by files, NIS, or LDAP. It will be either a success or failure depending on if there is a matching user and password. If the credentials are valid then the system checks the mapping rules.
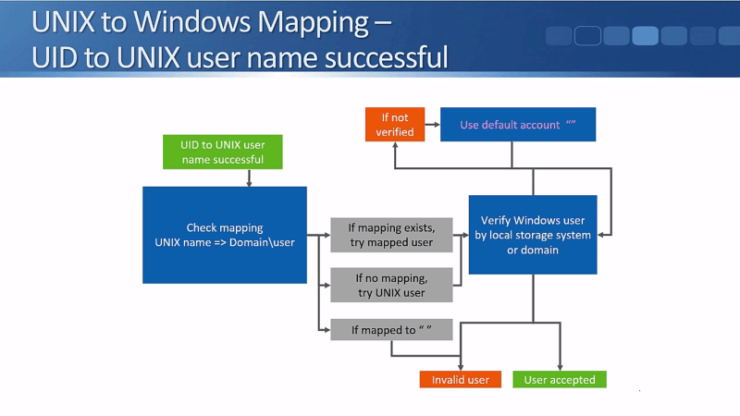
The storage system will first check if an administrator has explicitly mapped the UNIX user to a Windows user.
If a mapping does exist, for example, the UNIX user JoeBloggs to the Windows user JBLoggs, then the system will check to see if JBloggs has permission to access the data.
If the UNIX user is mapped to a null string then they're considered as an invalid user.
If there's no manual mapping for the UNIX user in the mapping rules, then the system will try to access the data using a matching Windows username. Meaning, if the UNIX user is ‘JoeBloggs’, it will check to see if there's a matching Windows username also named ‘JoeBloggs’, and see if that user has access to the data.
The Windows user is verified by the local storage system user database or by a Windows Domain Controller. If the client is mapped to a valid Windows username with permissions to access the data, then they will be accepted.
If they're not verified, then we can use a default Windows account and see if that Windows account has access to the data. The default Windows account is a null string which basically means that the feature is disabled by default. You can optionally set a valid Windows username as the default account that UNIX users will be mapped to if they don't match a more specific mapping.
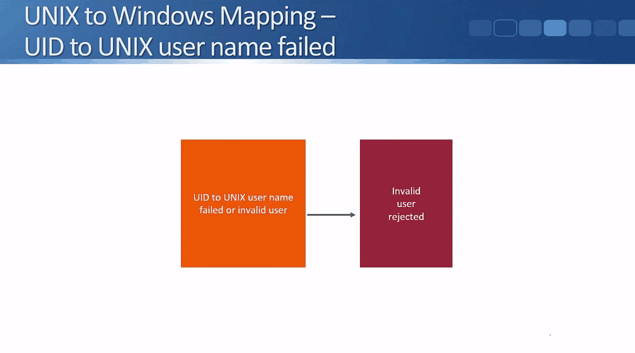
What happens to the failed UID to UNIX username or to an invalid user is very simple - they'll be rejected and won’t have access to the data.
NetApp Multiprotocol Name Mappings Video Tutorial

NetApp Multiprotocol Name Mappings
Client access to NAS volumes on a NetApp storage system is controlled by either NTFS (Windows) or UNIX style permissions (different volumes on the same storage system can have different security styles.) If a Windows user wants to access data with UNIX style permissions then the Windows user account has to be mapped to a UNIX user account. And vice versa if a UNIX user wants to access data with Windows style permissions.
Name mappings are used to map the Windows user accounts to UNIX or vice versa. They can be configured either in the GUI or in the command line. In both cases we use regular expressions to configure the mappings.
Regular expressions (often known as ‘regex’) are used to match strings of characters and/or numbers. They're used regularly in lots of different areas in IT, like in IP telephony when configuring dial plan rules; and in firewalls and Intrusion Prevention Systems when looking for a string that would signify an attack. Regular expressions are very flexible when it comes to matching strings. This is the reason why we use them to configure the name mappings in NetApp multiprotocol.
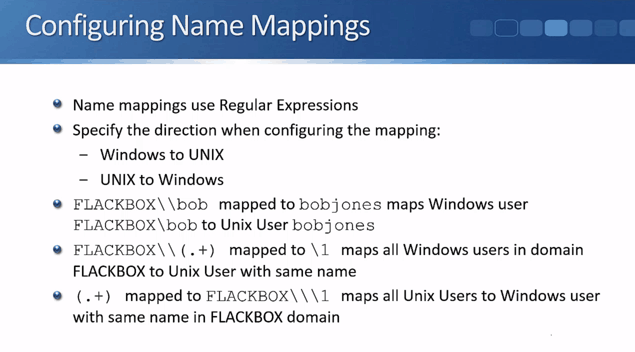
Always specify the direction when configuring a mapping. The system needs to know whether it is for Windows user to UNIX user or the other way around. Then configure the string that you are looking for and what that stringed is going to be changed (mapped) to. Let’s go through it step-by-step using the below examples.
NetApp MultiProtocol Name Mapping Example 1A – Windows to UNIX
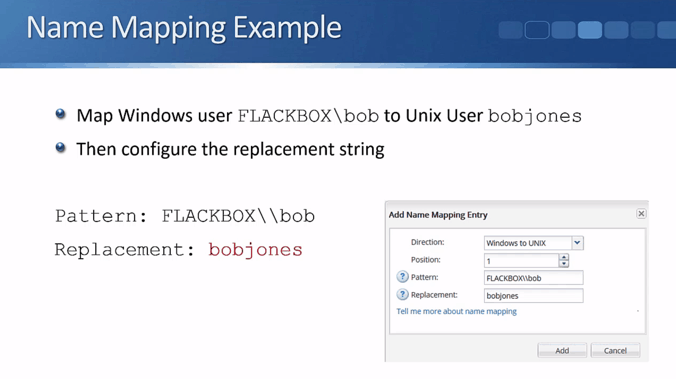
For our first example, we need to allow a Windows user to access some files and folders that have UNIX security style configured. The user will log into Windows as FLACKBOX\bob, and they should access the data as the UNIX user bobjones.
First we specify the text string we want to match on. Enter this in the ‘Pattern’ field in ONTAP System Manager:
FLACKBOX\\bob
Next, we specify the string which will replace that. Enter it in the ‘Replacement’ field in System Manager, and we’re done.
bobjones
NetApp MultiProtocol Name Mapping Example 1B – UNIX to Windows
If the UNIX user bobjones will be accessing folders with NTFS security style as FLACKBOX\bob, then we need to configure a mapping in the opposite direction, from UNIX to Windows. The pattern we're looking for is bobjones and the replacement will be Flackbox\\bob.

NetApp MultiProtocol Name Mapping Example 2A – Windows to UNIX
Adding a separate mapping for every single user is not scalable, so for our second example, we’re going to map all Windows users in the FLACKBOX domain to a UNIX user with the same name (e.g. if the Windows username is FLACKBOX\bobjones, the UNIX username will also be bobjones – with the domain name stripped off).
The storage system will actually do this by default anyway, but I want to show you how you would configure the mapping rules here.
With just one name mapping we can configure a rule that will work for all of our users. We need to configure the pattern that we are looking for first. In this example, it’s FLACKBOX\ (the domain name) and then the username which could be anything.
The first part of the string we’re looking for is ‘FLACKBOX\’. Because the backslash is a wildcard in regex, we need to include another backslash before it to say ‘look for literally a backslash. The next character is not a wildcard’.
The first part looks like this: FLACKBOX\\ and it means look for FLACKBOX\
For the next part we need to match the username which could be anything. Since we want to match any random string, we use the dot ‘.’ regular expression wildcard which means any character (a-z,0-9). Then after the dot we add a plus ‘+’ sign which means one or more repetitions of the previous character.
This will match any string of any length following ‘FLACKBOX\’, as long as there is at least one character.
The second part looks like this: .+
When we put the two parts together, it looks this: FLACKBOX\\.+
There’s one more thing we need to do. Because we need to copy the 2nd part (the username) back into the replacement string, we need to highlight it. We do that by including it inside parentheses.
This is what the final pattern string looks like:
FLACKBOX\\(.+)
We copy the 2nd part of the matched pattern (.+) back into the replacement string. The way we do that is by specifying \1 as the replacement string. \1 means copy whatever is in the first set of parentheses in the pattern string here. (We only have one set of parentheses in this example, so \2 wouldn’t match anything.)
So if a Windows user was logged in as FLACKBOX\bobjones that would match the FLACKBOX\\(.+) pattern. ‘bobjones’ would be caught by the (.+) and because we've put that in parentheses, that is what is copied into a replacement field.
So FLACKBOX\bobjones is replaced with bobjones.
FLACKBOX\janesmith would be replaced with janesmith.
What we're doing is stripping off the domain portion of the username.

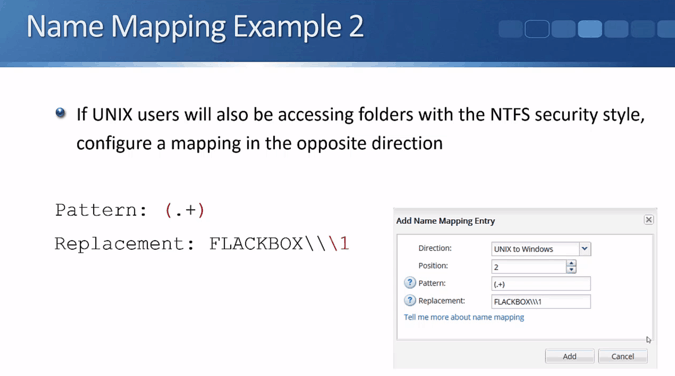
NetApp MultiProtocol Name Mapping Example 2B – UNIX to Windows
If the UNIX users will also be accessing folders with the NTFS security style, configure a mapping in the opposite direction. In the previous case we were looking for Windows users, stripping off the domain name and then using the resulting username as their UNIX username when they were accessing files and folders with a UNIX security style.
Here, we will be looking for any UNIX user and we're going to prefix their UNIX username with the Windows domain name when they access files and folders with an NTFS security style.
We will be using .+ as the pattern again since we are looking for a username that could be any string of text. And since we will be copying this into the replacement pattern, we will put the .+ inside parentheses.
On the replacement the string will start as FLACKBOX followed by two backslashes - we need to put two backslashes since we literally mean backslash (not the wildcard). Then we followed it with another backslash one to copy the pattern.
So it’s the Flackbox domain name: FLACKBOX
Followed by literally a backslash: \\
Followed by whatever is in the first set of parentheses in the original pattern: \1
This is how it looks:
FLACKBOX\\\1
So if the UNIX username is bobjones, that would be changed to FLACKBOX\bob jones.
If the UNIX username is janesmith, that would be changed to FLACKBOX\janesmith.
So that’s how you can map a Windows username to a matching UNIX username and vice versa.
As mentioned earlier above and in Part 1, if there’s no explicitly configured mapping to override it, the system will try matching usernames for multiprotocol access. So you don’t actually need to configure Example 2 as it is done by the system anyway. The last example was just used to show how to configure mappings and how regular expressions works.
Recommended Security Styles – Windows or UNIX Only
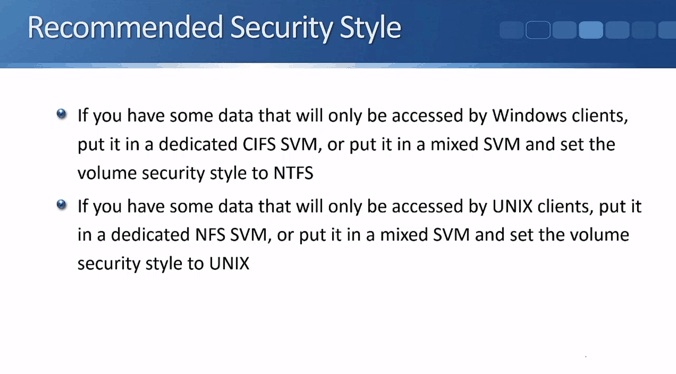
Lastly, we will talk about the recommended security styles. Basically, if you have data that will only be accessed by Windows clients, then set the security style to NTFS. And if you have data that will only be accessed by UNIX style clients, then set the security style to UNIX.
In other words, if you have data that will only be accessed by Windows clients, put it in a dedicated CIFS SVM, or put it in a mixed SVM and set the volume security style to NTFS. If you have data that will only be accessed by UNIX clients, put it in a dedicated NFS SVM, or put it in a mixed SVM and set the volume security style to UNIX.
This setup is typical in real-world deployments.
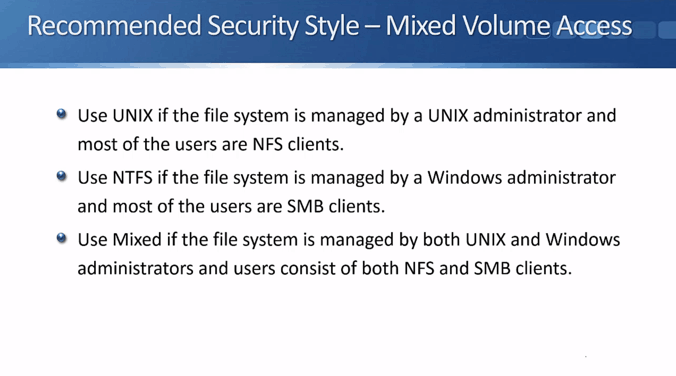
Recommended Security Styles – Mixed Volume Access
If you need both Windows and Linux clients to have access to the same data, then you will need to configure mixed volume access. Use ‘UNIX’ if the file system is managed by a UNIX administrator and most of the users are NFS clients. In that case, the data will sometimes be accessed by Windows clients, but the security style will always be UNIX.
Use ‘NTFS’ if the file system is managed by a Windows administrator and most of the users are SMB clients. In that case, it is sometimes being accessed by Linux clients, but the security style is always going to be NTFS.
Finally, use ‘mixed’ if the file system is managed by both UNIX and Windows administrators and users consist of a fairly even mix of both NFS and SMB clients. The security permission can be either style. It will be whichever client last set their permissions on that file or folder (as explained in Part 1).
With all three of the options, remember that you need to have multiprotocol configured correctly for all your clients for them to be able to access the data.
If the data in a particular volume or qtree is always going to be accessed by only Windows or UNIX style clients, then you don't need to worry about configuring multiprotocol. You just need to worry about your Export Policies and your standard UNIX or Windows file security.
NetApp Multiprotocol Configuration Example
This configuration example is an excerpt from my ‘NetApp ONTAP 9 Complete’ course. Full configuration examples using both the CLI and System Manager GUI are available in the course.
Want to practice this configuration for free on your laptop? Download your free step-by-step guide ‘How to Build a NetApp ONTAP Lab for Free’

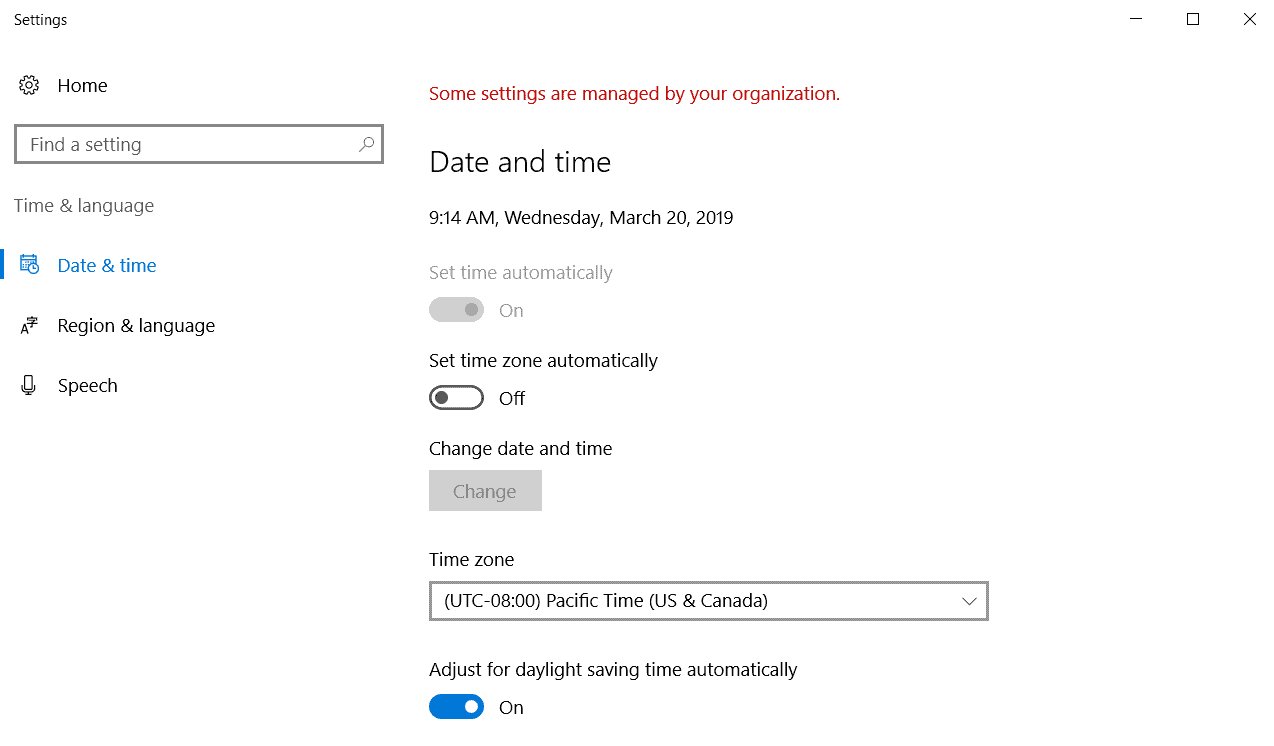
- Ensure the WinA client and the ONTAP cluster are still set to the same date and time.
Check the date, time and timezone on the WinA client.

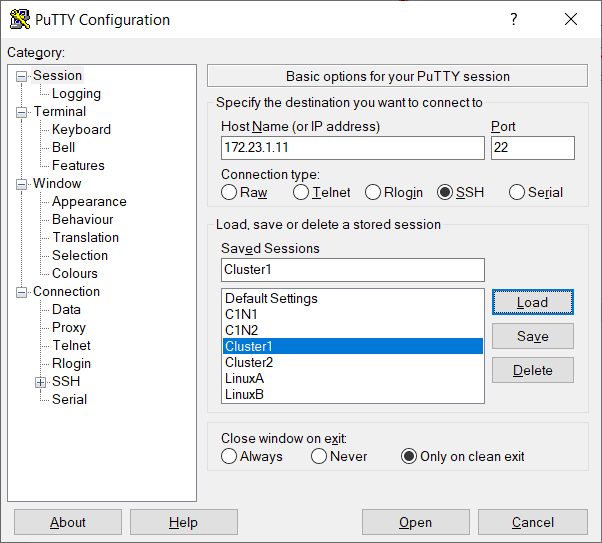
Log in to the ONTAP CLI.

Set the timezone, date and time to match the WinA client. The example below sets the date and time to 20th March 2019, 09:23am PST.
cluster1::> cluster date modify -timezone US/Pacific
cluster1::> cluster date modify -dateandtime 201903200923
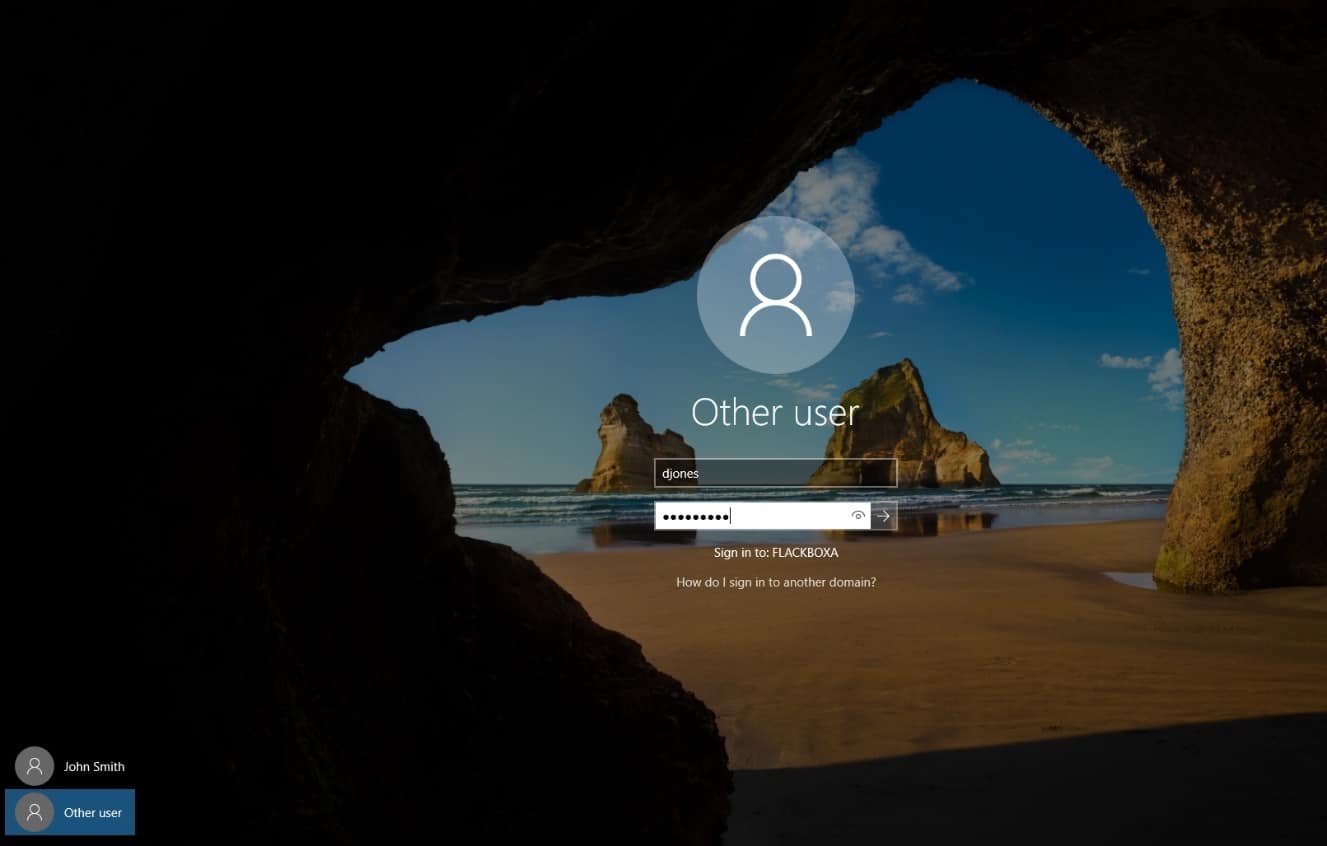
2. On the LinuxA client, create users named djones and jsmith and add them both to the sales group. Set a password of Flackbox1 for both users.
Log in to the LinuxA client as the flackbox user and open a Terminal window.
flackbox@ubuntu:~$ sudo useradd -m -s /bin/bash djones -g sales
flackbox@ubuntu:~$ sudo useradd -m -s /bin/bash jsmith -g sales
flackbox@ubuntu:~$ sudo passwd djones
Enter new UNIX password: Flackbox1
Retype new UNIX password: Flackbox1
passwd: password updated successfully
flackbox@ubuntu:~$ sudo passwd jsmith
Enter new UNIX password: Flackbox1
Retype new UNIX password: Flackbox1
passwd: password updated successfully
flackbox@ubuntu:~$
3. Verify and note down the UIDs of djones and jsmith.
flackbox@ubuntu:~$ grep djones /etc/passwd
djones:x:1003:1001::/home/djones:/bin/bash
flackbox@ubuntu:~$ grep jsmith /etc/passwd
jsmith:x:1004:1001::/home/jsmith:/bin/bash
The UID of djones is 1003.
The UID of jsmith is 1004.
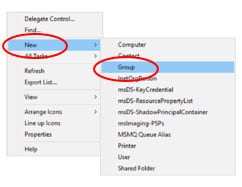
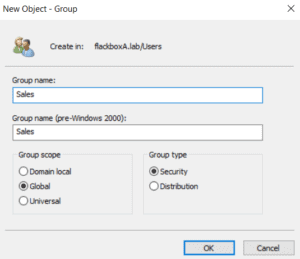
4. On the WinA Active Directory server, create a group named Sales.
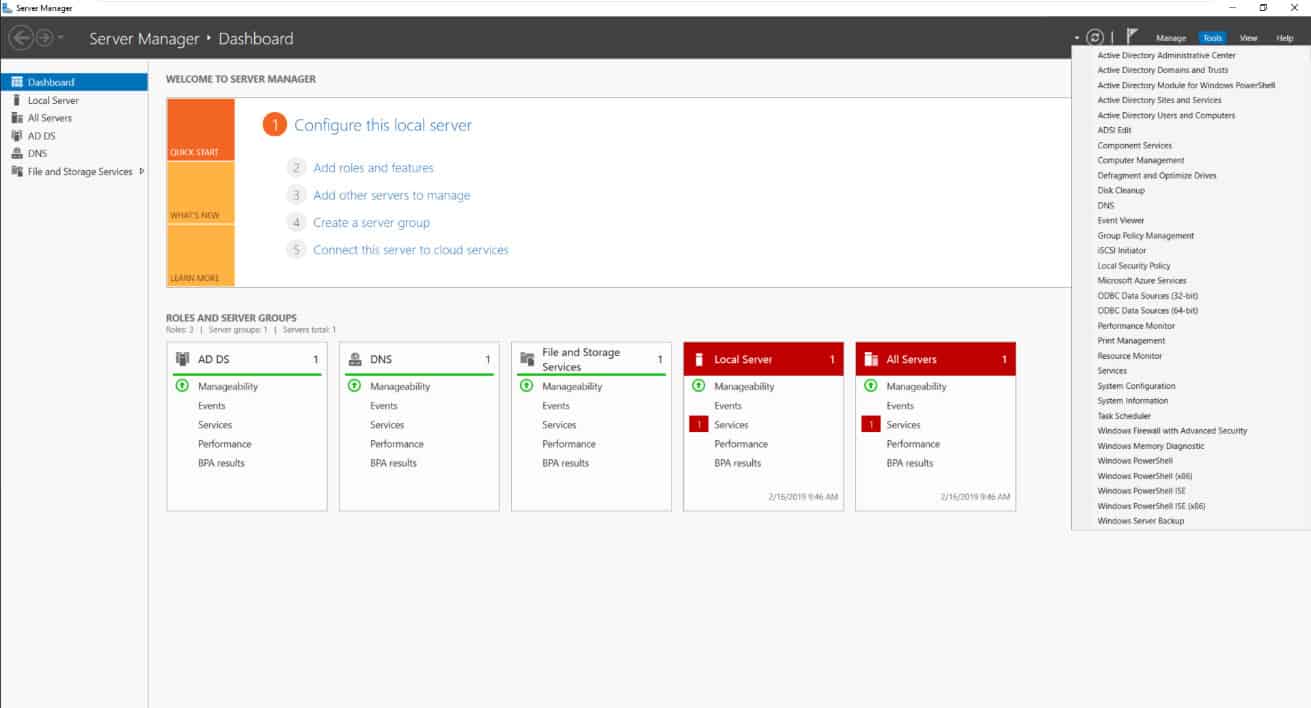
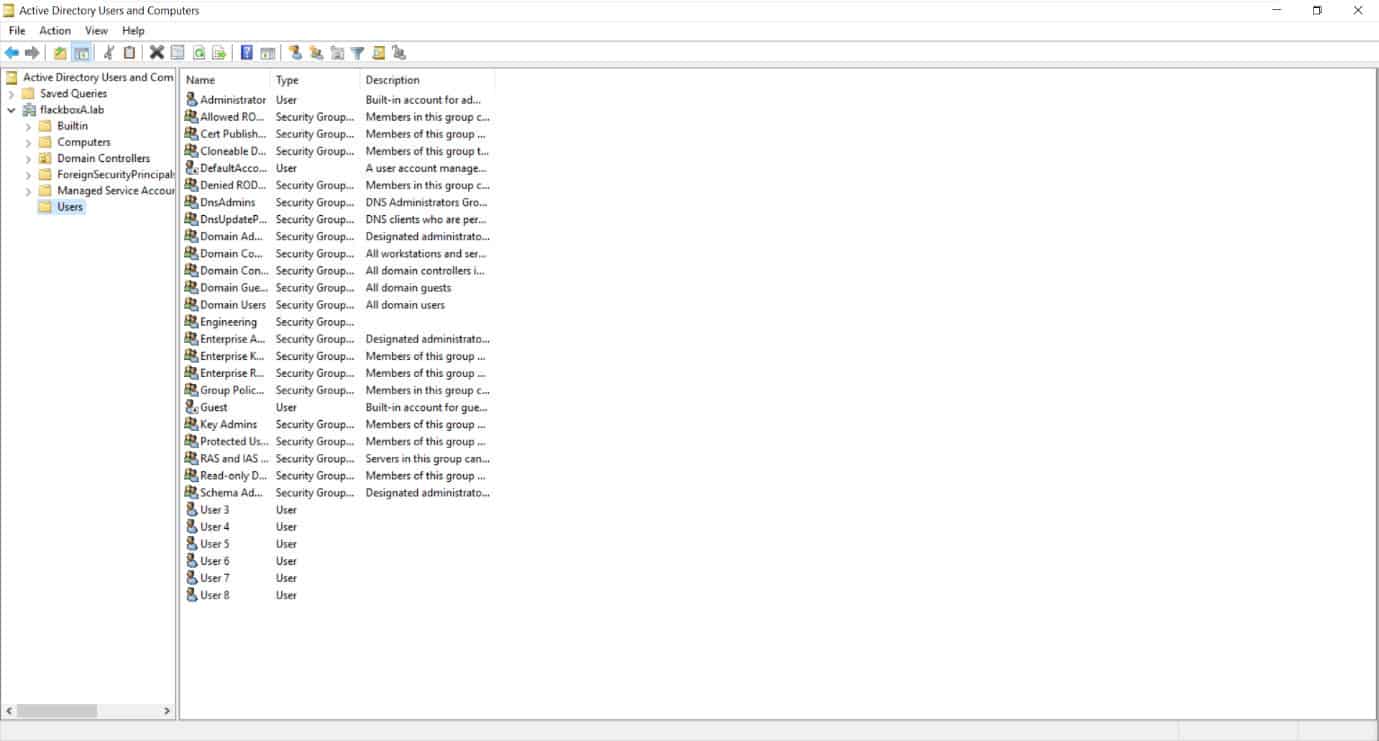
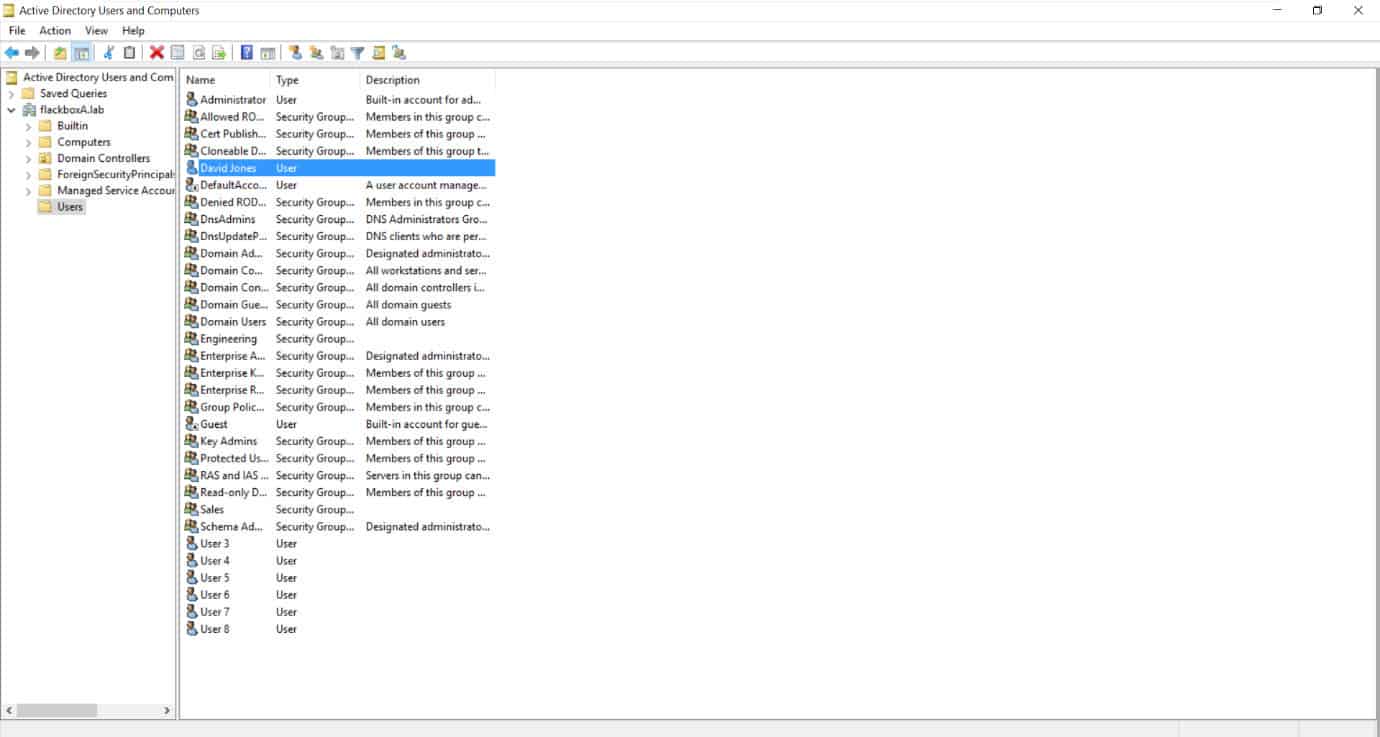
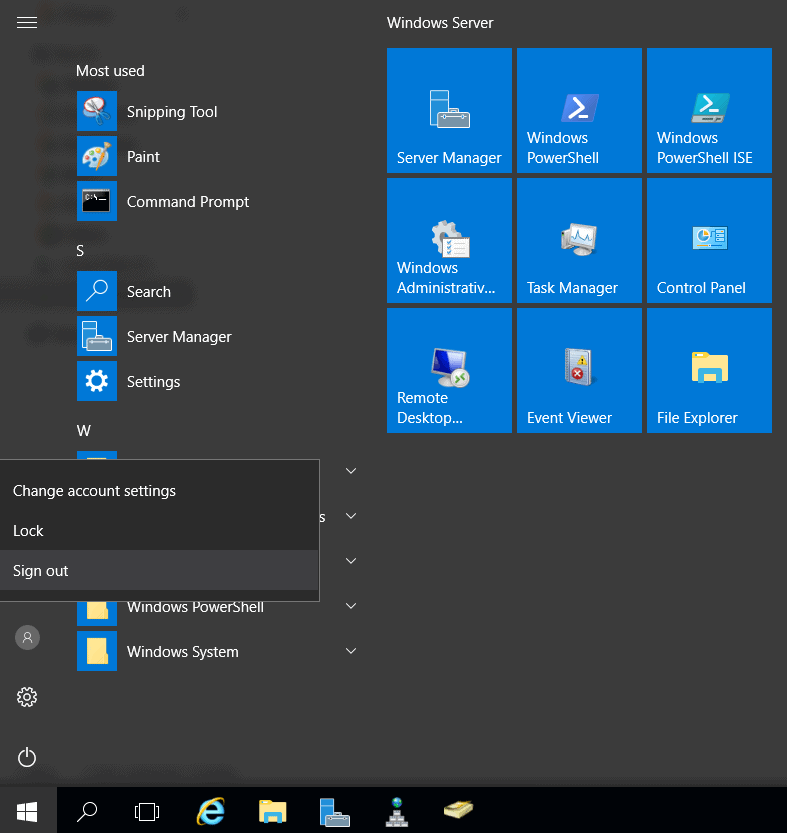
Open the Active Directory Users and Computers applet on the WinA server from Server Manager.
Click on the Users OU on the left hand menu, then right-click in free space in the main window and select ‘New > Group’

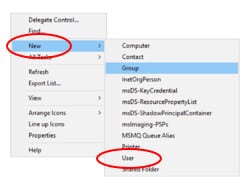
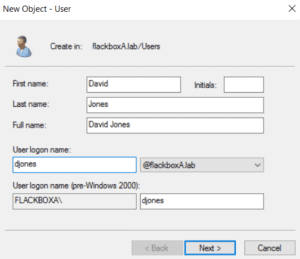
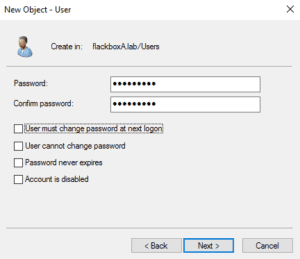
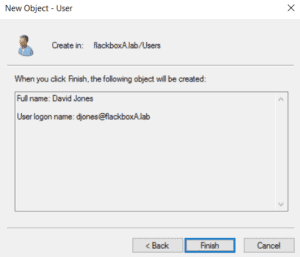
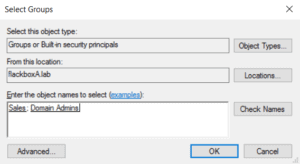
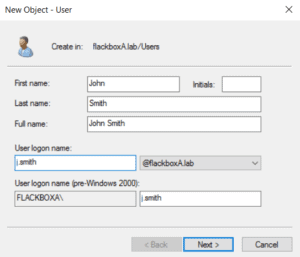
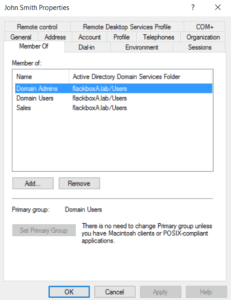
5. Create users named djones and j.smith and add them both to the Sales and Domain Admins groups (we would not usually add normal users to the Domain Admins group but we need to give them rights to log on to the server for testing). Set a password of Flackbox1 for both users.
IMPORTANT: The UNIX users are djones and jsmith. The Windows users are djones (the same as the UNIX username) and j.smith (different than the UNIX username – it has a dot.)
Click on the Users OU in the left hand menu, then right-click in free space in the main window and select ‘New > User’
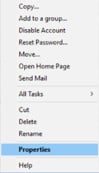
Right-click on the user and select Properties.
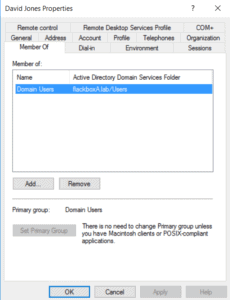
Select the ‘Member of’ tab and click ‘Add’.
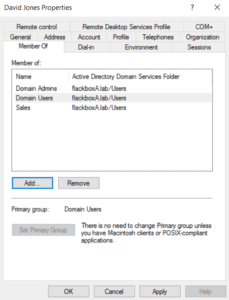
Repeat for j.smith.
6. In ONTAP, create a new SVM named Multi and enable both CIFS and NFS. Use NTFS as the root volume security style.
Manually (without using a Subnet) create the LIFs shown in the table below for the SVM. Allow both CIFS and NFS clients to use the same LIFs. The gateway address is 172.23.2.254. Use the SVM wizard to create the 1st LIF if using System Manager
Accept the defaults for other settings. Do not create any data volumes yet.
| LIF Name | IP Address | Node | Port |
| Multi_cifs_nfs_lif1 | 172.23.2.41 | cluster1-01 | e0d |
| Multi_cifs_nfs_lif2 | 172.23.2.42 | cluster1-01 | e0e |
| Multi_cifs_nfs_lif3 | 172.23.2.43 | cluster1-02 | e0d |
| Multi_cifs_nfs_lif4 | 172.23.2.44 | cluster1-02 | e0e |
Create the SVM, using NTFS as the security style.
cluster1::> vserver create -vserver Multi -rootvolume-security-style ntfs
[Job 91] Job succeeded:
Vserver creation completed.
Allow only CIFS and NFS.
cluster1::> vserver remove-protocols -vserver Multi -protocols fcp,iscsi,ndmp
The SVM will verify services are available when you try to configure them so you need to configure networking first. Create the LIFs.
cluster1::> network interface create -vserver Multi -lif Multi_cifs_nfs_lif1 -role data -data-protocol cifs,nfs -home-node cluster1-01 -home-port e0d -address 172.23.2.41 -netmask-length 24
cluster1::> network interface create -vserver Multi -lif Multi_cifs_nfs_lif2 -role data -data-protocol cifs,nfs -home-node cluster1-01 -home-port e0e -address 172.23.2.42 -netmask-length 24
cluster1::> network interface create -vserver Multi -lif Multi_cifs_nfs_lif3 -role data -data-protocol cifs,nfs -home-node cluster1-02 -home-port e0d -address 172.23.2.43 -netmask-length 24
cluster1::> network interface create -vserver Multi -lif Multi_cifs_nfs_lif4 -role data -data-protocol cifs,nfs -home-node cluster1-02 -home-port e0e -address 172.23.2.44 -netmask-length 24
You also need to add a route when creating LIFs at the command line.
cluster1::> network route create -vserver Multi -destination 0.0.0.0/0 -gateway 172.23.2.254
Configure the DNS settings. You can ignore the single-point-of-failure warning message in this lab environment.
cluster1::> vserver services dns create -vserver Multi -domains flackboxA.lab -name-servers 172.23.4.1
Warning: Only one DNS server is configured. Configure more than one DNS server to avoid a single-point-of-failure.
Enable CIFS on the SVM.
cluster1::> vserver cifs create -vserver Multi -cifs-server Multi -domain flackboxA.lab
In order to create an Active Directory machine account for the CIFS server, you must supply the name and password of a Windows account with sufficient privileges to add computers to the "CN=Computers" container within the "FLACKBOXA.LAB" domain.
Enter the user name: Administrator
Enter the password: Flackbox1
Info: SMB1 protocol version is disabled on this CIFS server. If required, use the (privilege: advanced) command "vserver cifs options modify -vserver Multi -smb1-enabled true" to enable it.
Enable NFS on the SVM.
cluster1::> vserver nfs create -vserver Multi
7. Verify the SVM has been created successfully.
cluster1::> vserver cifs show -vserver Multi
Vserver: Multi
CIFS Server NetBIOS Name: MULTI
NetBIOS Domain/Workgroup Name: FLACKBOXA
Fully Qualified Domain Name: FLACKBOXA.LAB
Organizational Unit: CN=Computers
Default Site Used by LIFs Without Site Membership:
Workgroup Name: -
Authentication Style: domain
CIFS Server Administrative Status: up
CIFS Server Description:
List of NetBIOS Aliases: -
cluster1::> vserver nfs show -vserver Multi
Vserver: Multi
General NFS Access: true
NFS v3: enabled
NFS v4.0: disabled
UDP Protocol: enabled
TCP Protocol: enabled
Default Windows User: -
NFSv4.0 ACL Support: disabled
NFSv4.0 Read Delegation Support: disabled
NFSv4.0 Write Delegation Support: disabled
NFSv4 ID Mapping Domain: defaultv4iddomain.com
NFSv4 Grace Timeout Value (in secs): 45
Preserves and Modifies NFSv4 ACL (and NTFS File Permissions in Unified Security Style): enabled
NFSv4.1 Minor Version Support: disabled
Rquota Enable: disabled
NFSv4.1 Parallel NFS Support: enabled
NFSv4.1 ACL Support: disabled
NFS vStorage Support: disabled
NFSv4 Support for Numeric Owner IDs: enabled
Default Windows Group: -
NFSv4.1 Read Delegation Support: disabled
NFSv4.1 Write Delegation Support: disabled
NFS Mount Root Only: enabled
NFS Root Only: disabled
Permitted Kerberos Encryption Types: des, des3, aes-128, aes-256
Showmount Enabled: enabled
Set the Protocol Used for Name Services Lookups for Exports: udp
NFSv3 MS-DOS Client Support: disabled
Idle Connection Timeout Value (in seconds): 360
Are Idle NFS Connections Supported: disabled
Hide Snapshot Directory under NFSv3 Mount Point: disabled
8. Verify the LIFs have been created successfully.
cluster1::> network interface show -vserver Multi
Logical Status Network Current Current Is
Vserver Interface Admin/Oper Address/Mask Node Port Home
----------- ---------- ---------- ------------------ ------------- ------- ----
Multi
Multi_cifs_nfs_lif1
up/up 172.23.2.41/24 cluster1-01 e0d true
Multi_cifs_nfs_lif2
up/up 172.23.2.42/24 cluster1-01 e0e true
Multi_cifs_nfs_lif3
up/up 172.23.2.43/24 cluster1-02 e0d true
Multi_cifs_nfs_lif4
up/up 172.23.2.44/24 cluster1-02 e0e true
4 entries were displayed.
9. Create the UNIX group sales and users djones and jsmith in the SVM. These users are the same as on the LinuxA client - neither username has a dot. Use the same GID and UIDs as on the LinuxA host.
cluster1::> vserver services unix-group create -vserver Multi -name sales -id 1001
cluster1::> vserver services unix-user create -vserver Multi -user djones -id 1003 -primary-gid 1001
cluster1::> vserver services unix-user create -vserver Multi -user jsmith -id 1004 -primary-gid 1001
10. Disable the default mapping of Windows administrators to the UNIX root account.
cluster1::> set -privilege advanced
Warning: These advanced commands are potentially dangerous; use them only when directed to do so by NetApp personnel. Do you want to continue? {y|n}: y
cluster1::*> vserver cifs options modify -vserver Multi -is-admin-users-mapped-to-root-enabled false
cluster1::*> vserver cifs options show -vserver Multi -fields is-admin-users-mapped-to-root-enabled
vserver is-admin-users-mapped-to-root-enabled
------- -------------------------------------
Multi false
cluster1::*> set -privilege admin
11. Create a 50MB volume in the SVM named win_vol. Mount it in the SVM namespace using the same name. This volume will be used mainly by Windows clients but also accessed by Linux clients.
cluster1::> volume create -vserver Multi -aggregate aggr1_C1N1 -volume win_vol -size 50MB -junction-path /win_vol
Warning: The export-policy "default" has no rules in it. The volume will therefore be inaccessible over NFS and CIFS protocol.
Do you want to continue? {y|n}: y
[Job 93] Job succeeded: Successful
The export policy will only apply to NFS clients. NFS clients will be accessing this volume so the export policy issue will be fixed in a few steps time.
12. Verify the volume security style is NTFS.
cluster1::> volume show -vserver Multi -volume win_vol -fields security-style
vserver volume security-style
------- ------- --------------
Multi win_vol ntfs
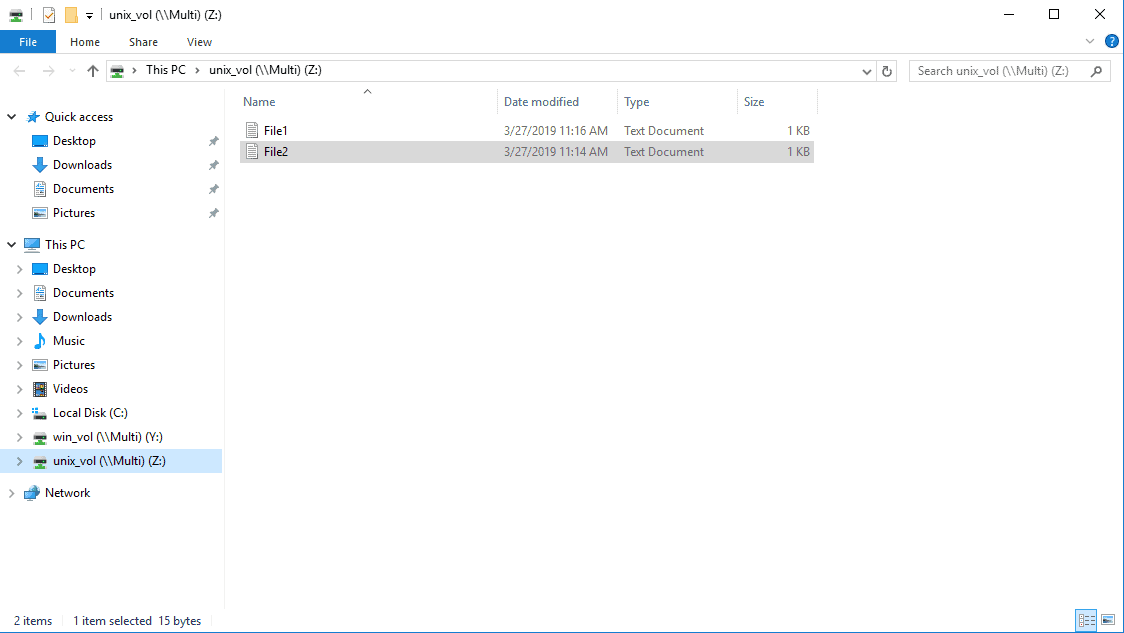
13. Create a 50MB volume in the SVM named unix_vol. Mount it in the SVM namespace using the same name. This volume will be used mainly by Linux clients but also accessed by Windows clients.
cluster1::> volume create -vserver Multi -aggregate aggr1_C1N1 -volume unix_vol -size 50MB -junction-path /unix_vol
Warning: The export-policy "default" has no rules in it. The volume will therefore be inaccessible over NFS and CIFS protocol.
Do you want to continue? {y|n}: y
[Job 95] Job succeeded: Successful
14. Ensure the volume security style is UNIX and enable rwx access for all clients.
cluster1::> volume show -vserver Multi -volume unix_vol -fields security-style
vserver volume security-style
------- -------- --------------
Multi unix_vol ntfs
The volume inherits the root volume security style of NTFS. Change this to UNIX and set the mode bits to allow access for all clients.
cluster1::> volume modify -vserver Multi -volume unix_vol -security-style unix -unix-permissions 0777
Volume modify successful on volume unix_vol of Vserver Multi.
Verify the changes.
cluster1::> volume show -vserver Multi -volume unix_vol -fields security-style
vserver volume security-style
------- -------- --------------
Multi unix_vol unix
cluster1::> volume show -vserver Multi -volume unix_vol -fields unix-permissions
vserver volume unix-permissions
------- -------- ----------------
Multi unix_vol ---rwxrwxrwx
15. Ensure both volumes are mounted in the SVM namespace.
cluster1::> volume show -vserver Multi -fields junction-path -volume win_vol
vserver volume junction-path
------- ------- -------------
Multi win_vol /win_vol
cluster1::> volume show -vserver Multi -fields junction-path -volume unix_vol
vserver volume junction-path
------- -------- -------------
Multi unix_vol /unix_vol
16. Edit the Default Export Policy for the Multi SVM to allow unrestricted access (including superuser) to all clients. This will be applied by default to all volumes in the SVM including win_vol and unix_vol. It will affect NFS, not CIFS clients.
cluster1::> vserver export-policy rule create -vserver Multi -policyname default -ruleindex 1 -protocol nfs,cifs -clientmatch 0.0.0.0/0 -rorule any -rwrule any -superuser any
17. Verify the Default Export Policy is configured correctly.
cluster1::> vserver export-policy rule show -vserver Multi -policyname default -instance
Vserver: Multi
Policy Name: default
Rule Index: 1
Access Protocol: cifs, nfs
List of Client Match Hostnames, IP Addresses, Netgroups, or Domains: 0.0.0.0/0
RO Access Rule: any
RW Access Rule: any
User ID To Which Anonymous Users Are Mapped: 65534
Superuser Security Types: any
Honor SetUID Bits in SETATTR: true
Allow Creation of Devices: true
18. Share both win_vol and unix_vol. Accept the default Everyone Full Control share permissions.
cluster1::> vserver cifs share create -vserver Multi -share-name win_vol -path /win_vol
cluster1::> vserver cifs share create -vserver Multi -share-name unix_vol -path /unix_vol
19. Verify ‘Everyone Full Control’ share permissions are applied.
cluster1::> vserver cifs share show -vserver Multi
Vserver Share Path Properties Comment ACL
-------------- ------------- ----------------- ---------- -------- -----------
Multi admin$ / browsable - -
Multi c$ / oplocks - BUILTIN\Administrators / Full Control
browsable
changenotify
show-previous-versions
Multi ipc$ / browsable - -
Multi unix_vol /unix_vol oplocks - Everyone / Full Control
browsable
changenotify
show-previous-versions
Multi win_vol /win_vol oplocks - Everyone / Full Control
browsable
changenotify
show-previous-versions
5 entries were displayed.
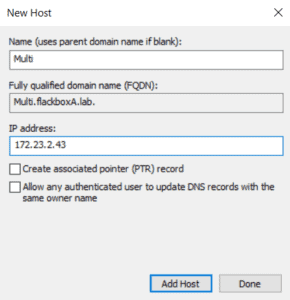
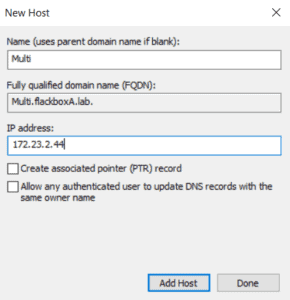
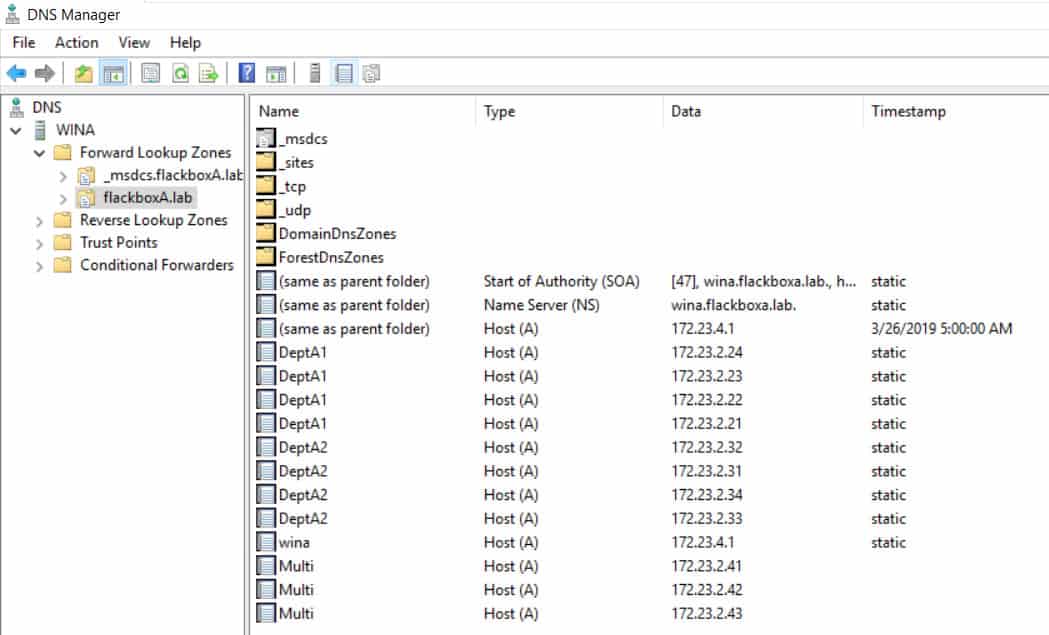
20. Enable off-box round robin DNS load balancing on the WinA DNS server for the four LIFs. Clients should reach the SVM using the FQDN Multi.flackboxA.lab
Open the DNS applet on the WinA server from Server Manager.

Expand the menu in the left-hand window and select the flackboxA.lab domain. Right-click in the right-hand window and select New Host (A or AAAA)…
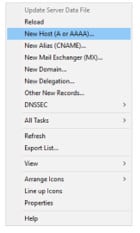
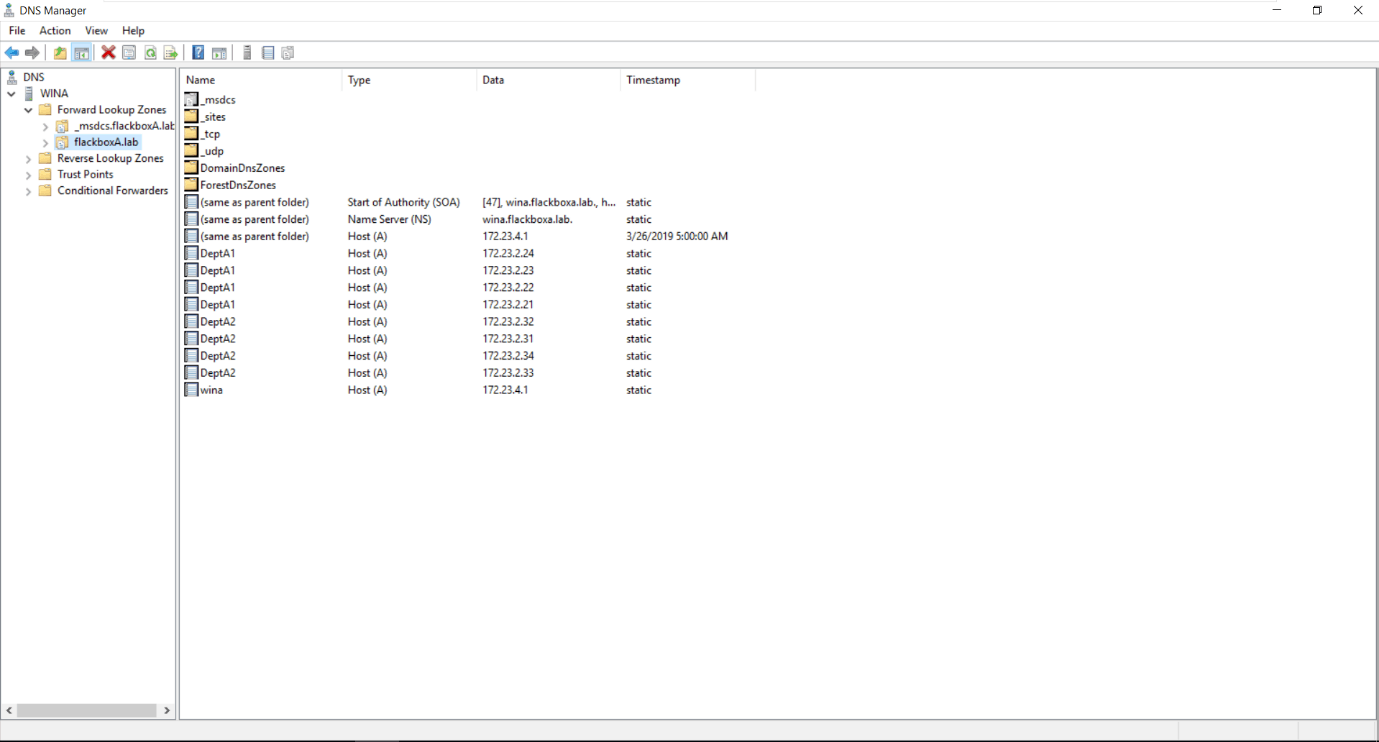
Add an Address (A) record for the first LIF with IP address 172.23.2.41 with the FQDN Multi.flackboxA.lab.

Repeat for the other three LIFs.

You should now have four A records for DeptA1.flackboxA.lab, one for each of the LIFs.
21. Log in to the LinuxA client as the flackbox user. Mount unix_vol and win_vol.
flackbox@ubuntu:~$ sudo mkdir /mnt/unix_vol
[sudo] password for flackbox:
flackbox@ubuntu:~$ sudo mkdir /mnt/win_vol
flackbox@ubuntu:~$ sudo mount Multi:/unix_vol /mnt/unix_vol
flackbox@ubuntu:~$ sudo mount Multi:/win_vol /mnt/win_vol
22. Log in to the LinuxA client as djones. Use the vi editor to create a file named File1.txt in unix_vol and add some text to it.
djones@ubuntu:~$ cd /mnt/unix_vol
djones@ubuntu:/mnt/unix_vol$ vi File1.txt
i
This is File1
~
~
:wq!
23. Set the UNIX mode bits permissions on File1.txt. Allow rwx access to the owner djones, do not allow any other access. Verify the change has been applied.
djones@ubuntu:/mnt/unix_vol$ chmod 700 File1.txt
djones@ubuntu:/mnt/unix_vol$ ls -l
total 0
-rwx------ 1 djones sales 17 Mar 26 18:53 File1.txt
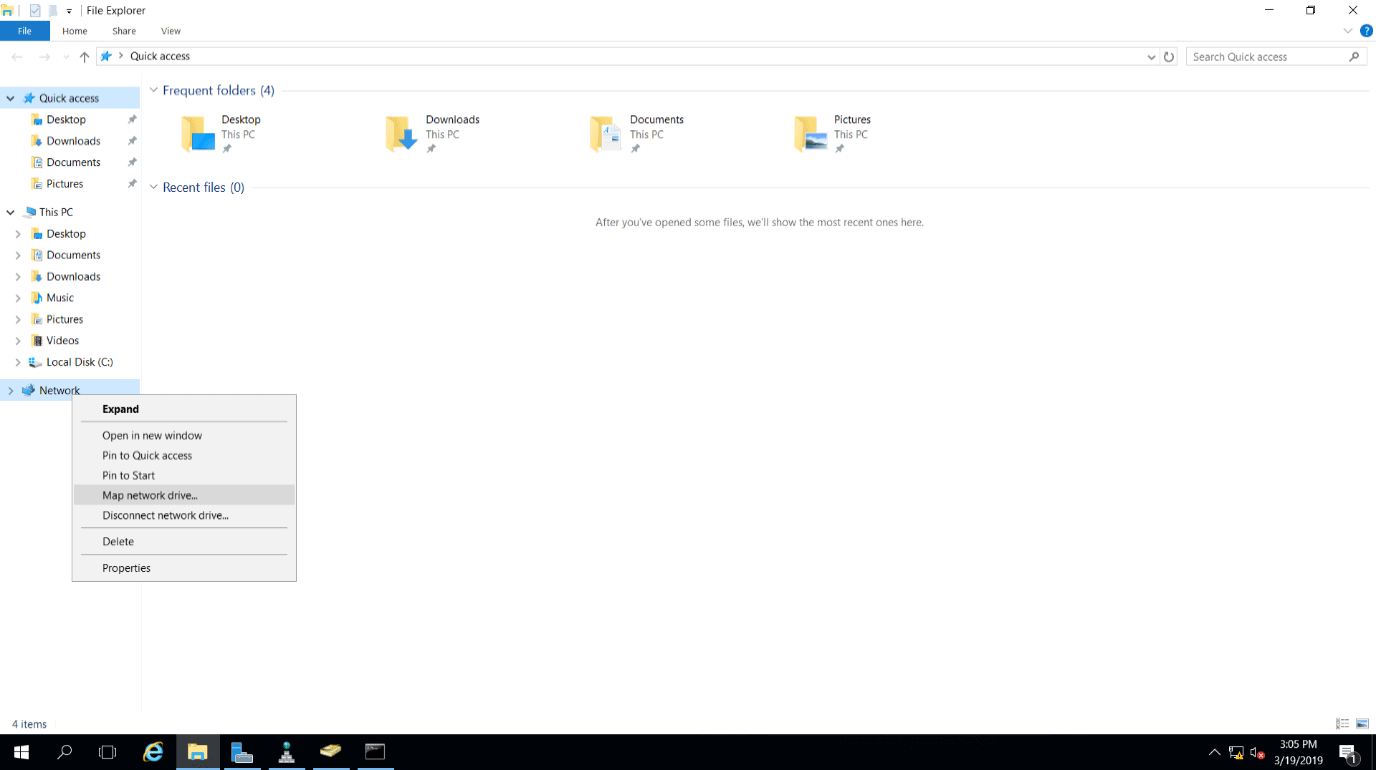
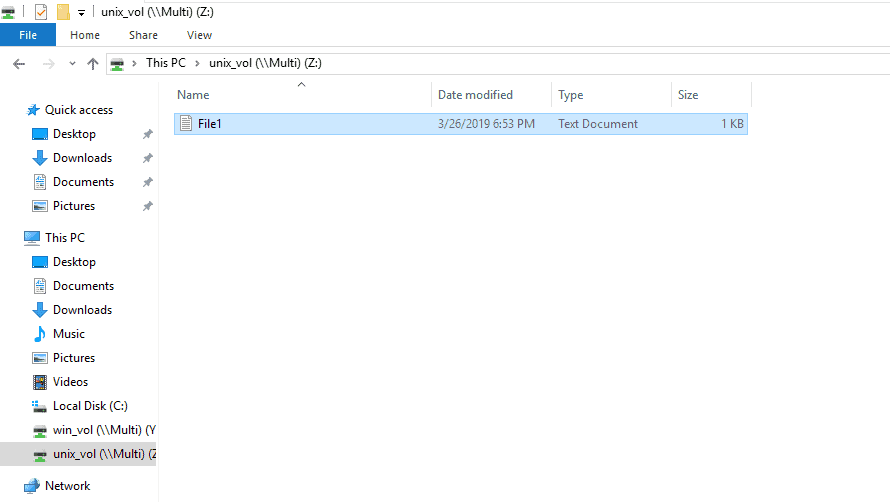
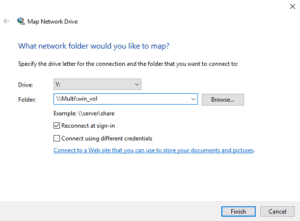
24. Log in to the WinA client as user djones and map a drive to unix_vol and win_vol.
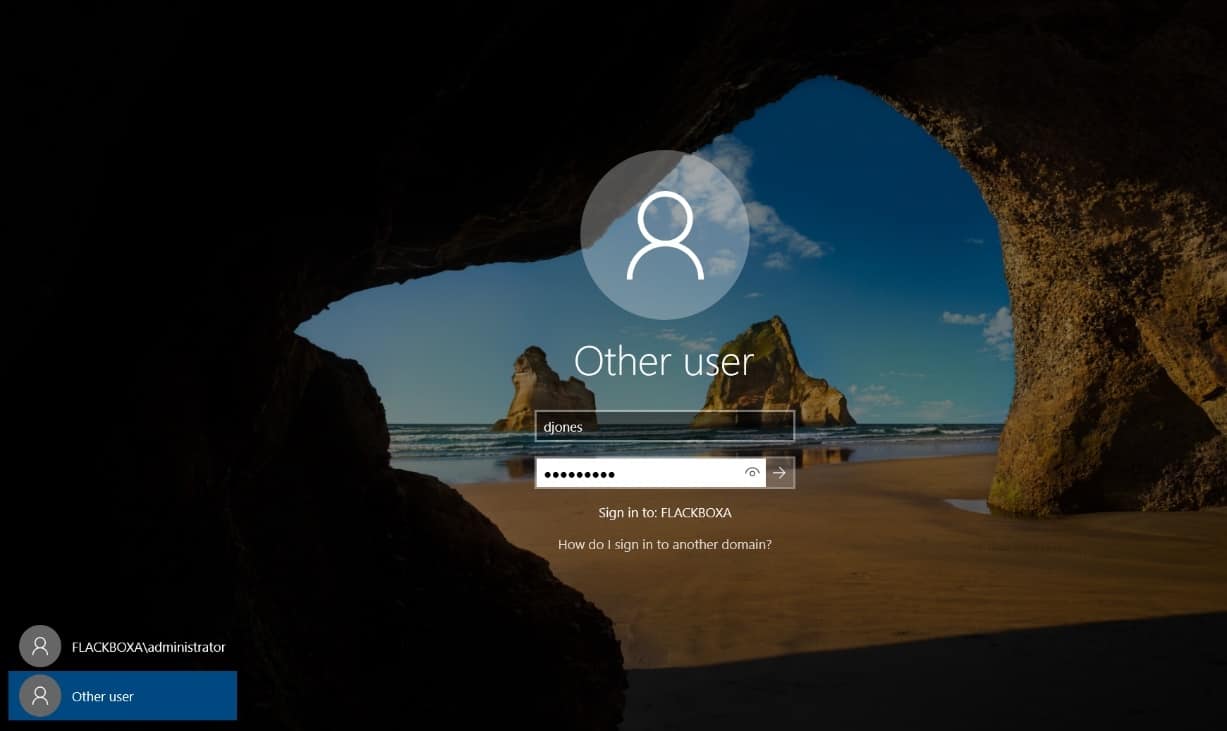
Map the drives to \\Multi\unix_vol and \\Multi\win_vol in File Explorer.


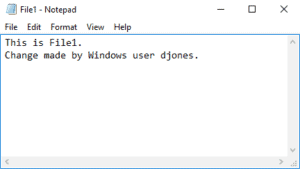
25. Should Windows user djones be able to open and edit File1.txt in unix_vol? Why or why not? Make any changes necessary to grant Windows user djones access to the file, then open it as them and add some text to verify they have write access.
The file is owned by UNIX user djones. ONTAP maps the Windows djones username to the UNIX djones username by default so no changes are required.
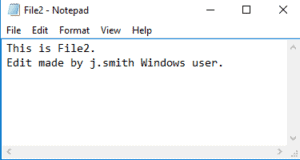
26. Log in to the LinuxA client as jsmith. Use the vi editor to create a file named File2.txt in unix_vol and add some text to it.
jsmith@ubuntu:~$ cd /mnt/unix_vol
jsmith@ubuntu:/mnt/unix_vol$ vi File2.txt
i
This is File2.
~
~
:wq!
27. Set the UNIX mode bits permissions on File1.txt. Allow rwx access to the owner jsmith, do not allow any other access. Verify the change has been applied.
jsmith@ubuntu:/mnt/unix_vol$ chmod 700 File2.txt
jsmith@ubuntu:/mnt/unix_vol$ ls -l
total 0
-rwx------ 1 djones sales 17 Mar 26 18:53 File1.txt
-rwx------ 1 jsmith sales 15 Mar 27 11:14 File2.txt
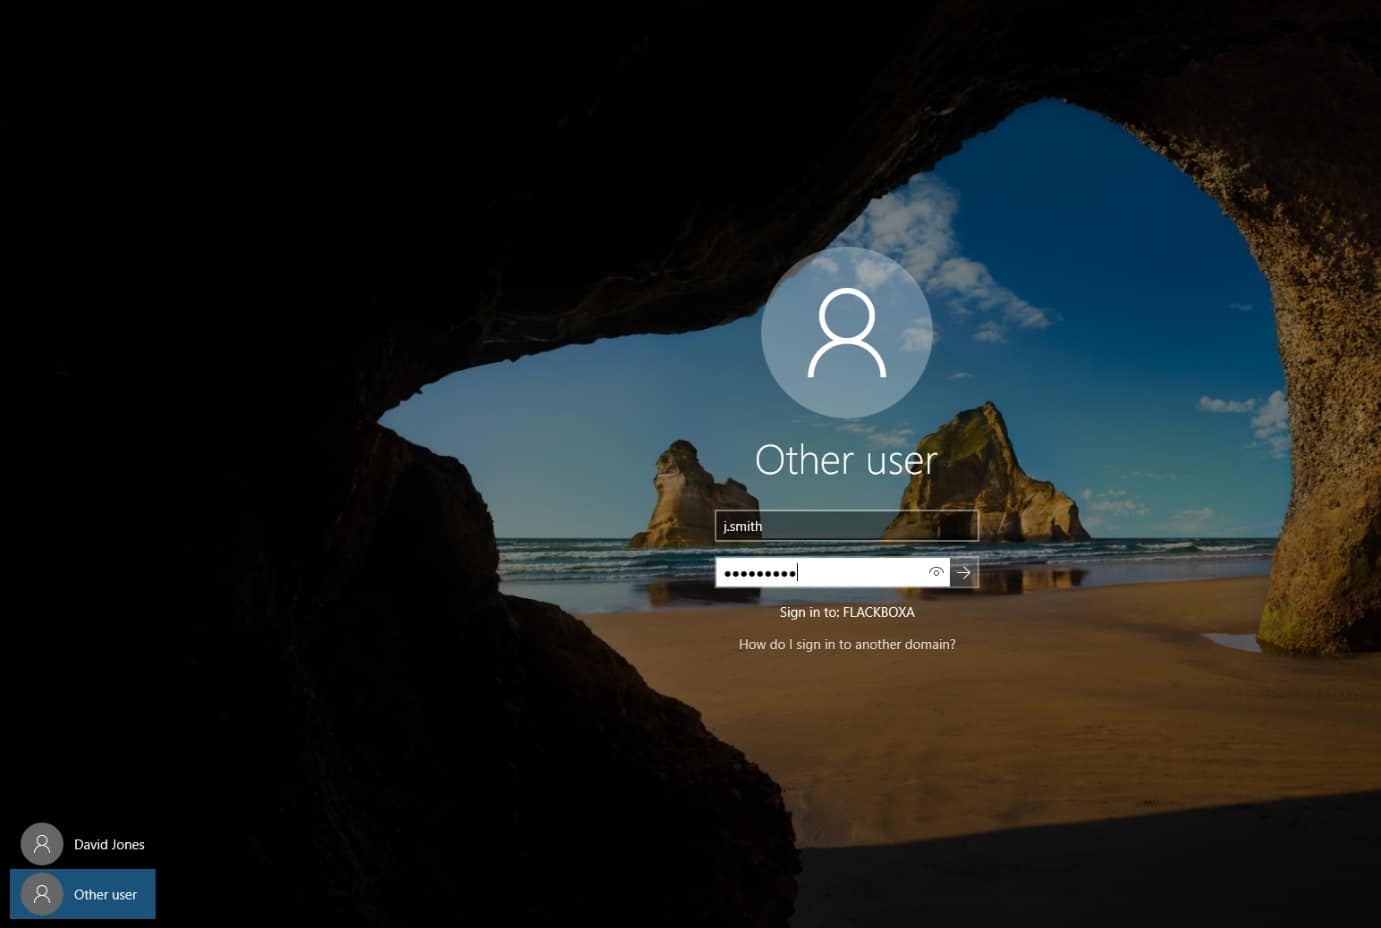
28. Log in to the WinA client as user j.smith and map a drive to unix_vol and win_vol.
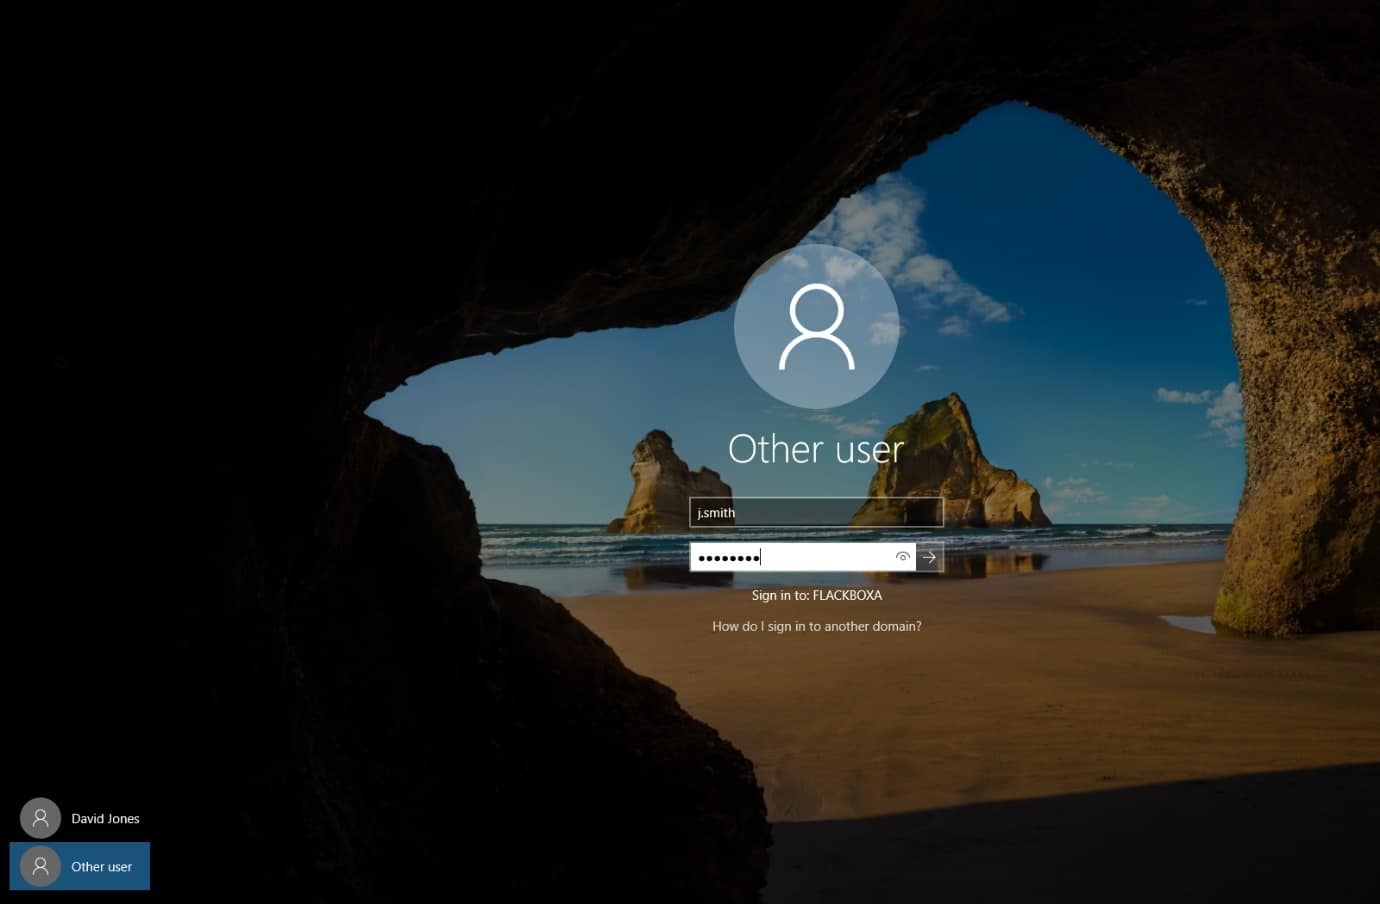
Map the drives to \\Multi\unix_vol and \\Multi\win_vol in File Explorer.


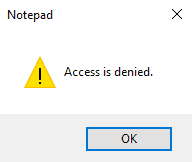
29. Should Windows user j.smith be able to open and edit File2.txt in unix_vol? Why or why not? Make any changes necessary to grant Windows user j.smith access to the file, then open it as them and add some text to verify they have write access.
The file is owned by UNIX user jsmith. ONTAP would map the Windows jsmith username to the UNIX jsmith username by default, but the Windows username is not jsmith, it is j.smith with a dot. The user is denied access to the file.

You need to manually create a custom mapping in ONTAP from Windows user j.smith to UNIX user jsmith. You could use ‘FLACKBOXA\j.smith’ as the pattern and ‘jsmith’ as the replacement, but you wouldn’t want to configure individual mappings like that for 500 users. A better way is to use regular expressions to remove the domain name and the dot after the first initial in the username.
cluster1::> vserver name-mapping create -vserver Multi -direction win-unix -position 1 -pattern "FLACKBOXA\\(.)\.(.+)" -replacement "\1\2"
Warning: The pattern field is a regular expression, and it contains a single backslash, which will be interpreted as the beginning of an escape sequence. For a literal backslash, type "\\" (without the quotes) instead.
Do you want to continue? {y|n}: y
The direction is Windows to UNIX - you want to give a Windows user access to a file with UNIX permissions set.
You need to remove the Windows domain name and the ‘.’ between their initial and surname.
Let’s break down the pattern…
FLACKBOXA - The domain name
\\ - The ‘\’ is a wildcard. You want to say literally a ‘\’, so put a ‘\’ before it. ‘\\’ means literally ‘\’
(.) – The ‘.’ regular expression matches any single character. This will match the user’s initial at the start of their username. Put it in brackets because you want to copy it down to the replacement. (.)
\. – There is a dot in the username after the user’s initial. We want to match this dot. The dot is a wildcard so use ‘\.’ to mean literally a dot.
(.+) – The ‘+’ regular expression matches zero or more occurrences of the regular expression that precedes it. ‘.+’ means match any single character, then zero or more repetitions of any single character. This will match any string of characters that has at least one character. In this instance it will match the user’s surname at the end of their username. Put it in brackets because you want to copy it down to the replacement. (.+)
And the replacement…
\1 will copy whatever was in the 1st set of brackets in the pattern. This was (.) and will copy the user’s initial.
\2 will copy whatever was in the 2nd set of brackets in the pattern. This was (.+) and will copy the user’s surname.
FLACKBOX\j.smith will match the pattern and be replaced with jsmith.
Sign out of Windows then back in again as user j.smith.
Try to open and edit File2.txt again, it should now succeed.
30. Sign the j.smith user out of Windows and then sign in as djones.

31. Create a text file named File3.txt in win_vol and add some text to it.
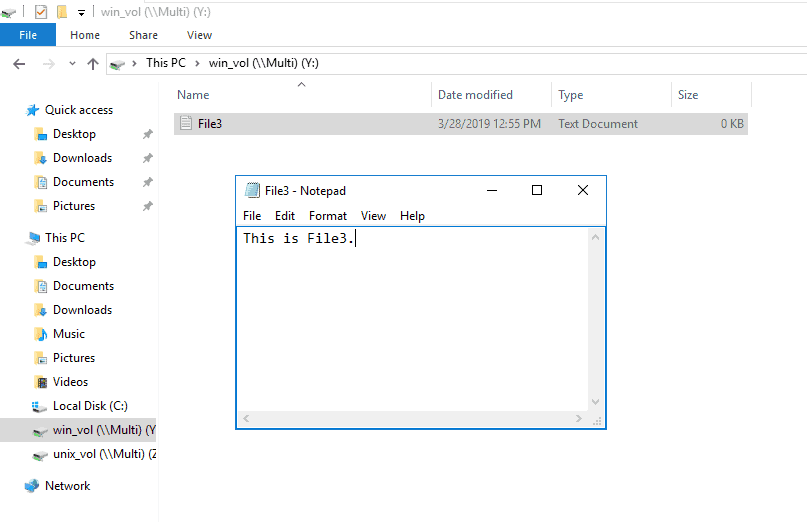
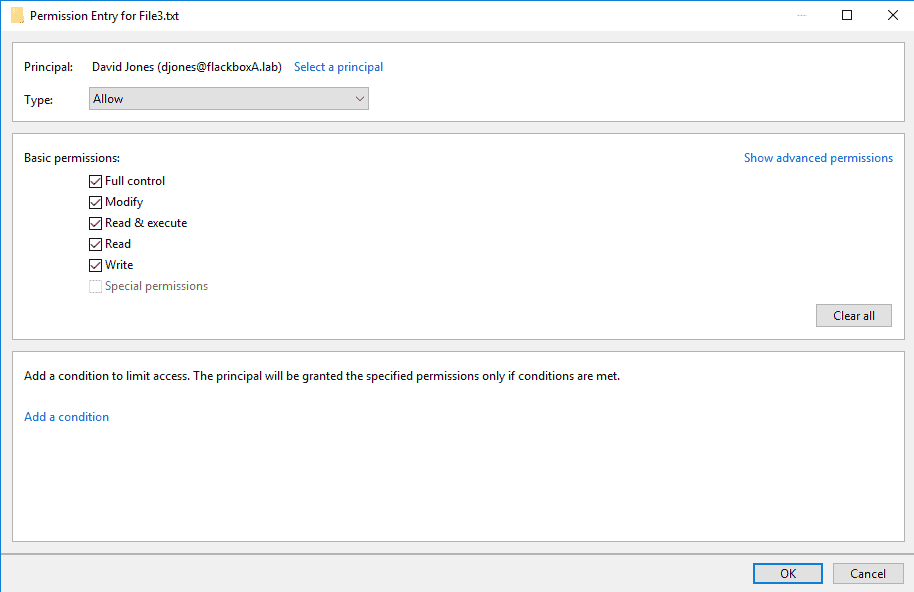
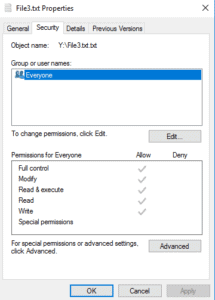
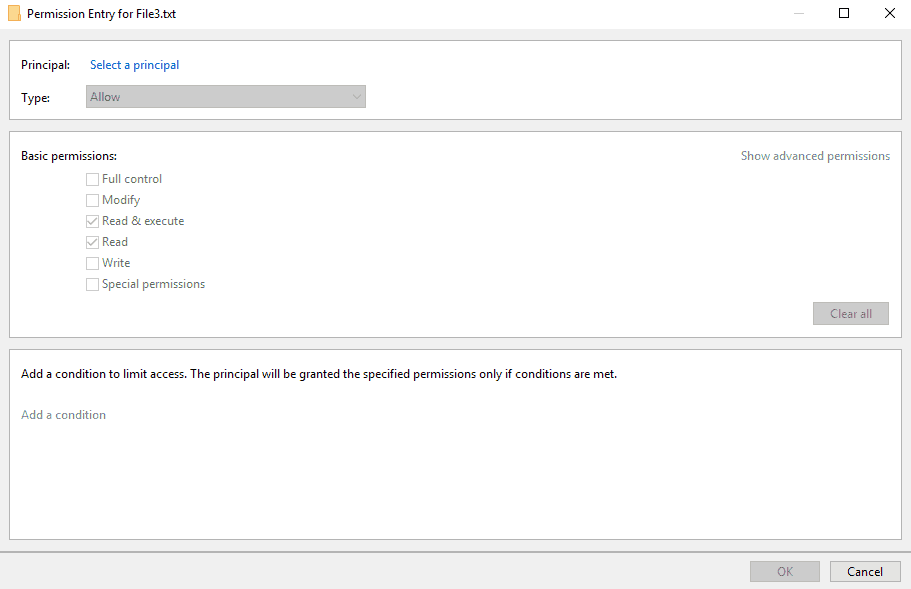
32. Set the NTFS permissions on File3.txt to allow the Windows user djones Full Control access. Deny all other access.
Right-click on File3.txt and select Properties.
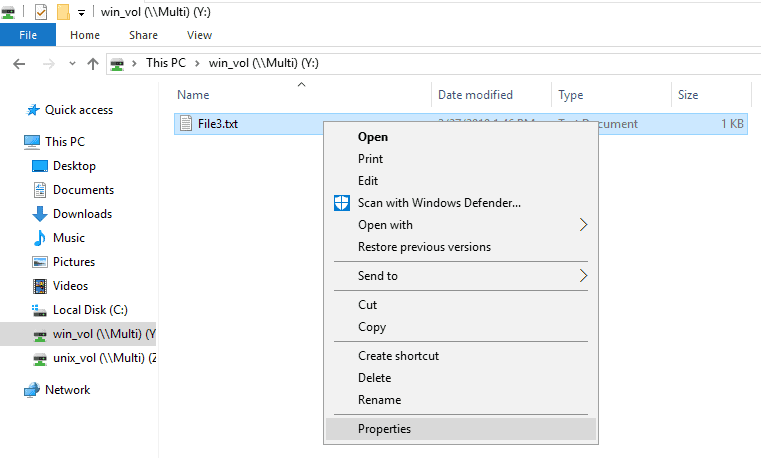
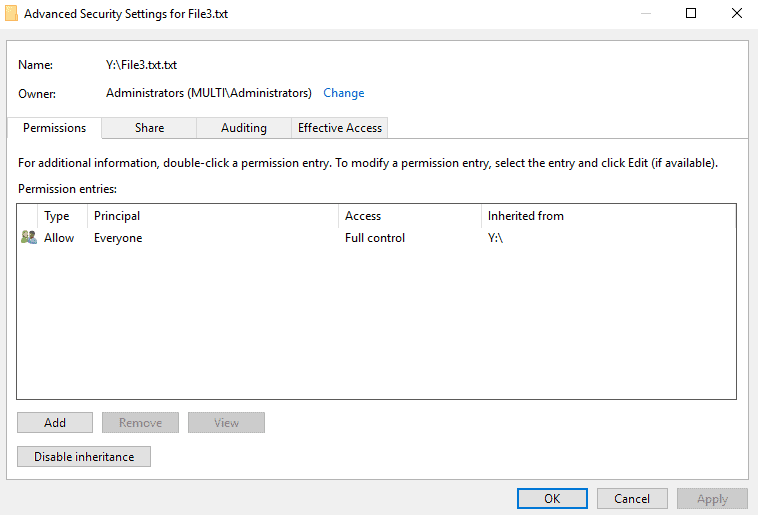
The default permissions are Everyone Full Control. Click the Security tab then Advanced.

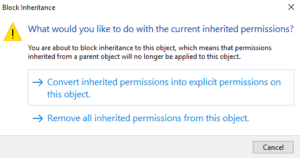
Disable inheritance.

Remove all inherited permissions from this object.

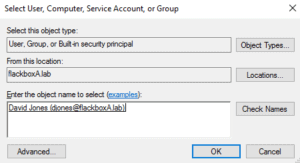
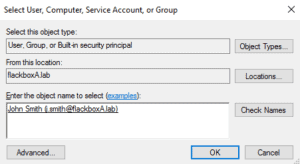
Add.

Select a principal.

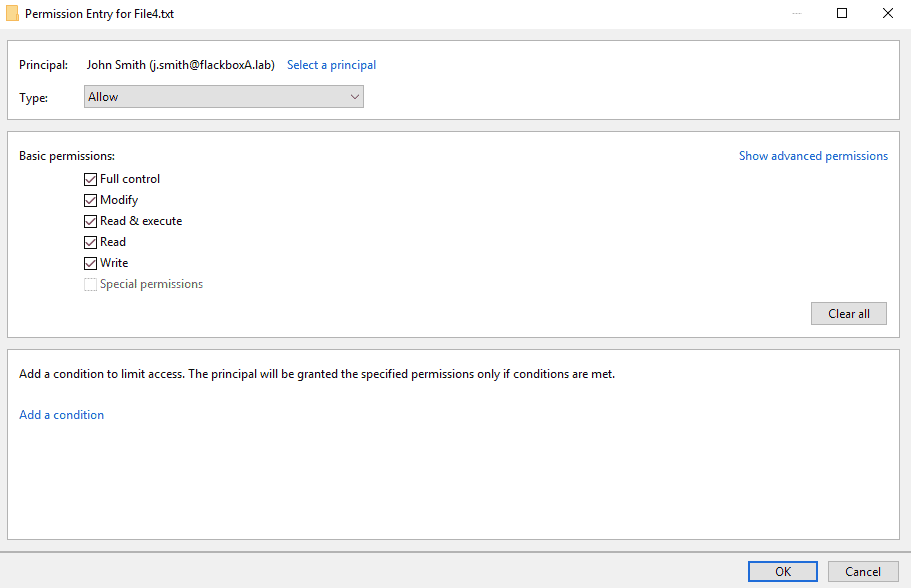
Add djones.
Grant Full Control access.
33. Sign the djones user out of Windows.

34. Should UNIX user djones be able to open and edit File3.txt in win_vol? Why or why not? Make any changes necessary to grant UNIX user djones access to the file, then open it as them and add some text to verify they have write access.
The permissions grant Full Control access to Windows user djones. ONTAP maps the UNIX djones username to the Windows djones username by default so no changes are required.
djones@ubuntu:~$ cd /mnt/win_vol
djones@ubuntu:/mnt/win_vol$ vi File3.txt
i
This is File3.
Change made by UNIX user djones.
~
~
:wq!
35. Sign in to the WinA client as j.smith.
36. While logged in to WinA as j.smith, create a text file named File4.txt in win_vol and add some text to it.
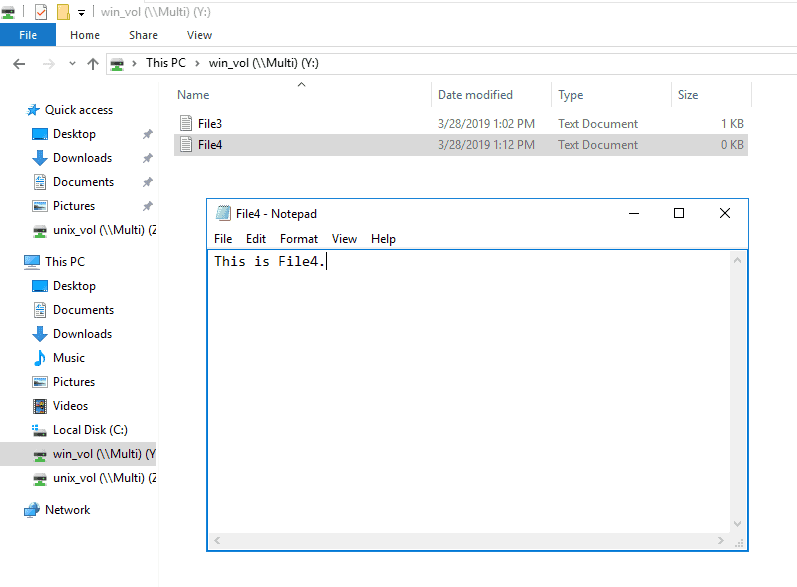
37. Set the NTFS permissions on File4.txt to allow the Windows user j.smith Full Control access. Deny all other access.
As shown before for File3.txt, right-click on File4.txt and select Properties.

The default permissions are Everyone Full Control. Click the Security tab then Advanced.
Disable inheritance.
Remove all inherited permissions from this object.
Add.

Select a principal.
Add j.smith.
Grant Full Control access.
38. Should UNIX user jsmith be able to open and edit File4.txt in win_vol? Why or why not? Make any changes necessary to grant UNIX user jsmith access to the file, then open it as them and add some text to verify they have write access.
The NTFS permissions are Windows user j.smith Full Control. ONTAP would map the UNIX j.smith username to the Windows j.smith username by default, but the UNIX username is not j.smith, it is jsmith with no dot. The user cannot even change directory to /mnt/win_vol because they are not mapped to a valid Windows user.
jsmith@ubuntu:~$ cd /mnt/win_vol
-bash: cd: /mnt/win_vol: Permission denied
You need to manually create a custom mapping in ONTAP from UNIX user jsmith to Windows user j.smith. You could use ‘jsmith’ as the pattern and ‘FLACKBOXA\j.smith’ as the replacement, but you wouldn’t want to do that for 500 users. A better way is to use regular expressions to add the domain name and the dot after the first initial in the username.
The direction is UNIX to Windows - you want to give a UNIX user access to a file with NTFS permissions set.
You need to add the Windows domain name and the ‘.’ between their initial and surname.
cluster1::> vserver name-mapping create -vserver Multi -direction unix-win -position 1 -pattern "(.)(.+)" -replacement "FLACKBOXA\\\1\.\2"
Warning: The pattern field is a regular expression, and it contains a single backslash, which will be interpreted as the beginning of an escape sequence. For a literal backslash, type "\\" (without the quotes) instead.
Do you want to continue? {y|n}: y
Let’s break down the pattern…
(.) – The ‘.’ regular expression matches any single character. This will match the user’s initial at the start of their username. Put it in brackets because you want to copy it down to the replacement. (.)
(.+) – The ‘+’ regular expression matches zero or more occurrences of the regular expression that precedes it. ‘.+’ means match any single character, then zero or more repetitions of any single character. This will match any string of characters that has at least one character. In this instance it will match the user’s surname at the end of their username. Put it in brackets because you want to copy it down to the replacement. (.+)
And the replacement…
FLACKBOXA - The domain name
\\ - The ‘\’ is a wildcard. You want to say literally a ‘\’, so put a ‘\’ before it. ‘\\’ means literally ‘\’
\1 will copy whatever was in the 1st set of brackets in the pattern. This was (.) and will copy the user’s initial.
\. – There is a dot in the username after the user’s initial. We want to add this dot. The dot is a wildcard so use ‘\.’ to mean literally a dot.
\2 will copy whatever was in the 2nd set of brackets in the pattern. This was (.+) and will copy the user’s surname.
jsmith will match the pattern and be replaced with FLACKBOX\j.smith.
Sign out of LinuxA then back in again as user j.smith.
jsmith@ubuntu:~$ logout
Try to open and edit File4.txt again, it should now succeed.
jsmith@ubuntu:~$ cd /mnt/win_vol
jsmith@ubuntu:/mnt/win_vol$ vi File4.txt
i
This is File4.
Change made by UNIX user jsmith.
~
~
:wq!
Additional Resources
SMB/CIFS and NFS Multiprotocol Configuration Overview
Mixed perceptions with NetApp multiprotocol NAS access