In this NetApp tutorial, you’ll learn how to do restores from snapshots, using either the ONTAP command line or doing it from client hosts. Scroll down for the video and also the text tutorials.
NetApp Snapshot Restores Video Tutorial

Thomas Goreham

This course has played a pivotal role in my success. Yesterday I was offered the opportunity to work as a Technical Support Engineer for NetApp. Passing my NCDA was what really helped my career take off.
If the option to make the snapshot directory visible is set on a volume by default, users can do their own restores from snapshots. But if you don't allow that option, you can still do restores from snapshots, but you, as the administrator, will have to do it from the ONTAP command line.
The considerations for enabling that or not, if a user does restore from a snapshot, they can actually end up overwriting newer information, which obviously could cause havoc if other people are working on the same shared file. So if you want to make sure that that doesn't happen, then don't give them the option.
But the flip side is that if you don't give them the option, then whenever a user does want a restore, they're going to have to raise a ticket for it. Then, one of the NetApp administrators will have to do it for them.
So if you don't allow users to do their own restores, it will be more workload for you. If you allow them to do it, it's going to take away some of your workloads, but you might have to fix things if a user makes a mistake.
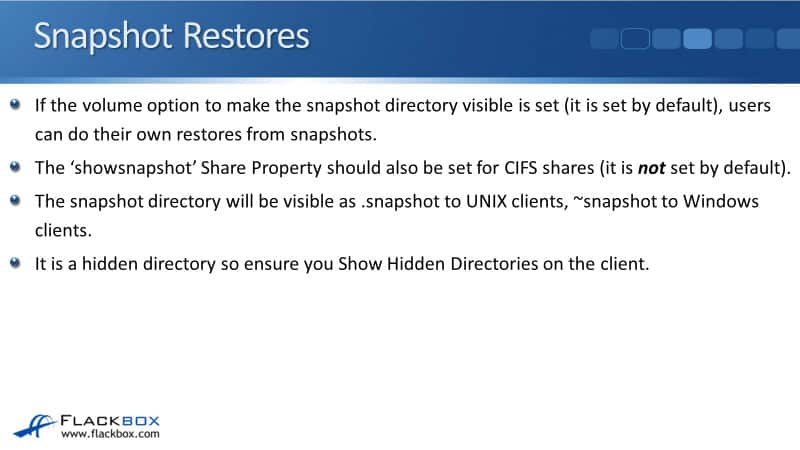
The "showsnapshot" Share Property should also be set for CIFS shares, and it is not set by default. For Unix and Linux clients, you just need to make it visible on the volume, and they will be able to see the snapshot directory.
For Windows hosts to see the snapshot directory, you must enable it on the volume and the share level. It's enabled by default on the volume, but it is not enabled by default in the share. So if you have set things up and go on a Windows host and cannot see the snapshot directory, the first thing to check is that you enabled it on the share.
Now when the snapshot directory is visible, it will show up as a directory inside the volume, and to Unix clients, it will show it as a directory named .snapshot. To Windows clients, it will show up as ~snapshot. The snapshot directory is a hidden directory, so you need to ensure that you show hidden directories on the client for them to be able to see it.
Users can browse to the snapshot directory if you've enabled this. They can view and copy the old version of the file or folder and paste it into the same or a different location in the active file system.

Let's say that you have got a file that you've got just one user is working on. They've made some edits, but we're not happy with the edits, and they want to roll back to a previous version. They can do that by just restoring an older snapshot directly on top of the file's current version. That will overwrite the current version and return to their old information again.
Another scenario is if you've got users working on a shared file where multiple users have been making some changes. Let's say you've got user1 and user2. User2 has overwritten some changes that user1 made. User1 then wants to get those changes back, but they don't want to overwrite the changes that were made by user2. So, you want to have two different versions of the file.
In that case, the user can browse to the snapshot directory and then copy the old version to a different location. Now you've got the two different versions, and the users can sort them out. They can make the edits, which keeps all of their changes from both users.
Windows users can also use the Previous Versions tool, browse the folder, and drag and drop files. If Snapchat Directory Access is enabled on the volume, but the "showsnapshot" Share Property is not set, Windows users can use the Previous Versions tool but cannot browse to the ~snapshot directory.
Again, for Windows users to be able to do this, you should enable it on the volume and the share as well. If it's just enabled on the volume, they will be able to use the Previous Versions tool, but when they try to browse to the Snapshot Directory, they're not going to see it. So to be able to browse to the directory, you need to enable it on the volume and on the share as well.
Restores from a client host use a copy operation. Let's look and see what the client is actually going to see when they look in the volume and look at the Snapshot Directory. We'll work through an example for that.
Snapshot Directory Example
Here, we have got a volume which is called thinvol. A Linux user is accessing this, and they're browsing through it. They can see that right now, in our example, there's a directory inside the volume, which is called Directory1. There are also a couple of files in there called File1 and File2.
Then the administrator takes a manual snapshot for this example. I can see it was a manual snapshot because the .snapshot directory will now be visible when that happens. Again, this is on a Linux host, so it's showing up as .snapshot. The name of the snapshot shows up as a sub-directory in the .snapshot folder.
Here, the administrator has manually created a snapshot called manual1 that contains a point-in-time copy of the active file system. So what was in the active file system right now was a directory called Directory1 and the two files called File1 and File2. After that snapshot has been taken, if a user browses to the volume, this is what they will see if they expand the folders:
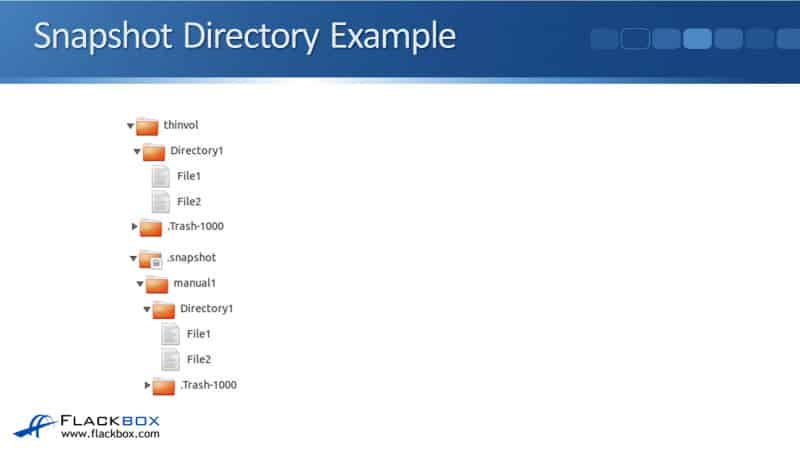
Directory1 here is in the active file system. That's what's being actively being worked on by the users. They'll also see the .snapshot directory there, and they'll see a folder for every single snapshot that is taken. Inside each snapshot directory, they'll see what was in the active file system at the time of the snapshot.
The next thing that happens is the user creates a new directory called Directory2 and puts a new file in there called File1. If they then expand the snapshot directory, they will see the manual snapshot that was taken by the administrator, named manual1.
They'll see what was in the active file system at that time, Directory1, File1, and File2. Directory2 is not in any snapshot here because the snapshot was taken before Directory2 was created.
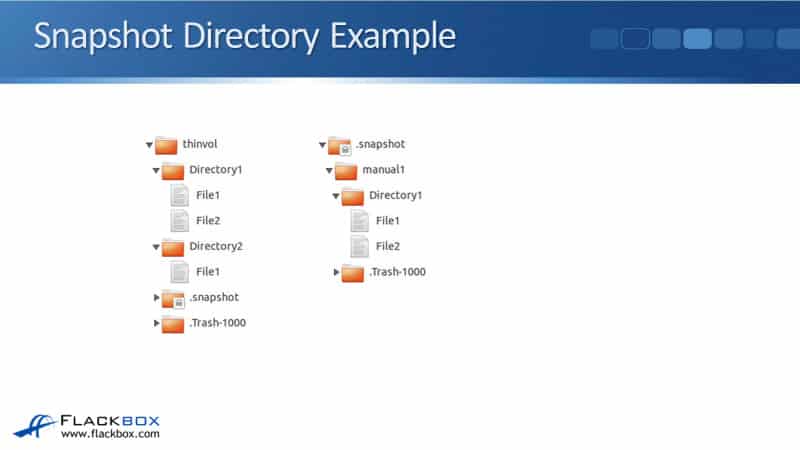
The next thing that happens is that now the administrator takes a second manual snapshot named manual2. If a user browses now to the snapshot directory, they will see the first snapshot, which was named as manual1, and what was in the active file system when that snapshot was taken, Directory1, File1, and File2.
They will also see the new snapshot, a separate directory for that, which is named manual2. In there, they will see Directory1 and its files, and Directory2 and its files as well.
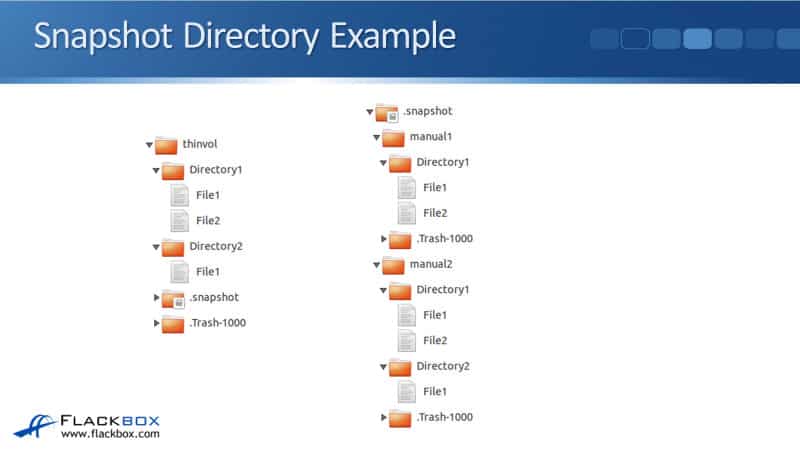
So you can see from here that whenever the first snapshot is taken, that will create the .snapshot directory, and the first snapshot will be there. After that, any new snapshots taken will get their own directory underneath the .snapshot directory, and they will contain whatever was in the active file system at the time of that snapshot.
SnapRestore
The last thing to tell you here is about doing restores from snapshots using the ONTAP command line. To be able to do this, obviously, you need to be an administrator to be able to log on to the command line. If you do that, you can use SnapRestore.
SnapRestore is a license that allows snapshot restores to be run from a NetApp command line. This is not a separate piece of software that you have to install. All you have to do is add the license code, and now SnapRestore is enabled. SnapRestore is built into the normal ONTAP command line. You just need to license it.
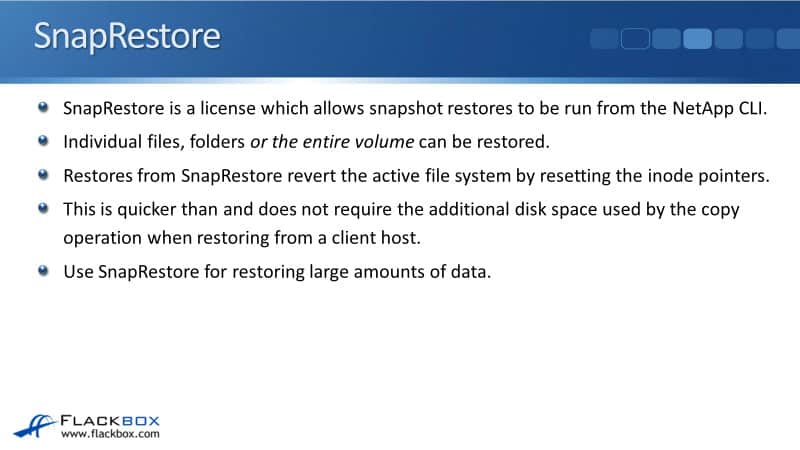
Individual files, folders, or an entire volume can be restored when you use SnapRestore. If you are restoring from a client, you can restore files or folders, but you can't restore the entire volume. If you want to do the entire volume, you need to do that from the command line.
Restores from SnapRestore revert the active file system by resetting the inode pointers. This is different than how it works when you're doing a restore from a client. It's quicker than and does not require the additional disk space used by the copy operation when restoring from a client host.
When you do a restore from a client, it uses a copy. When you use SnapRestore at the command line, it resets the inode pointers, and it's much faster doing it from the command line. Because of that, use SnapRestore for restoring large amounts of data, because it doesn't take that additional disk space with the copy and it's much faster as well.
Snapshot Restore Considerations
Some final considerations about snapshot restore operations when completing a volume restore with SnapRestore, all snapshots which are newer than the one used for the restore are deleted. So be careful, and make sure you're restoring from the correct snapshot.
If you're not sure, then start with the newer ones, and work your way back. Don't go with the older one, because as soon as you've done that, you've lost all the newer snapshots. Restoring a file or folder, however, does not delete newer snapshots. This is just when you restore the volume.
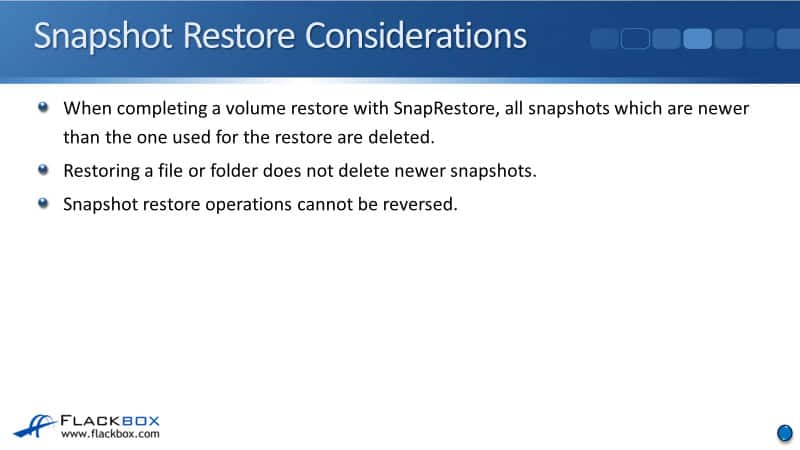
Snapshot restore operations cannot be reversed. So once you've done it, there's no option to roll back there. Now, if you had restored a file with a folder, and there was a newer snapshot, you could still revert to the newer snapshot. But if there's no newer snapshot, and you revert back to a snapshot, then what was in the active file system is gone.
You're back to what was in the snapshot now. Hopefully, you've got a backup in that case. If you have no backup, and you don't have a newer snapshot, then you've lost whatever had changed since that snapshot that you restored.
Additional Resources
What SnapRestore does: https://library.netapp.com/ecmdocs/ECMP1368826/html/GUID-930371F4-B810-4EDC-83BD-AFC8F3093FFF.html
Restoring a volume from a Snapshot copy: https://library.netapp.com/ecmdocs/ECMP1354558/html/GUID-D8C1F5B5-1BBE-45F9-B0F0-7A6FF51499AD.html
Restoring files from Snapshot copies: https://library.netapp.com/ecmdocs/ECMP1368826/html/GUID-18D2508E-6A93-4FC5-8739-D3DDAE1CBA03.html
Reverting a volume to a selected Snapshot copy: https://library.netapp.com/ecmdocs/ECMP1635994/html/GUID-49B75008-DEBE-4D99-AC73-085F596F0EF5.html
Libby Teofilo

Text by Libby Teofilo, Technical Writer at www.flackbox.com
Libby’s passion for technology drives her to constantly learn and share her insights. When she’s not immersed in the tech world, she’s either lost in a good book with a cup of coffee or out exploring on her next adventure. Always curious, always inspired.