In this NetApp training tutorial, we will cover deduplication, compression, and compaction. These are ONTAP storage efficiency technologies that help save physical space and reduce cost. Scroll down for the video and also text tutorial.
NetApp Deduplication, Compression, and Compaction Video Tutorial

Brad Dyke

I saw the writing on the wall about new technologies and wanted to transition to a new role as a storage / HCI cloud architect.
I used Flackbox.com classes to sync me up with ONTAP and passed my certs two days after completing your training, it took about six business days in total.
I got the job I wanted with CGI and it’s a great company to work for.
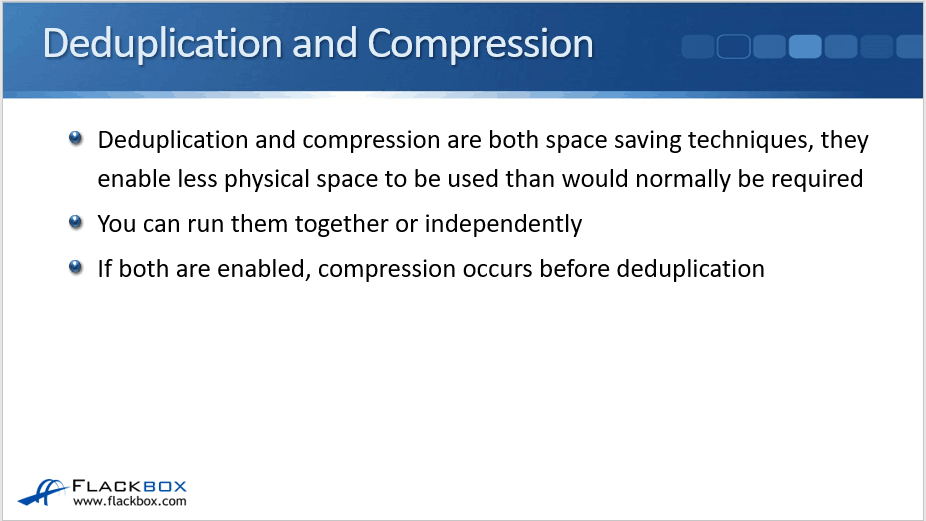
Deduplication and Compression
Deduplication and compression are both space-saving techniques. They enable less physical space to be used than would normally be required. You can run them together or independently. Typically, when you've got either of them enabled, you will be running both of them at the same time. When both are enabled, compression runs before deduplication.
Deduplication
Deduplication eliminates redundant duplicate blocks across a volume or aggregate. By saving only one instance of a block rather than multiple copies of it, disk space usage can be significantly reduced.
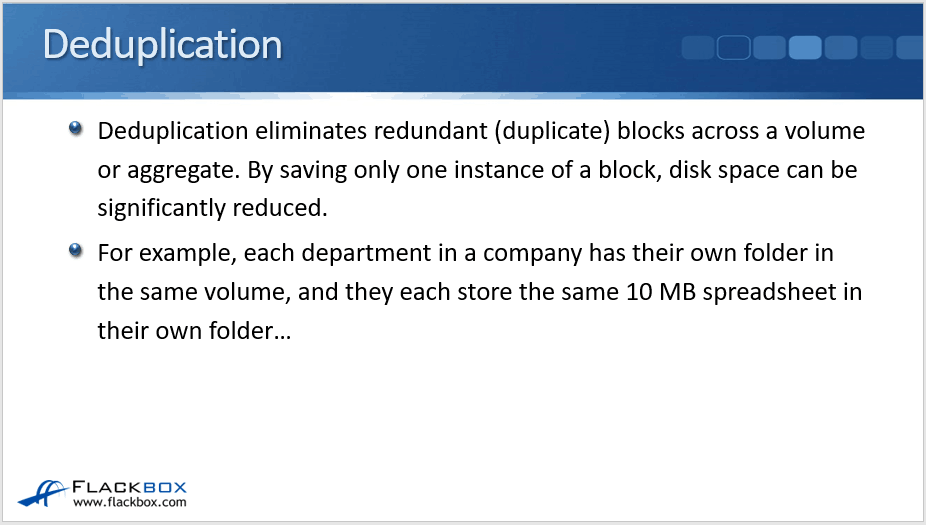
For example, let's say a company has 10 departments, each department has its own folder in a volume and each folder contains the same 10 MB spreadsheet file. That's going to be 10 copies of the same 10 MB file in 10 different folders. That adds up to 100 MB of disk space used when we're not using deduplication.
If we turn on deduplication, it ensures that only one copy of the blocks that make up the file are saved in the volume. Duplicate blocks are going to be saved as references only (basically just pointers) to the original block and the users can still see their own files in their own folders.
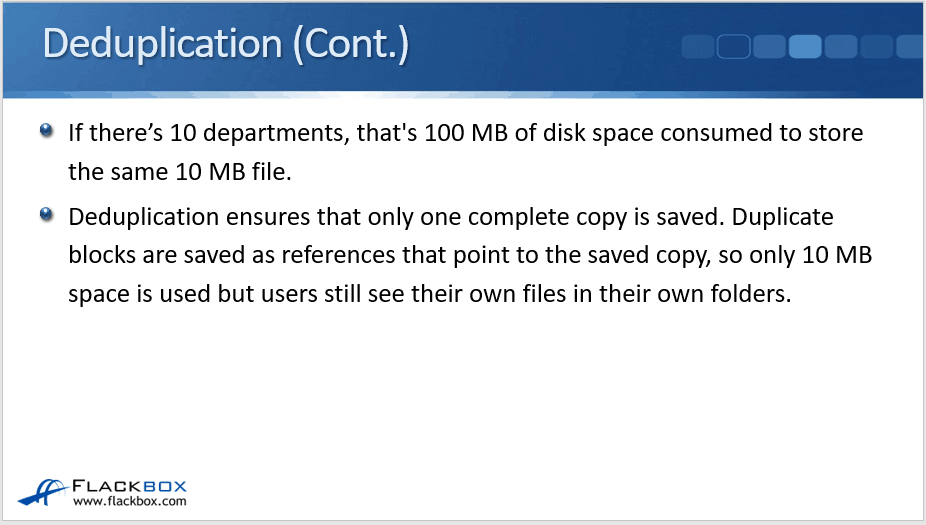
Now, rather than having 10 copies of that 10 MB file on disk, we only have one copy of it taking up disk space. The other 9 copies are just composed of pointers. Now we're just using up 10 MB worth of disk space rather than 100 MB.
Deduplication Operation
Let's have a look at how deduplication works. In the example below, a user in the first department creates a spreadsheet that is called spreadsheet1.xls and that is 20 blocks in size. It is saved in a volume in folder one and then they give a copy of it to somebody else in one of the other departments. They also save it in their folder in the same volume.
If we didn't have deduplication enabled, that would be two files, a copy of spreadsheet1 in the two different folders. Because we've got two copies of it now, that would now be using up 40 blocks. So if we copied it again to another folder in the same volume for the other department, then that's another copy of the same file. Three times 20 blocks would be 60 blocks being used.
If the user who's got the copy in the third folder makes an edit to the file, they add some information which is 10 blocks, for example. Now, we've got the original 20, times three, 60 blocks, plus the extra 10 blocks in folder three. That adds up to a total of 70 blocks taking up actual physical space on disc if we're not using deduplication.

In the diagram above, the blue-colored blocks are the identical blocks. If we do enable deduplication, then the duplicate copies of the same blocks are removed. They're replaced with pointers and we just keep the first copy of those blocks.
With deduplication, we've got one copy of those 20 duplicate blocks, plus the 10 blocks that were added. We have now got just 30 blocks on the disk rather than 70 blocks. We're taking up a lot less of physical space, but everything still looks the same logically.
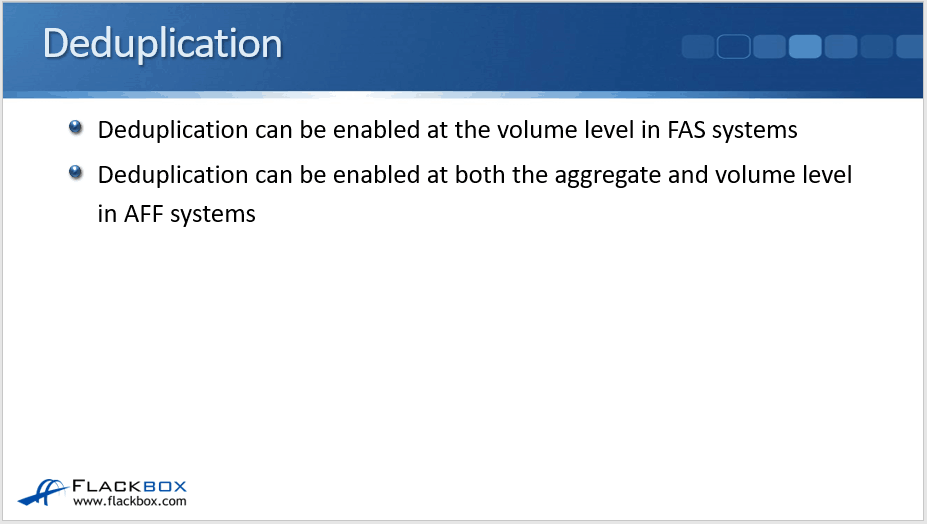
Deduplication can be enabled in:
- FAS Systems - Volume Level
- AFF Systems - Volume Level and Aggregate Level
Volume level deduplication scans for duplicate blocks within the same volume. If you've got duplicate blocks that are in different volumes in the same or in different aggregates, deduplication will not occur.
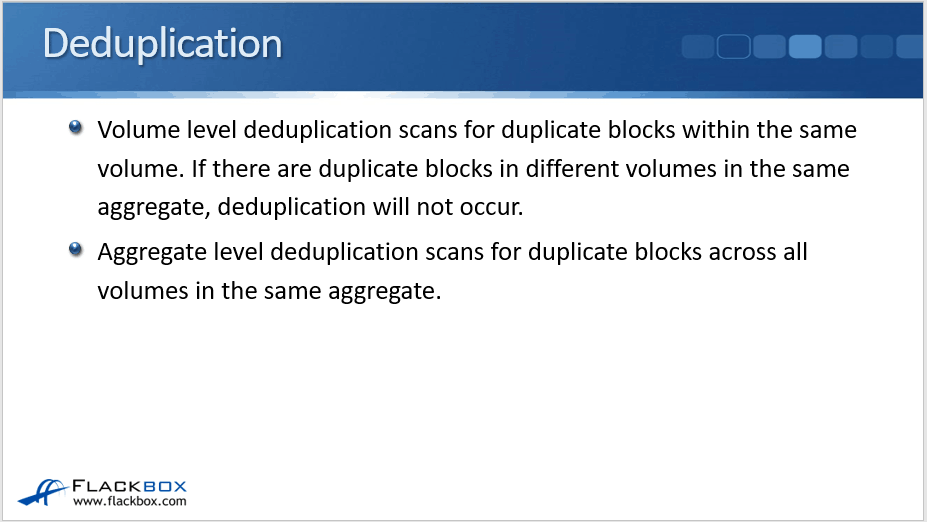
FAS systems support volume level and the aggregate level deduplication as well. Aggregate level deduplication scans for duplicate blocks across all volumes in the same aggregate.
With FAS systems, if you knew that you were going to be storing some data which had a lot of duplicate blocks in it, you'd always want to have that in the same volume and enable deduplication on that volume to get the big amount of physical space savings. With AFF systems, it offers extra flexibility wherein we can store data in different volumes in the same aggregate.
Compression
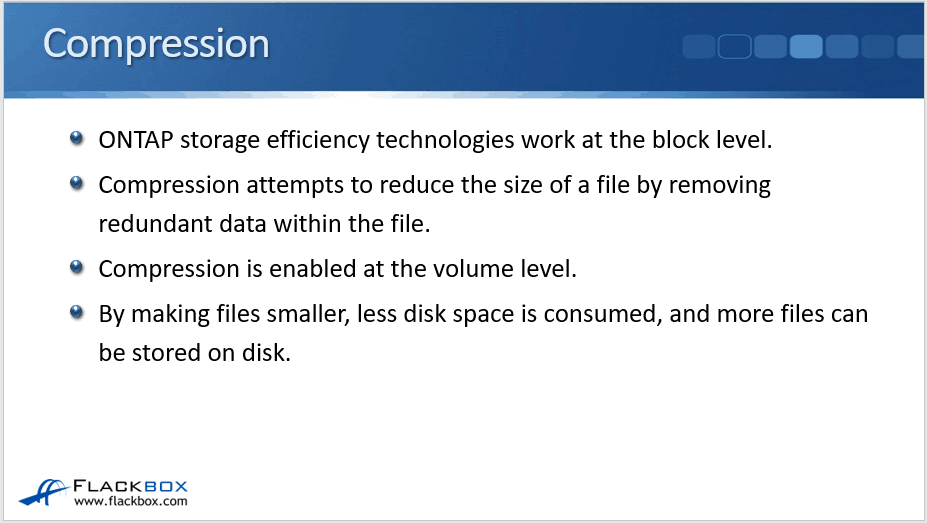
Let's have a look at compression now. ONTAP storage efficiency technologies work at the block level, therefore, deduplication is at the block level, so with compression and compaction.
Compression attempts to reduce the size of a file by removing redundant data within the file. Compression is enabled always at the volume level. By making files smaller, less disk space is consumed and more files can be stored on the disk. Compression works in a different way, but it has the same effect as deduplication on saving space on physical storage.
Deduplication works at the block level while compression works at the file level.
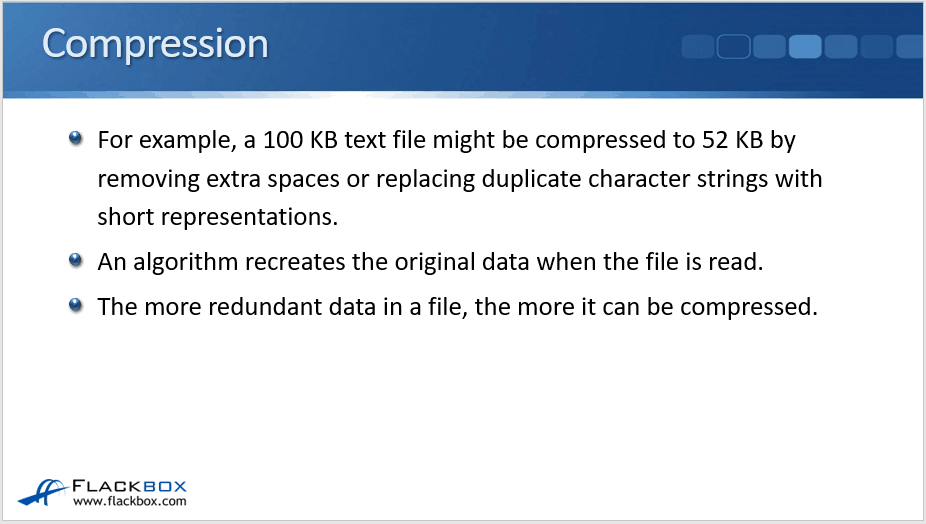
For example, we've got a 100 KB text file. We may be able to compress that to 52 KB by removing extra spaces within the file or by replacing duplicate character strings with shorter representations. An algorithm recreates the original data when the file is read and, obviously, the more redundant data there is in a file, the more compressible it will be.
Compression Groups
The way that comprehension works are with compression groups. Data compression combines multiple 4 KB WAFL blocks into compression groups for better performance. Rather than doing them one at a time, the system achieves better performance by grouping the blocks.
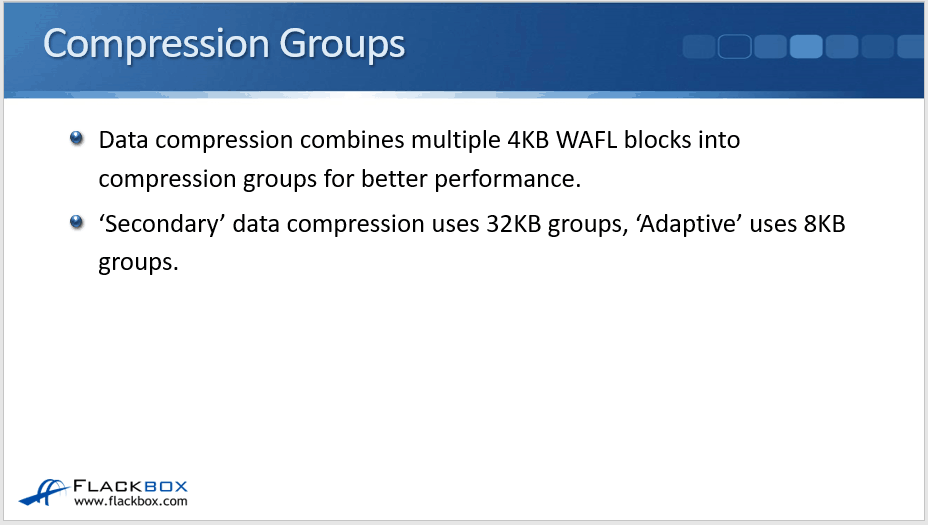
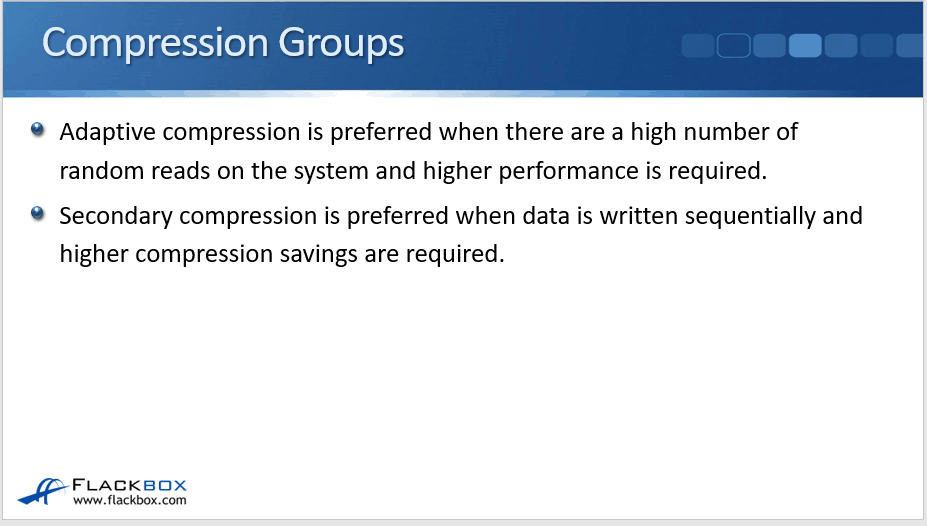
Secondary data compression uses 32 KB groups and adaptive uses 8 KB groups. Adaptive compression is preferred when there's a high number of random reads on the system and higher performance is required. Secondary compression is preferred when data is written sequentially and higher compression savings are required.
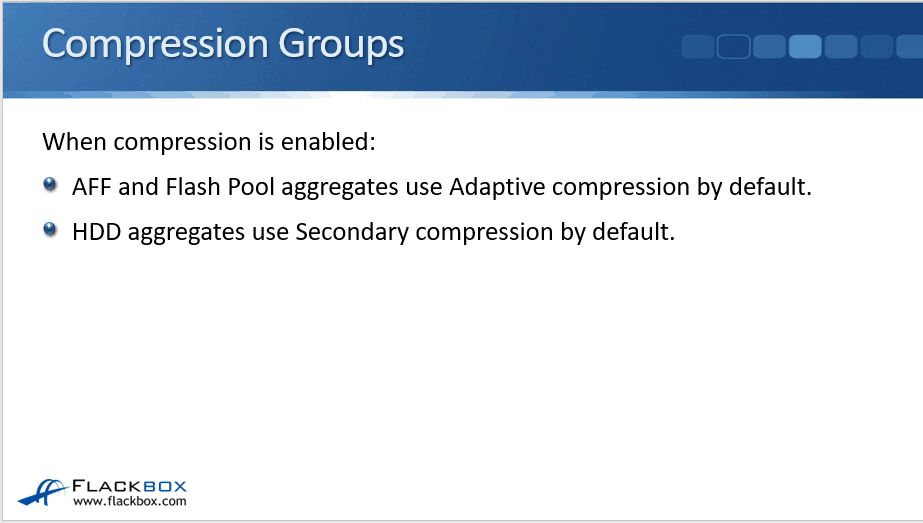
Remember, adaptive is for the high performance, so when compression is enabled, the high-performance AFF and Flash Pool aggregates, use the adaptive compression by default. HDD aggregates use secondary compression by default.
Data Compaction
The last technology is compaction. Small files or I/O which is padded with zeros are usually stored in a 4 KB block, whether or not they require 4 KB of physical storage. So you might have a file which is only 1 KB, 2 KB, or 3 KB in size, but it's still going to take up a 4 KB block.
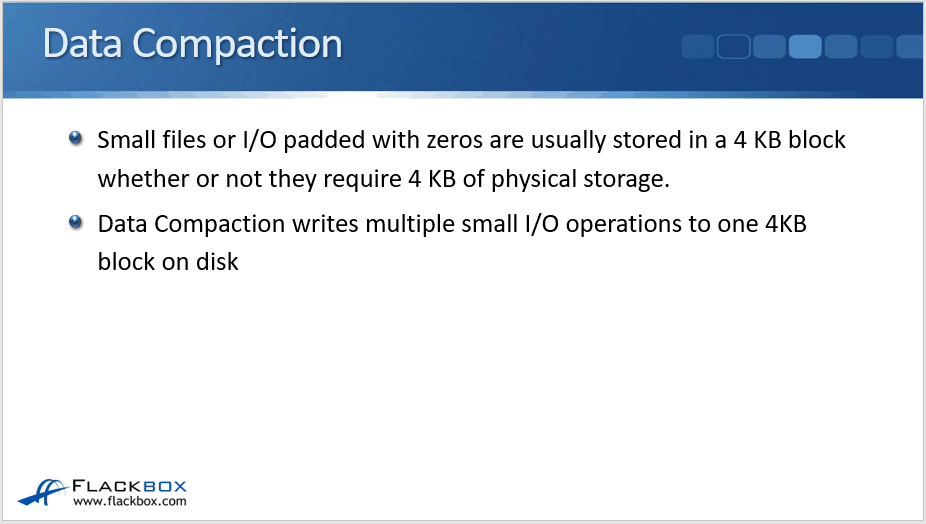
Enabling data compaction writes multiple small I/O operations to one 4 KB block on a disk. Rather than giving them their each separate block, it can squeeze them into the same 4 KB block.
Compaction is enabled at the volume level and it occurs inline during the consistency point, after inline compression and deduplication. Volumes must be thin provisioned for compaction to be enabled, it doesn't work on thick provisioned volumes.

No Compression
Let's have a look and see how compression and compaction are going to work when we've got them enabled together. So this first example here, you can see that the client is writing logical blocks to volume A, volume B, and volume C. It writes an 8 KB logical block, which is 50% compressible, and then two more 8 KB blocks on volume A. Then a couple of logical 4 KB blocks, which are 55% compressible going to volume B, and then three small 1 KB blocks going to volume C.
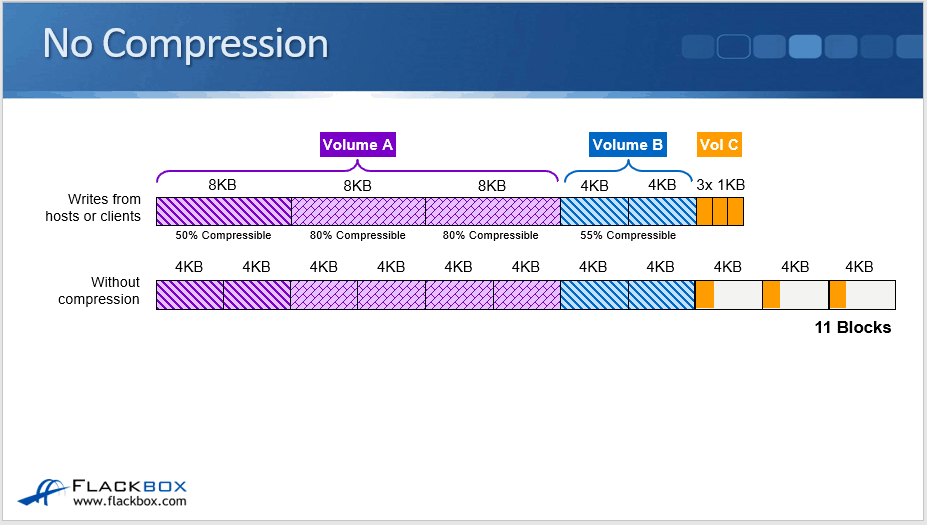
If we do not have compression or compaction enabled, because WAFL uses 4 KB blocks, that first 8 K block is going to be written to two 4 KB blocks on the disk. The second logical 8 KB block from the client will also be written to two 4 KB physical blocks on the disk, same with the third 8 KB block.
The 4 KB blocks will each be written to a 4 KB block on the disk. The three 1 KB blocks won't get into the same 4 KB block on the disk because they're separate I/O operations. They will get written to three separate physical blocks on the disk instead. Without compression enabled, adding this up would take 11 physical blocks on the disk.
Compression Enabled
Next, let's see what happens when we enable compression only. We're going to send the same write from the client again, and the first logical 8KB block is 50% compressible. So we can compress that down to 4 KB and fit it onto a single physical 4 KB block.
Then the next 8 KB logical block is 80% compressible, so we can compress that down to a little under 2 KB and fit that onto a single 4 KB block as well, whereas before it was taking up the two 4 KB blocks because it was 8 KB uncompressed. We do the same with the next logical 8 KB block as well, and that goes onto the next 4 KB physical block.
You can see these last two were both a little under 2 KB. We could actually fit them both into a single physical 4 KB block, but they are two separate I/O operations. Because of that, they're going to go into two separate physical blocks.
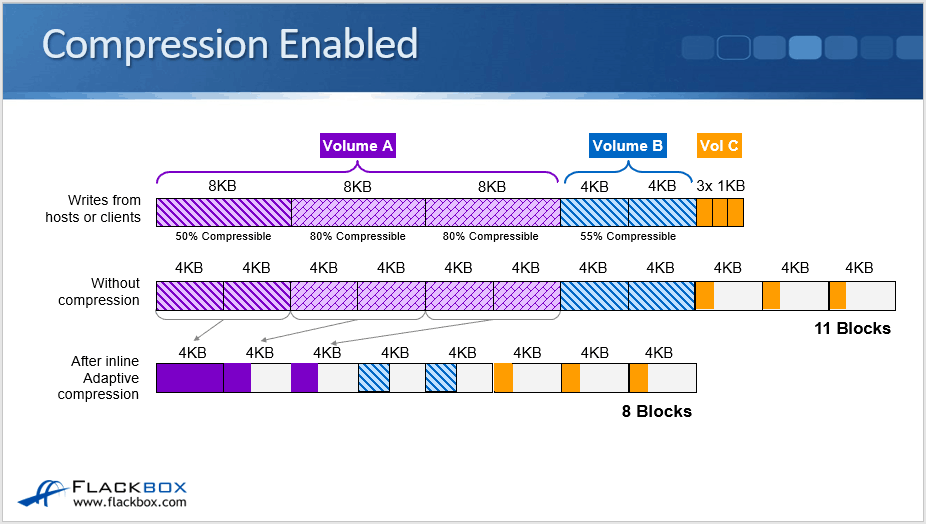
We then write the data for volume B, 4 KB block is 55% compressible, so that gets compressed down to a little under 2 K and goes on to the next physical 4 K block. The same happens with the next one as well. Again, we could fit them both into the same physical block, but they're two separate I/O operations so they go into two separate blocks.
For volume C, we have three times 1 KB logical blocks. Again, it's three separate logical I/O operations, so that goes into three separate 4 KB blocks. The purple logical blocks for volume A are able to fit into three physical blocks rather than six physical blocks before we enabled compression.
You can see we've gone from 11 blocks down to eight blocks, so we're getting good space savings by enabling compression.
Compression and Compaction Enabled
Let's see what happens when we also enable compaction. What compaction does is it allows you to put multiple logical I/O operations onto the same physical block.
The first 8 KB logical block which was 50% compressible, we compress that down to 4 KB and it goes to a physical 4 KB block. The next two 8 KB logical blocks are 80% percent compressible, so we can compress them down to a little under 2 KB each.
Now they can both fit onto the same 4 KB physical block because we've got compaction as well as compression enabled.
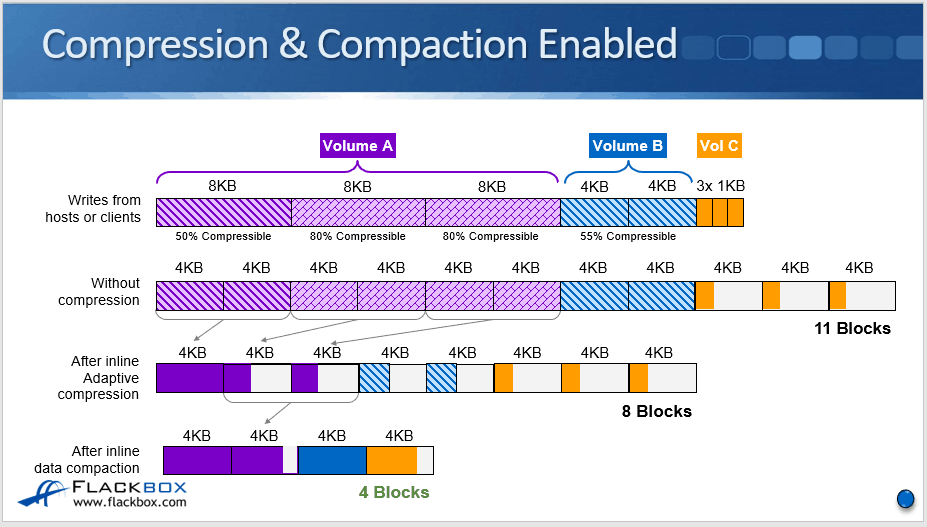
Then for volume B, our two 4 KB blocks are 55% compressible, so again, they can be compressed down to a little under 2 KB each. They can both fit into the same 4 KB physical block with compaction.
Finally, we have the three 1 KB blocks for volume C. Because we've got compaction enabled, the three of those can fit onto the same 4 KB physical block. When we've got compression and compaction enabled, we've gone from 11 blocks down to four blocks. So we're getting really good space savings there.
That was how deduplication, compression, and compaction works, and how they save physical space.
See my previous tutorial to learn about the space efficiency technique Thin Provisioning.
NetApp Deduplication, Compression, and Compaction Configuration Example
This configuration example is an excerpt from my ‘NetApp ONTAP 9 Complete’ course. Full configuration examples using both the CLI and System Manager GUI are available in the course.
Want to practice this configuration for free on your laptop? Download your free step-by-step guide ‘How to Build a NetApp ONTAP Lab for Free’

- Which combination of inline and/or postprocess deduplication, compression and compaction do you expect to be enabled on the thickvol volume in the NAS SVM? Verify this.
Storage efficiency is enabled by default on AFF systems, and disabled by default on FAS systems.
cluster1::> volume efficiency show -vserver SAN -volume thickvol
There are no entries matching your query.
cluster1::> volume efficiency config -vserver SAN -volume thickvol
There are no entries matching your query.
- Enable postprocess deduplication and compression on the thickvol volume in the NAS SVM. Do not enable inline storage efficiency.
Use a volume efficiency policy to configure deduplication and compression to run every night at 2am.
Turn volume efficiency on to enable postprocess deduplication.
cluster1::> volume efficiency on -vserver NAS -volume thickvol
Also enable postprocess compression.
cluster1::> volume efficiency modify -vserver NAS -volume thickvol -compression true
Configure the cron schedule for the volume efficiency policy.
cluster1::> job schedule cron create -name 2am -hour 2 -minute 0
cluster1::> job schedule cron show -name 2am
Cluster Name Description
------------- ----------- ------------------------------------------
cluster1 2am @2:00
cluster1::> volume efficiency policy create -vserver NAS -policy 2am -schedule 2am
cluster1::> volume efficiency modify -vserver NAS -volume thickvol -policy 2am
- Verify the storage efficiency settings have been successfully applied to the volume.
cluster1::> volume efficiency config -vserver NAS -volume thickvol
Vserver: NAS
Volume: thickvol
Schedule: -
Policy: 2am
Compression: true
Inline Compression: false
Inline Dedupe: false
Data Compaction: false
Cross Volume Inline Deduplication: false
Cross Volume Background Deduplication: false
cluster1::> volume efficiency show -vserver NAS -volume thickvol
Vserver Name: NAS
Volume Name: thickvol
Volume Path: /vol/thickvol
State: Enabled
Status: Idle
Progress: Idle for 00:15:14
Type: Regular
Schedule: -
Efficiency Policy Name: 2am
Blocks Skipped Sharing: 0
Last Operation State: Success
Last Success Operation Begin: Tue Jun 18 05:12:58 2019
Last Success Operation End: Tue Jun 18 05:12:58 2019
Last Operation Begin: Tue Jun 18 05:12:58 2019
Last Operation End: Tue Jun 18 05:12:58 2019
Last Operation Size: 0B
Last Operation Error: -
Changelog Usage: 0%
Logical Data Size: 29.09MB
Logical Data Limit: 640TB
Logical Data Percent: 0%
Queued Job: -
Stale Fingerprint Percentage: 0
Compression: true
Inline Compression: false
Constituent Volume: false
Inline Dedupe: false
Data Compaction: false
Cross Volume Inline Deduplication: false
Cross Volume Background Deduplication: false
Extended Compressed Data: false
- How much space savings do you expect to have resulted from enabled storage efficiency? Verify this.
The schedule has not run yet, so no savings have been realised yet.
cluster1::> volume show -vserver NAS -volume thickvol -fields compression-space-saved,compression-space-saved-percent,dedupe-space-saved,dedupe-space-saved-percent,sis-space-saved,sis-space-saved-percent
vserver volume sis-space-saved sis-space-saved-percent dedupe-space-saved dedupe-space-saved-percent compression-space-saved compression-space-saved-percent
------- -------- --------------- ----------------------- ------------------
NAS thickvol 0B 0% 0B 0% 0B 0%
- Run a manual scan of data in the volume now. Do not scan old data.
cluster1::> volume efficiency start -vserver NAS -volume thickvol
The efficiency operation for volume "thickvol" of Vserver "NAS" has started.
- How much space savings do you expect to have resulted from enabled storage efficiency? Verify this.
Storage efficiency applies only to new data after it is enabled, so no savings have been realised yet.
cluster1::> volume show -vserver NAS -volume thickvol -fields compression-space-saved,compression-space-saved-percent,dedupe-space-saved,dedupe-space-saved-percent,sis-space-saved,sis-space-saved-percent
vserver volume sis-space-saved sis-space-saved-percent dedupe-space-saved dedupe-space-saved-percent compression-space-saved compression-space-saved-percent
------- -------- --------------- ----------------------- ------------------
NAS thickvol 0B 0% 0B 0% 0B 0%
- Run a scan of all data in the volume now.
cluster1::> volume efficiency start -vserver NAS -volume thickvol -scan-old-data
Warning: This operation scans all of the data in volume "thickvol" of Vserver "NAS". It may take a significant time, and may degrade performance during that time.
Do you want to continue? {y|n}: y
The efficiency operation for volume "thickvol" of Vserver "NAS" has started.
(Note the command to perform aggregate level deduplication on all data on an AFF system is:
storage aggregate efficiency cross-volume-dedupe start -
aggregate name -scan-old-data true )
- Check how much space savings have resulted from storage efficiency now.
cluster1::> volume show -vserver NAS -volume thickvol -fields compression-space-saved,compression-space-saved-percent,dedupe-space-saved,dedupe-space-saved-percent,sis-space-saved,sis-space-saved-percent
vserver volume sis-space-saved sis-space-saved-percent dedupe-space-saved dedupe-space-saved-percent compression-space-saved compression-space-saved-percent
------- -------- --------------- ----------------------- ------------------
NAS thickvol 20.09MB 69% 8.30MB 28% 11.79MB 40%
You may see different values in your lab environment.
- Enable both postprocess and inline deduplication and compression on the thinvol volume in the NAS SVM. Also enable compaction.
Use a volume efficiency policy to configure postprocess deduplication and compression to run every time 15% of the data in the volume changes.
Inline deduplication is not supported on non-AFF systems by default. Enable support for inline deduplication first.
cluster1::> set diagnostic
Warning: These diagnostic commands are for use by NetApp personnel only. Do you want to continue? {y|n}: y
cluster1::*> node run -node cluster1-01 -command options sis.idedup_allow_non_aff_hya on
cluster1::*> node run -node cluster1-02 -command options sis.idedup_allow_non_aff_hya on
cluster1::*> set admin
Then enable postprocess and inline deduplication and compression and compaction on the volume.
cluster1::> volume efficiency on -vserver NAS -volume thinvol
Efficiency for volume "thinvol" of Vserver "NAS" is enabled.
cluster1::> volume efficiency modify -vserver NAS -volume thinvol -inline-dedup true -compression true -inline-compression true -data-compaction true
To enable compaction on FAS systems, first check which node and aggregate the volume is on.
cluster1::> volume show -vserver NAS -volume thinvol -fields aggregate
vserver volume aggregate
------- ------- ----------
NAS thinvol aggr2_C1N2
Then enable compaction on the aggregate and volume on the node.
cluster1::> set advanced
Warning: These advanced commands are potentially dangerous; use them only when directed to do so by NetApp personnel.
Do you want to continue? {y|n}: y
cluster1::*> node run -node cluster1-02 -command wafl compaction enable -A aggr2_C1N2
Enabled data compaction on aggregate "aggr2_C1N2".
cluster1::*> node run -node cluster1-02 -command wafl compaction enable thinvol
Enabled data compaction on volume "thinvol".
cluster1::*> set admin
Configure the volume efficiency policy and apply it to the volume.
cluster1::> volume efficiency policy create -vserver NAS -policy 15percent -type threshold -start-threshold-percent 15
cluster1::> volume efficiency modify -vserver NAS -volume thinvol -policy 15percent
- Verify the storage efficiency settings have been successfully applied to the volume.
cluster1::> volume efficiency config -vserver NAS -volume thinvol
Vserver: NAS
Volume: thinvol
Schedule: -
Policy: 15percent
Compression: true
Inline Compression: true
Inline Dedupe: true
Data Compaction: true
Cross Volume Inline Deduplication: false
Cross Volume Background Deduplication: false
cluster1::> volume efficiency show -vserver NAS -volume thinvol
Vserver Name: NAS
Volume Name: thinvol
Volume Path: /vol/thinvol
State: Enabled
Status: Idle
Progress: Idle for 03:04:58
Type: Regular
Schedule: -
Efficiency Policy Name: 15percent
Blocks Skipped Sharing: 0
Last Operation State: Success
Last Success Operation Begin: Sat Jun 15 16:18:44 2019
Last Success Operation End: Sat Jun 15 16:18:44 2019
Last Operation Begin: Sat Jun 15 16:18:44 2019
Last Operation End: Sat Jun 15 16:18:44 2019
Last Operation Size: 0B
Last Operation Error: -
Changelog Usage: 0%
Logical Data Size: 29.34MB
Logical Data Limit: 640TB
Logical Data Percent: 0%
Queued Job: -
Stale Fingerprint Percentage: 0
Compression: true
Inline Compression: true
Constituent Volume: false
Inline Dedupe: true
Data Compaction: true
Cross Volume Inline Deduplication: false
Cross Volume Background Deduplication: false
Extended Compressed Data: false
- Run a scan of all data in the volume to occur now.
cluster1::> volume efficiency start -vserver NAS -volume thinvol -scan-old-data
Warning: This operation scans all of the data in volume "thinvol" of Vserver "NAS". It may take a significant time, and may degrade performance during that time.
Do you want to continue? {y|n}: y
The efficiency operation for volume "thinvol" of Vserver "NAS" has started.
- Check how much space savings have resulted from storage efficiency.
cluster1::> volume show -vserver NAS -volume thinvol -fields compression-space-saved,compression-space-saved-percent,dedupe-space-saved,dedupe-space-saved-percent,sis-space-saved,sis-space-saved-percent
vserver volume sis-space-saved sis-space-saved-percent dedupe-space-saved dedupe-space-saved-percent compression-space-saved compression-space-saved-percent
------- -------- --------------- ----------------------- ------------------
NAS thinvol 14.32MB 36% 14.32MB 36% 0B 0%
You may see different values in your lab environment.
- Using the CLI, enable postprocess deduplication and compression on the thick volume in the SAN SVM. Do not enable inline storage efficiency.
Turn volume efficiency on to enable postprocess deduplication.
cluster1::> volume efficiency on -vserver SAN -volume thick
Efficiency for volume "thick" of Vserver "SAN" is enabled.
Also enable postprocess compression.
cluster1::> volume efficiency modify -vserver SAN -volume thick -compression true
- Configure deduplication and compression to run every night at 2am. Do not use a volume efficiency policy
cluster1::> volume efficiency modify -vserver SAN -volume thick -schedule @2
- Verify the storage efficiency settings have been successfully applied to the volume.
cluster1::> volume efficiency config -vserver SAN -volume thick
Vserver: SAN
Volume: thick
Schedule: @2
Policy: -
Compression: true
Inline Compression: false
Inline Dedupe: false
Data Compaction: false
Cross Volume Inline Deduplication: false
Cross Volume Background Deduplication: false
cluster1::> volume efficiency show -vserver SAN -volume thick
Vserver Name: SAN
Volume Name: thick
Volume Path: /vol/thick
State: Enabled
Status: Idle
Progress: Idle for 00:02:07
Type: Regular
Schedule: @2
Efficiency Policy Name: -
Blocks Skipped Sharing: 0
Last Operation State: Success
Last Success Operation Begin: Tue Jun 18 06:34:49 2019
Last Success Operation End: Tue Jun 18 06:34:49 2019
Last Operation Begin: Tue Jun 18 06:34:49 2019
Last Operation End: Tue Jun 18 06:34:49 2019
Last Operation Size: 0B
Last Operation Error: -
Changelog Usage: 0%
Logical Data Size: 552KB
Logical Data Limit: 640TB
Logical Data Percent: 0%
Queued Job: -
Stale Fingerprint Percentage: 0
Compression: true
Inline Compression: false
Constituent Volume: false
Inline Dedupe: false
Data Compaction: false
Cross Volume Inline Deduplication: false
Cross Volume Background Deduplication: false
Extended Compressed Data: false
- Using the CLI, enable postprocess deduplication and compression on the none volume in the SAN SVM. Do not enable inline storage efficiency.
Turn volume efficiency on to enable postprocess deduplication.
cluster1::> volume efficiency on -vserver SAN -volume none
Efficiency for volume "none" of Vserver "SAN" is enabled.
Also enable postprocess compression.
cluster1::> volume efficiency modify -vserver SAN -volume none -compression true
- Configure postprocess deduplication and compression to run every time 15% of the data in the volume changes. Do not use a volume efficiency policy
cluster1::> volume efficiency modify -vserver SAN -volume none -schedule auto@15
- Verify the storage efficiency settings have been successfully applied to the volume.
cluster1::> volume efficiency config -vserver SAN -volume none
Vserver: SAN
Volume: none
Schedule: auto@15
Policy: -
Compression: true
Inline Compression: false
Inline Dedupe: false
Data Compaction: false
Cross Volume Inline Deduplication: false
Cross Volume Background Deduplication: false
cluster1::> volume efficiency show -vserver SAN -volume none
Vserver Name: SAN
Volume Name: none
Volume Path: /vol/none
State: Enabled
Status: Idle
Progress: Idle for 00:03:58
Type: Regular
Schedule: auto@15
Efficiency Policy Name: -
Blocks Skipped Sharing: 0
Last Operation State: Success
Last Success Operation Begin: Tue Jun 18 06:40:11 2019
Last Success Operation End: Tue Jun 18 06:40:11 2019
Last Operation Begin: Tue Jun 18 06:40:11 2019
Last Operation End: Tue Jun 18 06:40:11 2019
Last Operation Size: 0B
Last Operation Error: -
Changelog Usage: 0%
Logical Data Size: 464KB
Logical Data Limit: 640TB
Logical Data Percent: 0%
Queued Job: -
Stale Fingerprint Percentage: 0
Compression: true
Inline Compression: false
Constituent Volume: false
Inline Dedupe: false
Data Compaction: false
Cross Volume Inline Deduplication: false
Cross Volume Background Deduplication: false
Extended Compressed Data: false
Additional Resources
Back to Basics: Data Compression
Using deduplication and data compression to increase storage efficiency from NetApp

Text by Alex Papas, Technical Writer at www.flackbox.com
Alex has been working with Data Center technologies for over 20 years. Currently he is the Network Lead for Costa, one of the largest agricultural companies in Australia. When he’s not knee deep in technology you can find Alex performing with his band 2am