In this Cisco CCNA tutorial, you’re going to learn about the Open Systems Interconnection (OSI) model. Scroll down for the video and also the text tutorial.
Cisco Open Systems Interconnection OSI Model Overview Tutorial
Shannon Larkin

Prior to passing my CCNA I had no experience and I was working in a warehouse.
I watched you everyday, studied in the library everyday, did the labs and I passed the exam!
After passing within a month I was able to get a helpdesk job and I am making more money than I have ever made.
The Open Systems Interconnection (OSI) model is a standard of the International Organization for Standardization, so it’s an ISO standard. It’s a general-purpose framework that characterises and standardises how computers communicate with one another over a network.
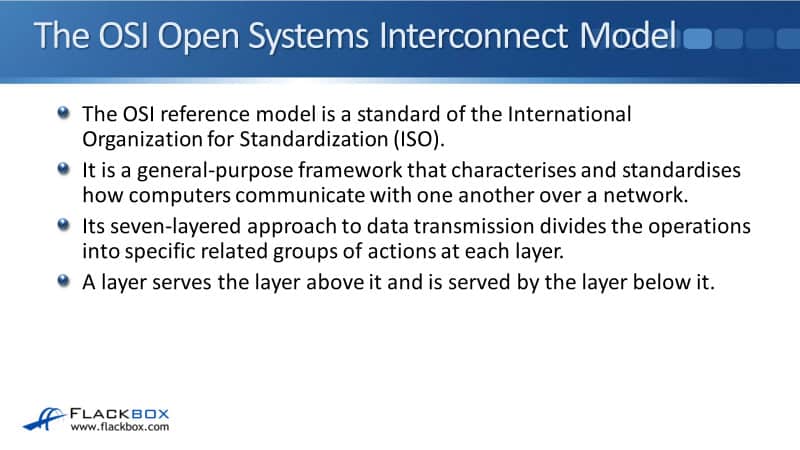
The OSI model, it’s conceptual. It’s not a physical thing or an actual protocol or technology. Its 7-layered approach to data transmission divides the operations into specific related groups of actions at each individual layer. A layer serves the layer above it and is served by the layer below it. Now, I know that doesn’t make much sense yet, so let’s have a look at how this works in action.
OSI Reference Model Encapsulation
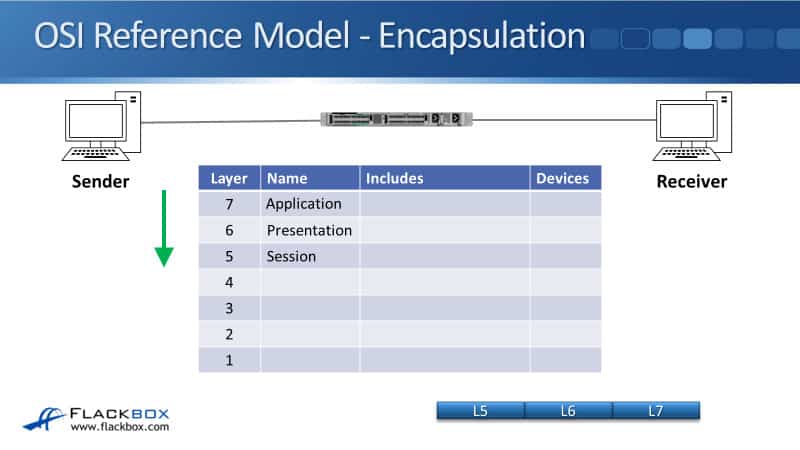
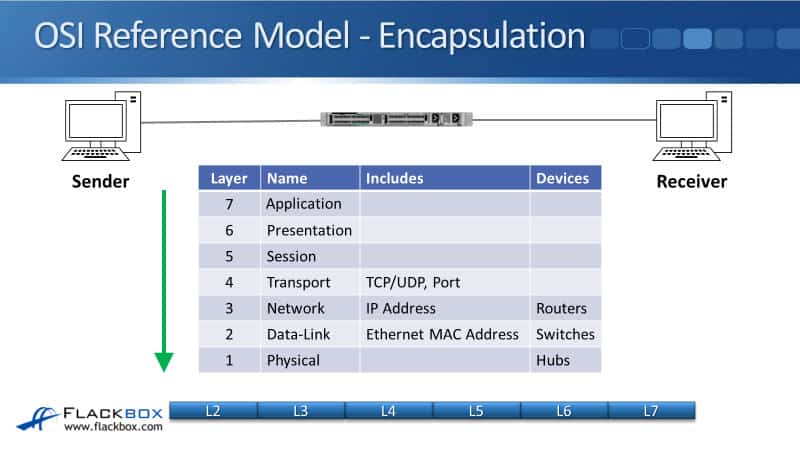
Let’s look at an example. Here, I’ve got a sender on the left, let’s say that’s my laptop, and we’ve got a receiver on the right, let’s say that’s my email server, and they’re both connected into a switch. I’m going to send an email to my email server.
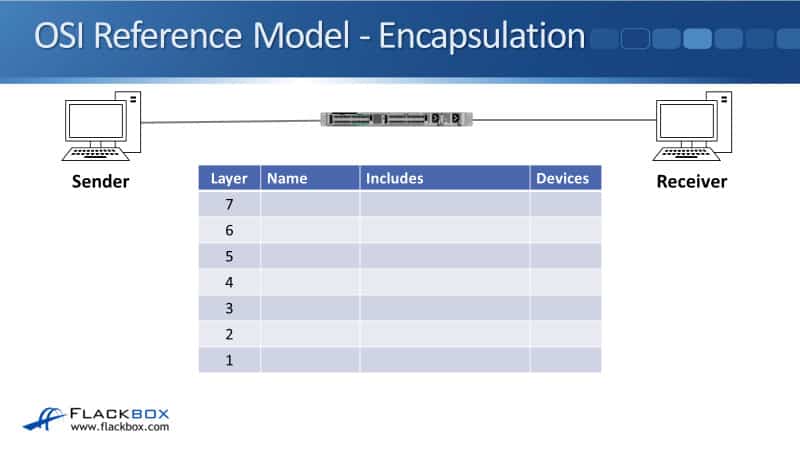
Obviously, the sender is going to compose this traffic that’s going to be sent to the receiver. As it builds this packet that is going to be sent, it’s going to start off at the top level, and then it’s going to work its way down to the bottom level. So at the sender, first off, it will create the Layer 7 information, which is the Application Layer.
So, if I’m sending an email that will contain information such as the from and the to field, etc., then it will encapsulate the Layer 7 information in the Layer 6 information. Layer 6 is the Presentation Layer. Then it will encapsulate that in the Layer 5, Session Layer information.
Layers 5, 6, and 7 are known as the upper layers, and they’re more important for application developers rather than network engineers.
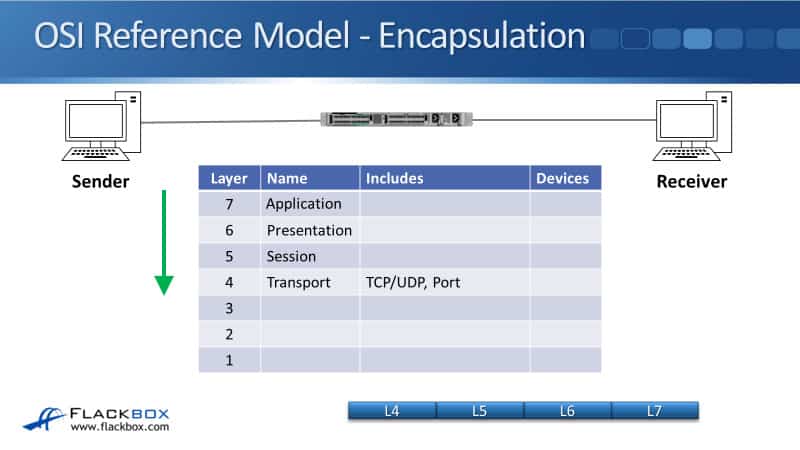
Network engineers start to get really interested when we get down to Layer 4. So we’ve got our upper layer traffic composed, that then gets encapsulated with our Layer 4 header, which is the Transport Layer.
Layer 4, this is going to be either TCP or UDP. It will include the port number, such as port 80 if it’s web traffic, port 25 for our email example.
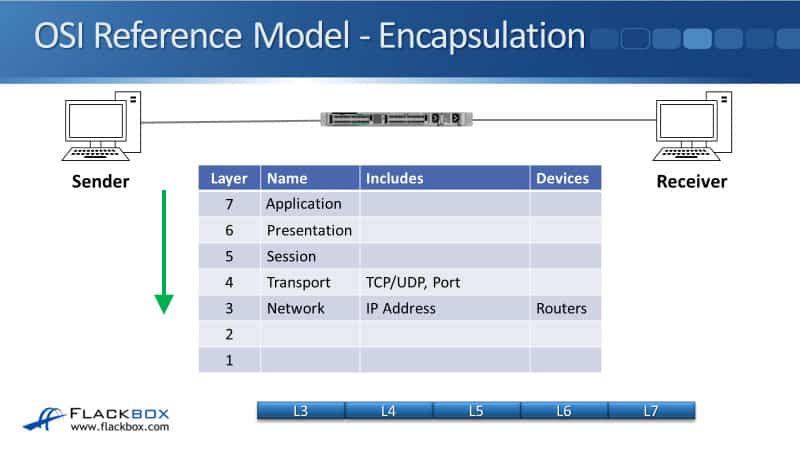
The next thing that happens is that it will then be encapsulated with our Layer 3 header. Layer 3 is the Network Layer, and important information that is included there is the source and destination IP address. A network device that operates at Layer 3 is our router.
The next thing that will happen, as we compose our packet, is the sender will then encapsulate that information in the Layer 2 header. Layer 2 is the Data-Link Layer. Important information there is the MAC address if we’re sending this over an Ethernet network. The network device that works at Layer 2 is our switch.
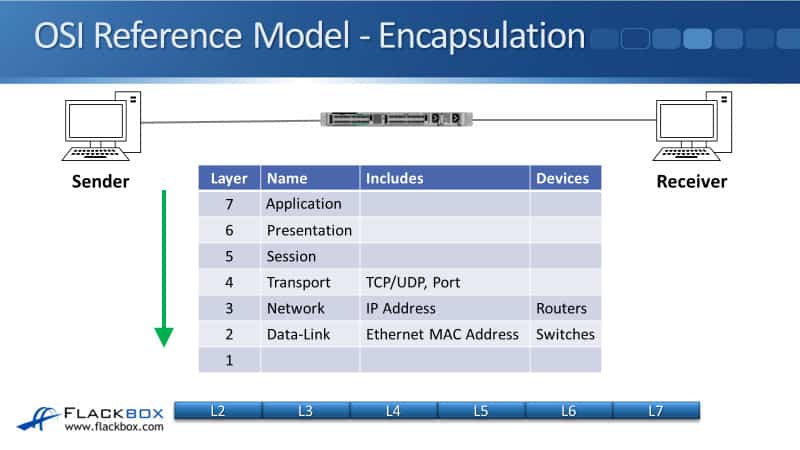
Finally, this packet is now ready that we can actually transmit it over the wire. When we do that, we’re down to Layer 1, which is the Physical Layer. A network device, which you don’t really see anymore, which operated in Layer 1 was the hub.
OSI Reference Model De-encapsulation
So we’ve now composed the packet at the sender side. We’ve put it onto the wire. It’s going to travel over the network, and it’s going to reach our receiver.
The order of operations is going to be reversed now because, obviously, it comes in at the Physical Layer. The receiver will process the packet from the bottom layer back up to the top layer now.
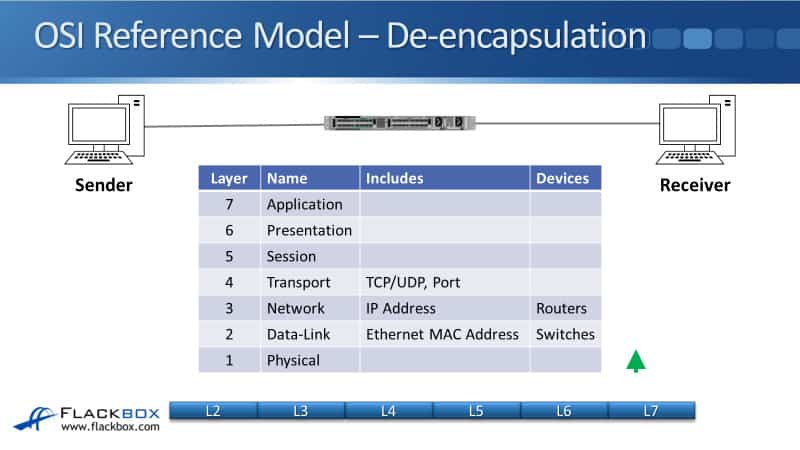
So it comes in at the Physical Layer. The receiver will then look at the outside header, which is the Layer 2 header. It will check that this packet is for it. It’ll check that the destination MAC address in the Layer 2 header is its MAC address. If it’s not for it, it will just discard the packet.
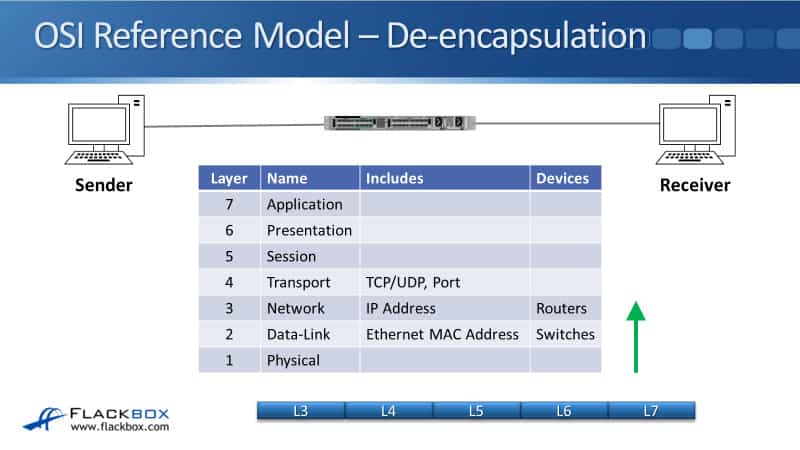
Next up, it will continue with de-encapsulation now. It will then look at the Layer 3 header. It will check the destination IP address, and again, it will check that the packet is for it. If not, it will discard the packet.
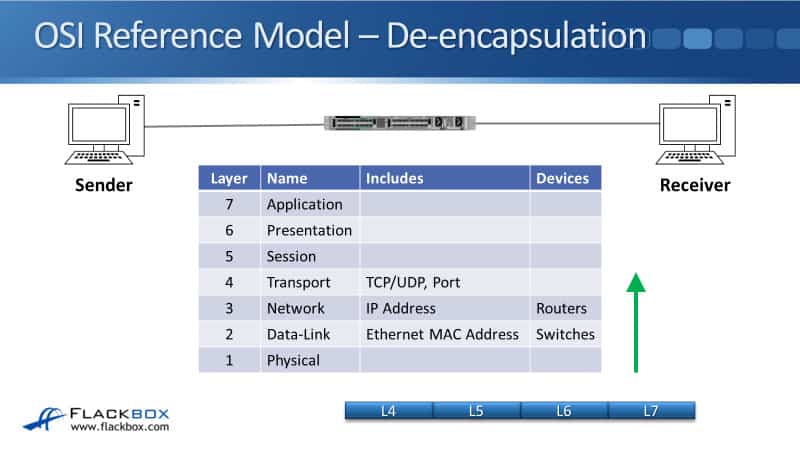
Then we carry on with our de-encapsulation on the receiver. It will look at the Layer 4 header. What this is useful for is, imagine the receiver is not just an email server listening on port 25 for email traffic. Let’s say it’s also a web server as well, listening on port 80 for web traffic.
How does it know if this traffic is for its email server application or its web server application? It can tell by looking at the port number.
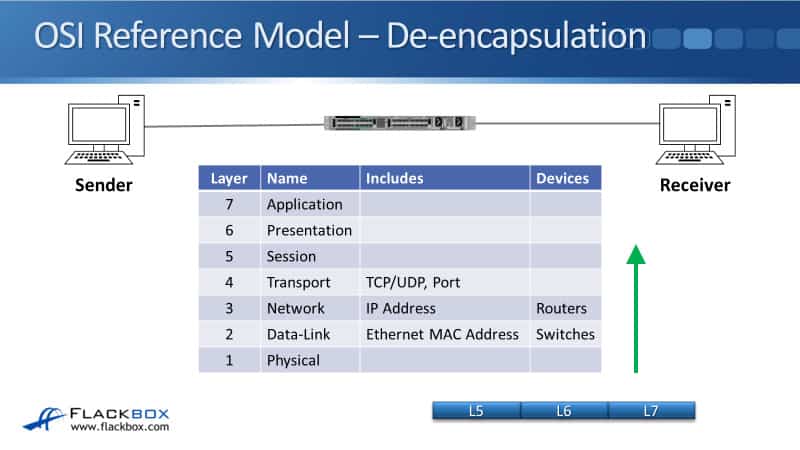
Next, we will carry on with the de-encapsulation. We’ll strip off the Layer 4 header. We’ll look at the Layer 5 header at the Session Layer. We’ll carry on up. We’ll then look at the Layer 6 header and then the Layer 7 header.
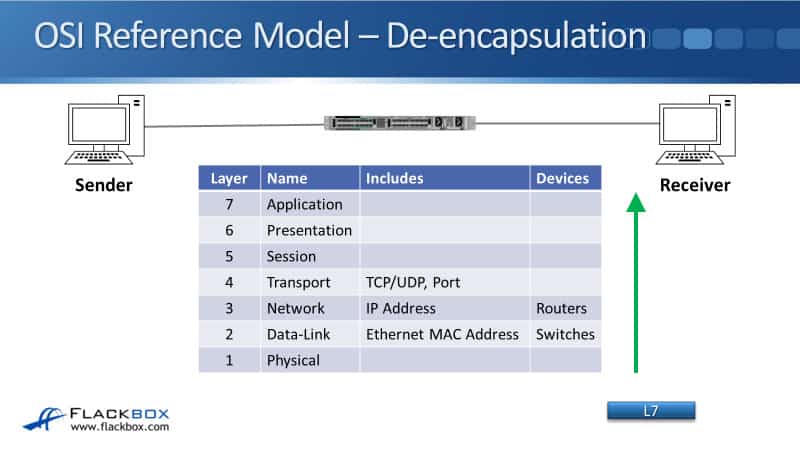
So that’s the whole thing. That’s how we got traffic from the sender to the receiver as far as the OSI model was concerned. At the sender side, again, we start off at the top layer. We work our way down to the Physical Layer.
It goes across the Physical Layer, it will hit the receiver there, and it will then de-encapsulate going into the opposite direction, going from the bottom layer up to the top layer.
OSI Model Benefits
Looking at the benefits we get from the OSI model, engineers don’t need to design a technology to work end to end from top to bottom of the model. They can just focus on their layer of expertise and make sure that they comply with the standards for the layers above and below. This leads to open standards and multi-vendor interoperability.
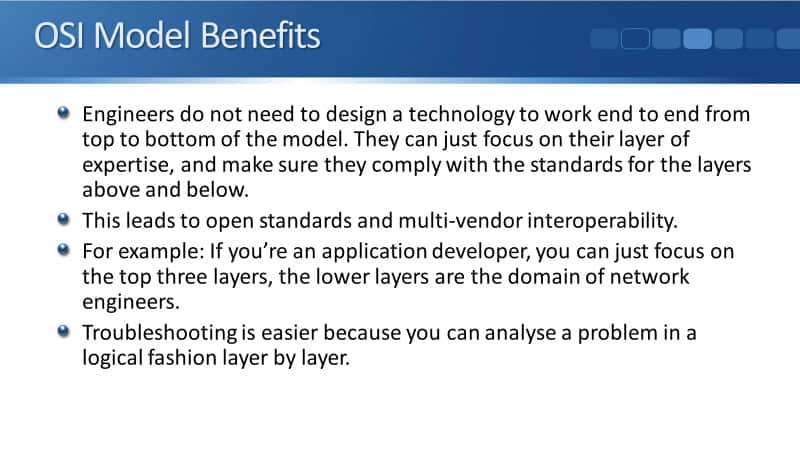
For example, if you’re an application developer, you can just focus on the top three layers. The lower layers are the domain of network engineers. So, you don’t need to understand them.
You just need to make sure that where you interface between Layer 5 and Layer 4, you’re complying with the standards there. Troubleshooting is also easier because you can analyze a problem in a logical fashion, layer by layer.
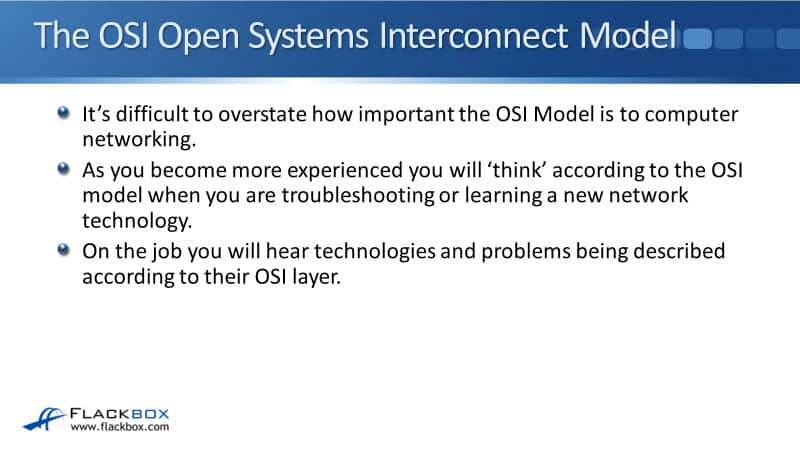
The OSI Open Systems Interconnect Model
It’s difficult to overstate just how important the OSI model is to computer networking. As you become more experienced with networking, you’ll think according to the OSI model when you’re troubleshooting or learning a new network technology. This will be natural for you. This is what I do really every day on a day-to-day basis.
On the job, you’ll hear technologies and problems being described according to their OSI layer. For example, if you’re troubleshooting a problem and you start looking at it in an overly complicated way, it might turn out that it was just because the cable was unplugged.
You would say to the guy next to you, “Oh yeah, it was a Layer 1 problem.” You might also hear of a Layer 8 problem, that’s when a user has made a mistake.
Okay, this is going to be tested heavily on the exam and like I just said in the last slide, it’s really important anyway, not just for exam purposes. For your whole understanding of networking, you really need to know the OSI model. It’s going to help you.
OSI Acronyms
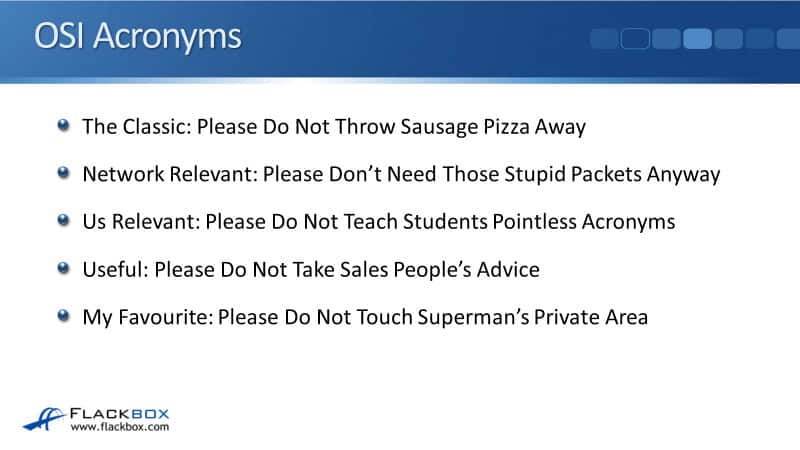
So, we are going to have acronyms that are going to help us remember what the actual names of the different layers are. The classic acronym that you’ll see in all the books going back years and years is, “Please Do Not Throw Sausage Pizza Away.”
So again, the layers were:
- Physical Layer
- Data-Link Layer
- Network Layer
- Transport Layer
- Session Layer
- Presentation Layer
- Application Layer
When you’re first beginning, in fact, to be honest with you, I still remember it from the acronym, and it’s just automatic for me.
I know it’s “Please Do Not Throw Sausage Pizza Away,” and that helps me easily remember what the names of the different layers are and what order they come in.
Other acronyms you can use if you don’t like that one, one that’s relevant to networking is, “Please Don’t Need Those Stupid Packets Anyway.” Another one that would be relevant to us here is, “Please Do Not Teach Students Pointless Acronyms.”
A useful one, “Please Do Not Take Salespeople’s Advice.” If you’ve been working in networking for any time already, you’ll know that’s its great advice. My personal favourite, “Please Do Not Touch Superman’s Private Area.”
Additional Resources
OSI Model Reference Chart: https://learningnetwork.cisco.com/s/article/osi-model-reference-chart
OSI & TCP/IP models: https://study-ccna.com/osi-tcp-ip-models/
Introduction to the OSI Model: https://networklessons.com/cisco/ccna-routing-switching-icnd1-100-105/introduction-to-the-osi-model
Libby Teofilo

Text by Libby Teofilo, Technical Writer at www.flackbox.com
Libby’s passion for technology drives her to constantly learn and share her insights. When she’s not immersed in the tech world, she’s either lost in a good book with a cup of coffee or out exploring on her next adventure. Always curious, always inspired.