In this Cisco CCNA tutorial, you’ll learn about RIP, the Routing Information Protocol. RIP is a distance vector routing protocol, so it’s going to be using routing by rumor. Scroll down for the video and also text tutorials.
RIP Routing Information Protocol Video Tutorial

Byron Picado Taylor

Great networking course, great lab environment, 100% recommended. Neil is a top world class instructor.
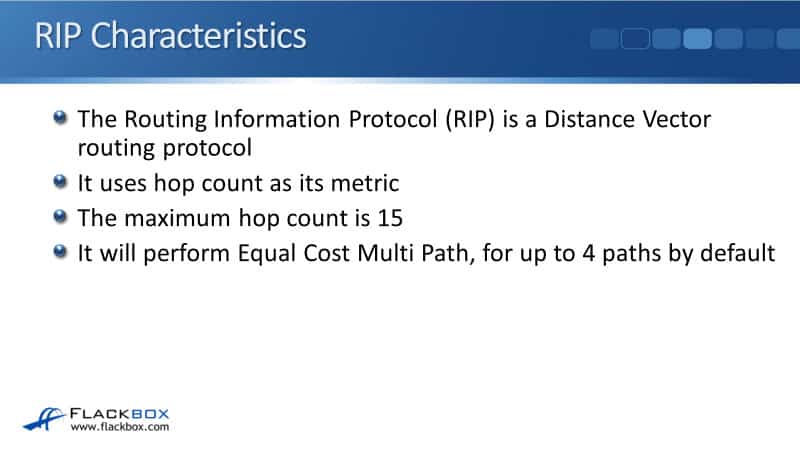
RIP Characteristics
RIP uses hop count as its metric. So, let's say that router R1 wants to get to the 10.1.0.0 network and it needs to go via R2, R3, and R4 to get there. Then, that network would be 3 hops away.
A hop is a router that the traffic has to go through to get to that final destination. The maximum hop count is 15 and it is a bit of a scalability limitation with RIP, therefore, it's not really used except in lab or demo environments. It will perform Equal Cost Multi Path (ECMP), up to 4 equal cost paths by default.
RIPv2 vs. RIPv1
We are currently on RIP version 2 and before was RIP version 1. RIPv1 is a legacy protocol that is typically not used at all anymore. RIPv2 isn't used very often. RIPv1 really isn't used at all anymore, although, it is still supported on Cisco routers.
RIPv1 has limitations even worse than we have with RIPv2. It doesn't send subnet mask information with routing updates, so Variable Length Subnet Masks (VSLM), is not supported. You don't have to use classful networks with RIPv1.
For example, all of your networks could be a /28, and that would work just fine as long as they are all /28. But you couldn't have some /24, some /28, and some /30, for example. They all have to be the same. RIPv2 does support VLSM.
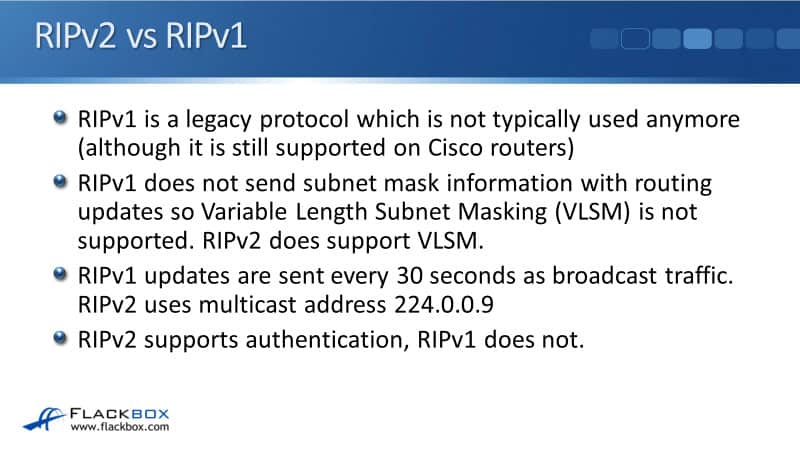
RIPv1 updates are sent every 30 seconds as broadcast traffic, so everything that gets hit by the traffic in that subnet has to process it. RIPv2 uses multicast address 224.0.0.9, so it's more efficient than RIPv1.
RIPv2 supports authentication, RIPv1 does not. With authentication, we can put a password on the router and both sides of the link, so they will not form an adjacency unless we both have the same matching password. It gives us some bare security. Authentication is supported in all the modern routing protocols but it's not covered on the CCNA exam.
RIPng
We also have RIPng which is RIP next generation. It supports IPv6 networks. It's not covered on the CCNA exam, you only need to know RIPv2.
RIPv2 Configuration
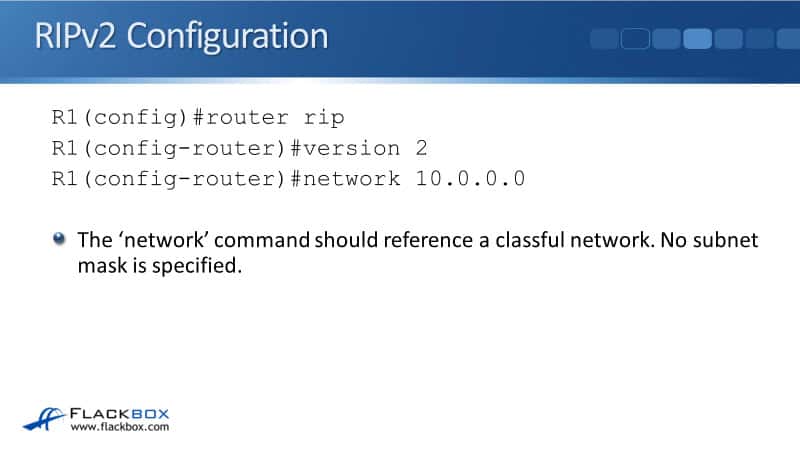
To configure RIP, at the global config, we issue the command:
router rip
Then optionally, we're going to say version 2. We do want it to be running the latest version. To specify the interfaces that you want RIP to be running on and to be advertised, we use the network command. In this example, we've said network 10.0.0.0. All interfaces that begin with 10 will start sending out RIP hello messages and try to form an adjacency.
When they do form a neighbor relationship with the router on the other side of the link, they will advertise all of the 10 networks to that router. The network command should reference a classful network, and no subnet mask is specified. For example, if on the router we had an interface with IP address 10.1.1.1/24, we don't say network 10.1.1.0, we say network 10.0.0.0.
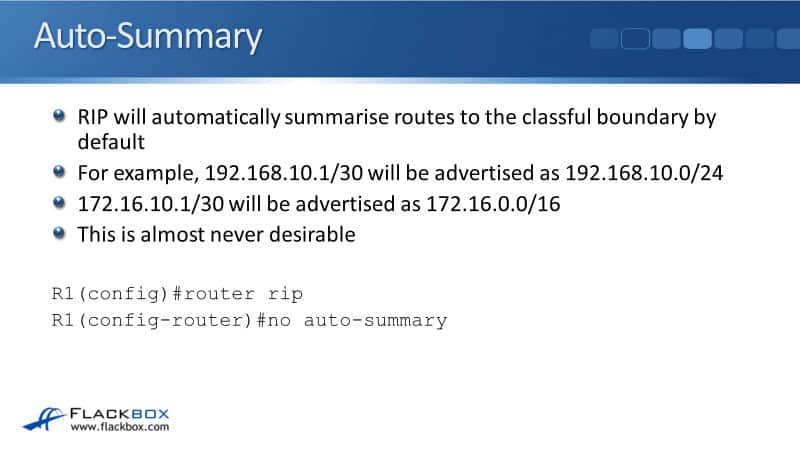
RIP will automatically summarize routes to the classful boundary by default. For example, if you've got an interface with IP address 192.168.10.1/30, and under RIP you include that with a network statement, it will be advertised as 192.168.10.0/24. It is because any address that begins with 192 is a class C address which has a default mask of /24. Rather than advertising it as a /30, it will summarize it to a /24.
If we had an interface with IP address 172.16.10.1/30, it will be advertised as 172.16.0.0/16 because that's a class B address and it would default to a /16. That is almost never desirable.
If in your network, the summarization does fall exactly into classical boundaries, in which case it would be fine. Modern networks aren't designed that they all fall into the summarization ranges exactly on classical boundaries.
So, if you leave auto summary turned on, it's liable to cause havoc on your network, dropping some of your traffic. Therefore, we always disable auto summary. To do that, the commands are:
router rip
no auto-summary
Manual Summarization
We don't want to do the automatic summarization, but we probably still will want to do summarization manually. To do that, the command is:
ip summary-address
Now, we get control of exactly how we are summarizing. When we do this, the individual summarized routes that fall within the larger range are not going to be advertised, only the summary route. In the neighbor router that learns the route, it's not going to learn all those different individual routes. It will only learn the summary route.
It's more efficient and it takes up less memory. It also compartmentalizes the different parts of your network. If you have an outage anywhere, it's going to limit the impact to that network.
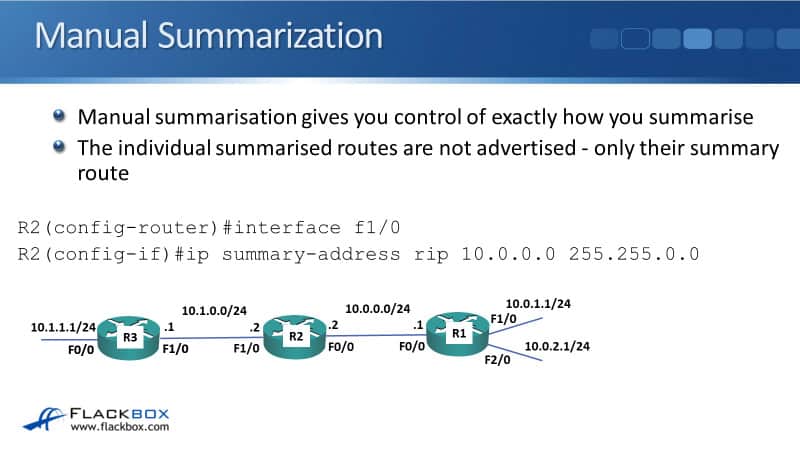
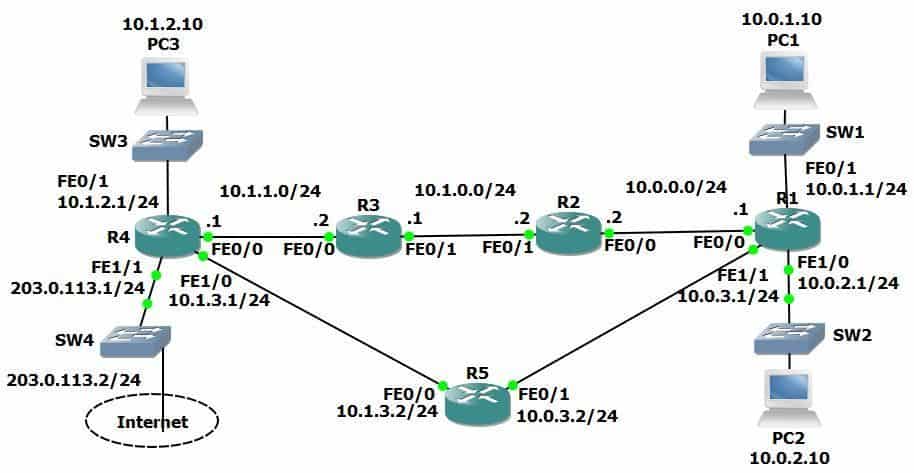
In our example here, on router R2, you see that all of the 10.1 networks are over to the left, out interface F1/0. All of the 10.0 networks are over to the right, out interface F0/0 on router R2.
What we're going to do is R2 is going to advertise all of the 10.0 networks to R3 as a single summary route rather than advertising 10.0.0.0/24, 10.0.1.0/24, and 10.0.2.0/24. It's just going to advertise 10.0.0.0/16. R3 is only going to learn that one summary route, rather than the three individual /24 routes.
We configure this at the interface level. You can figure it on the interface that you're sending the summary route out of. All of the 10.0 networks are available out interface F0/0, but we're going to advertise that to our three out interfaces.
We configure this on interface F1/0, the interface we're sending the summary right out of. To configure the summary, we say:
ip summary-address rip 10.0.0.0 255.255.0.0
It will just send that one route of 10.0.0.0/16 to router R3. To be honest though, RIP is only used in very small networks or for labs or for demos. Your network's probably not going to be that big, but you're going to care too much about summarization anyway.
RIPv2 Verification – show ip protocols
To verify RIP and any routing protocol that we've got running on our router, we can say:
show IP protocols
In the example here, we can see that the routing protocol is RIP and it is running. We can also see the interfaces that RIP is running on. I must have just put this command in not long after configuring it because it's only received two updates on those interfaces.
I can see it will do ECMP bouncing up to 4 maximum paths. It's routing for the 10.0.0.0 network, and it's got neighbors routing information sources at 10.0.0.02, and 10.0.3.2. The distance is the administrative distance, which defaults to 120 for RIP.
RIPv2 Verification – show run | section rip
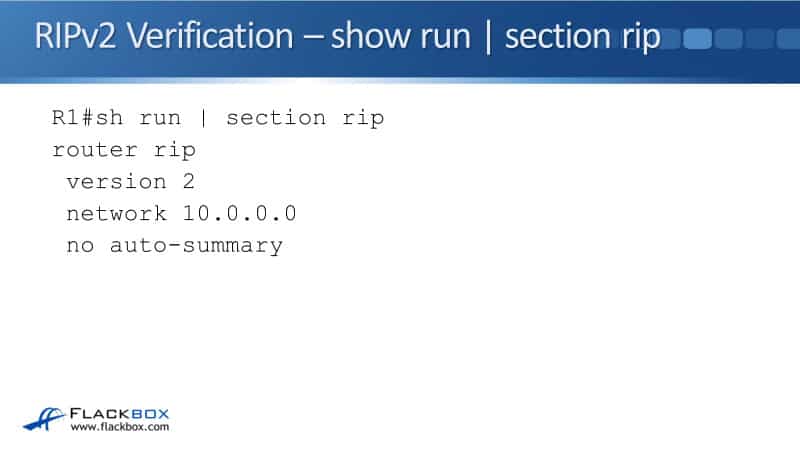
If I wanted to see my RIP configuration, I can do:
show run | section rip
Rather than doing a show run and having it scroll through the whole config to the RIP section, this will show just the RIP commands. It's quite convenient.
RIPv2 Verification – show ip route
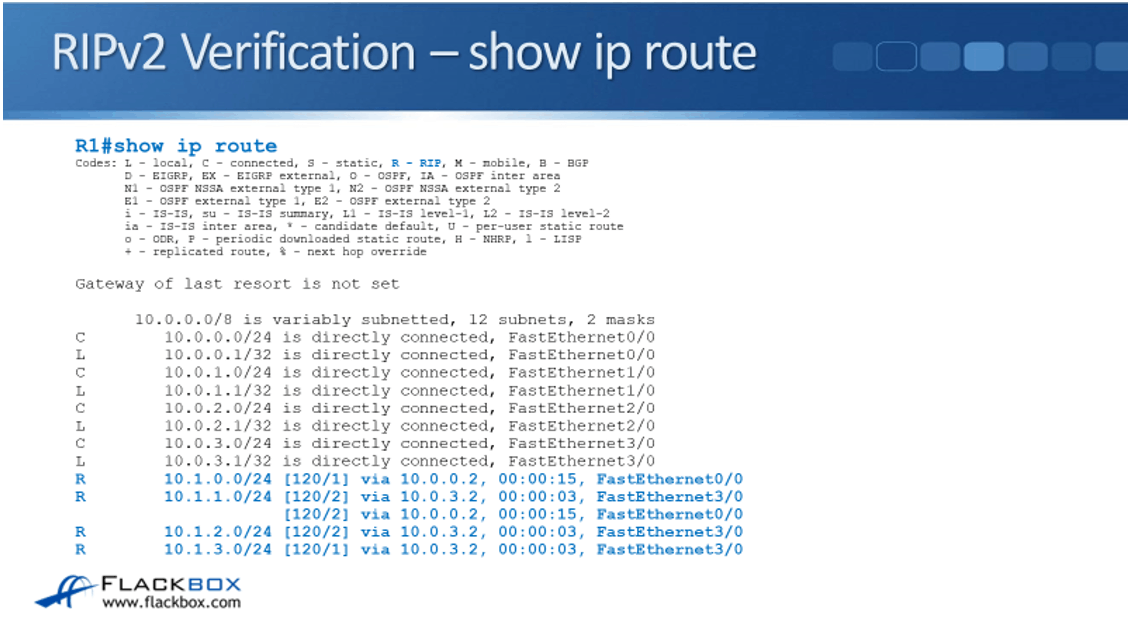
Once I've configured RIP, I'm going to want to check that I do have RIP routes in the routing table, so my standard command for that is:
show ip route
In the example here, I can see that I've got 4 routes that were learned via RIP. I can see that by on the column on the left, it says R; means they were learned by RIP.
The administrative distance is 120 and then I've got the slash after that as the metric. That is how many hop counts that the destination network is away. Then the next hop address when I received the last update and the outgoing interface.
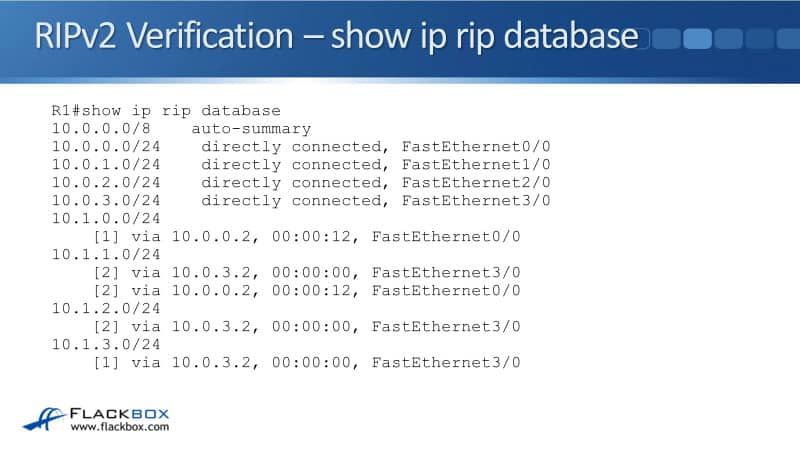
RIPv2 Verification – show ip rip database
Finally, I can also check the RIP database. What this is useful for is if you've configured RIP, and then you can see that you've got RIP neighbors, but you look in the routing table and you're not seeing the expected routes in there. Well, maybe the routes weren't even received all or maybe the routes were received, but they're not the best routes.
To check if the routes were received all by RIP, whether or not they made it into the routing table or not. The way that you can check that is with the command:
show ip rip database
Default Route Injection
The next thing to cover here is the default route injection. This is where we have got a default static route for all traffic, probably going out to the internet. We don't want to have to configure a default static route on every single router.
What we'll do is, on the final outbound router, which is connected out to the internet, we will configure a default static route there. We will then advertise it, inject that into RIP, so all of our other internal drivers will learn about it automatically. It saves us having to do a static route through every single router in the organization.
In the example here, it's R4 that is connected to the internet. On R4, I see IP route 0.0.0.0, 0.0.0.0, it's a default static route, with a next hop address of 203.0.113.2. I want to inject that into RIP, so I say:
router rip
default-information originate
The default static route will be injected into RIP, and it will be advertised to R3 and R5 from R4. Then, they will advertise it on, further inbound into my other internal RIP routers.
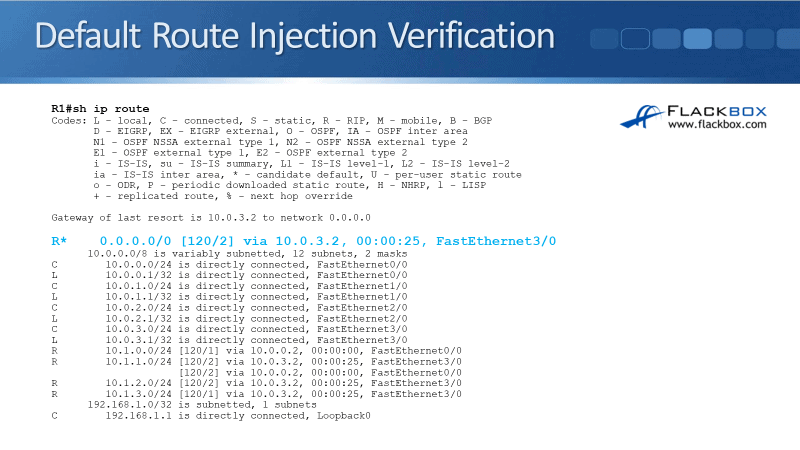
Default Route Injection Verification
If I now do a show ip route on R1, I do have a RIP route for 0.0.0.0/0 which is the default static route. The administrative distance is 120 because it's RIP. The hop count is 2 and I can see that my next hop address is 10.0.3.2, out interface F3/0.
RIP Routing Information Protocol Configuration Example
This configuration example is taken from my free ‘Cisco CCNA Lab Guide’ which includes over 350 pages of lab exercises and full instructions to set up the lab for free on your laptop.
Click here to download your free Cisco CCNA Lab Guide.
- Enable RIPv2 on every router. Ensure all networks except 203.0.113.0/24 are advertised. Do not perform any summarisation.
On every router:
R1(config)#router rip
R1(config-router)#version 2
R1(config-router)#no auto-summary
R1(config-router)#network 10.0.0.0
2. Verify all networks are in the router’s routing tables.
R1#show ip route
Codes: L - local, C - connected, S - static, R - RIP, M - mobile, B - BGP
D - EIGRP, EX - EIGRP external, O - OSPF, IA - OSPF inter area
N1 - OSPF NSSA external type 1, N2 - OSPF NSSA external type 2
E1 - OSPF external type 1, E2 - OSPF external type 2
i - IS-IS, su - IS-IS summary, L1 - IS-IS level-1, L2 - IS-IS level-2
ia - IS-IS inter area, * - candidate default, U - per-user static route
o - ODR, P - periodic downloaded static route, H - NHRP, l - LISP
+ - replicated route, % - next hop override
Gateway of last resort is not set
10.0.0.0/8 is variably subnetted, 12 subnets, 2 masks
C 10.0.0.0/24 is directly connected, FastEthernet0/0
L 10.0.0.1/32 is directly connected, FastEthernet0/0
C 10.0.1.0/24 is directly connected, FastEthernet0/1
L 10.0.1.1/32 is directly connected, FastEthernet0/1
C 10.0.2.0/24 is directly connected, FastEthernet1/0
L 10.0.2.1/32 is directly connected, FastEthernet1/0
C 10.0.3.0/24 is directly connected, FastEthernet1/1
L 10.0.3.1/32 is directly connected, FastEthernet1/1
R 10.1.0.0/24 [120/1] via 10.0.0.2, 00:00:00, FastEthernet0/0
R 10.1.1.0/24 [120/2] via 10.0.0.2, 00:00:00, FastEthernet0/0
[120/2] via 10.0.3.2, 00:00:10, FastEthernet1/1
R 10.1.2.0/24 [120/2] via 10.0.3.2, 00:00:10, FastEthernet1/1
R 10.1.3.0/24 [120/1] via 10.0.3.2, 00:00:24, FastEthernet1/1
3. Verify that routing is working by checking that PC1 has connectivity to PC3.
C:\>ping 10.1.2.10
Pinging 10.1.2.10 with 32 bytes of data:
Request timed out.
Reply from 10.1.2.10: bytes=32 time=1ms TTL=125
Reply from 10.1.2.10: bytes=32 time<1ms TTL=125
Reply from 10.1.2.10: bytes=32 time<1ms TTL=125
Ping statistics for 10.1.2.10:
Packets: Sent = 4, Received = 3, Lost = 1 (25% loss),
Approximate round trip times in milli-seconds:
Minimum = 0ms, Maximum = 1ms, Average = 0ms
4. Ensure that all routers have a route to the 203.0.113.0/24 network. Internal routes must not be advertised to the Service Provider at 203.0.113.2.
The 203.0.113.0/24 network must be added to the RIP process on R4, and interface FastEthernet 1/1 facing the service provider configured as a passive interface to avoid sending out internal network information.
R4(config)#router rip
R4(config-router)#passive-interface f1/1
R4(config-router)#network 203.0.113.0
5. Verify that all routers have a path to the 203.0.113.0/24 network.
R1#sh ip route
Codes: L - local, C - connected, S - static, R - RIP, M - mobile, B - BGP
D - EIGRP, EX - EIGRP external, O - OSPF, IA - OSPF inter area
N1 - OSPF NSSA external type 1, N2 - OSPF NSSA external type 2
E1 - OSPF external type 1, E2 - OSPF external type 2
i - IS-IS, su - IS-IS summary, L1 - IS-IS level-1, L2 - IS-IS level-2
ia - IS-IS inter area, * - candidate default, U - per-user static route
o - ODR, P - periodic downloaded static route, H - NHRP, l - LISP
+ - replicated route, % - next hop override
Gateway of last resort is not set
10.0.0.0/8 is variably subnetted, 12 subnets, 2 masks
C 10.0.0.0/24 is directly connected, FastEthernet0/0
L 10.0.0.1/32 is directly connected, FastEthernet0/0
C 10.0.1.0/24 is directly connected, FastEthernet0/1
L 10.0.1.1/32 is directly connected, FastEthernet0/1
C 10.0.2.0/24 is directly connected, FastEthernet1/0
L 10.0.2.1/32 is directly connected, FastEthernet1/0
C 10.0.3.0/24 is directly connected, FastEthernet1/1
L 10.0.3.1/32 is directly connected, FastEthernet1/1
R 10.1.0.0/24 [120/1] via 10.0.0.2, 00:00:24, FastEthernet0/0
R 10.1.1.0/24 [120/2] via 10.0.0.2, 00:00:24, FastEthernet0/0
[120/2] via 10.0.3.2, 00:00:14, FastEthernet1/1
R 10.1.2.0/24 [120/2] via 10.0.3.2, 00:00:14, FastEthernet1/1
R 10.1.3.0/24 [120/1] via 10.0.3.2, 00:00:14, FastEthernet1/1
R 203.0.113.0/24 [120/2] via 10.0.3.2, 00:00:12, FastEthernet1/1
6. Configure a default static route on R4 to the Internet via the service provider at 203.0.113.2
R4(config)#ip route 0.0.0.0 0.0.0.0 203.0.113.2
7. Ensure that all other routers learn via RIP how to reach the Internet.
Inject the default static route into RIP on R4.
R4(config)#router rip
R4(config-router)#default-information originate
8. Verify all routers have a route to the Internet.
R1#sh ip route
Codes: L - local, C - connected, S - static, R - RIP, M - mobile, B - BGP
D - EIGRP, EX - EIGRP external, O - OSPF, IA - OSPF inter area
N1 - OSPF NSSA external type 1, N2 - OSPF NSSA external type 2
E1 - OSPF external type 1, E2 - OSPF external type 2
i - IS-IS, su - IS-IS summary, L1 - IS-IS level-1, L2 - IS-IS level-2
ia - IS-IS inter area, * - candidate default, U - per-user static route
o - ODR, P - periodic downloaded static route, H - NHRP, l - LISP
+ - replicated route, % - next hop override
Gateway of last resort is 10.0.3.2 to network 0.0.0.0
10.0.0.0/8 is variably subnetted, 12 subnets, 2 masks
C 10.0.0.0/24 is directly connected, FastEthernet0/0
L 10.0.0.1/32 is directly connected, FastEthernet0/0
C 10.0.1.0/24 is directly connected, FastEthernet0/1
L 10.0.1.1/32 is directly connected, FastEthernet0/1
C 10.0.2.0/24 is directly connected, FastEthernet1/0
L 10.0.2.1/32 is directly connected, FastEthernet1/0
C 10.0.3.0/24 is directly connected, FastEthernet1/1
L 10.0.3.1/32 is directly connected, FastEthernet1/1
R 10.1.0.0/24 [120/1] via 10.0.0.2, 00:00:20, FastEthernet0/0
R 10.1.1.0/24 [120/2] via 10.0.0.2, 00:00:20, FastEthernet0/0
[120/2] via 10.0.3.2, 00:00:13, FastEthernet1/1
R 10.1.2.0/24 [120/2] via 10.0.3.2, 00:00:13, FastEthernet1/1
R 10.1.3.0/24 [120/1] via 10.0.3.2, 00:00:13, FastEthernet1/1
R 203.0.113.0/24 [120/2] via 10.0.3.2, 00:00:13, FastEthernet1/1
R* 0.0.0.0/0 [120/2] via 10.0.3.2, 00:00:13, FastEthernet1/1
Additional Resources
IP Routing: RIP Configuration Guide: https://www.cisco.com/c/en/us/td/docs/ios-xml/ios/iproute_rip/configuration/15-mt/irr-15-mt-book/irr-cfg-info-prot.html
RIP Protocol Configuration Guide with Examples: https://www.computernetworkingnotes.com/ccna-study-guide/rip-protocol-configuration-guide-with-examples.html
How to Configure RIP on a Cisco Router: https://networklessons.com/rip/how-to-configure-rip-on-a-cisco-router
Libby Teofilo

Text by Libby Teofilo, Technical Writer at www.flackbox.com
Libby’s passion for technology drives her to constantly learn and share her insights. When she’s not immersed in the tech world, she’s either lost in a good book with a cup of coffee or out exploring on her next adventure. Always curious, always inspired.