In this NetApp tutorial, you’ll learn about FlexVols. That’s our Flexible Volumes. Scroll down for the video and also text tutorial.
NetApp Flexible Volume (FlexVols) Video Tutorial
Amir Ramjan

Neil is extremely helpful and responsive, has spent time in the industry, and has a wide range of knowledge in the storage field.
His materials cover real examples and are easy to understand, and his labs give the feel of doing it in the real live environment.
After going through this program I was able to make myself competitive in the job market. I’ve landed an awesome job within NetApp itself as a consultant. I really recommend this course.
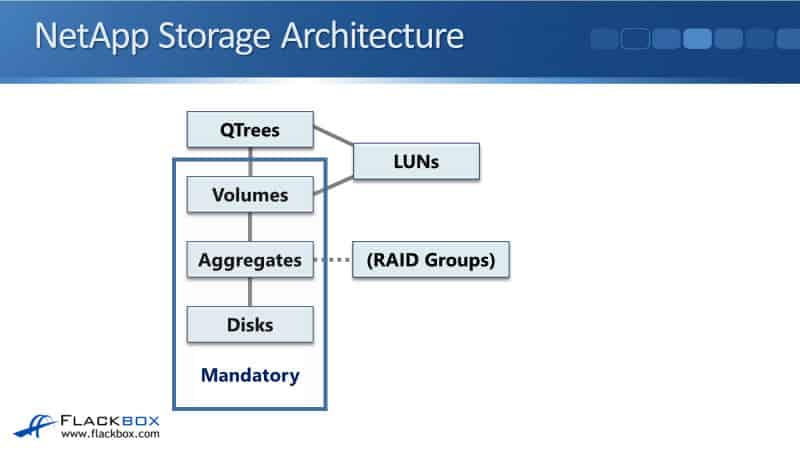
NetApp Storage Architecture
Volumes are the lowest level in the ONTAP architecture that clients can access data at. When we talk about volumes in general, we're talking about flexible volumes.
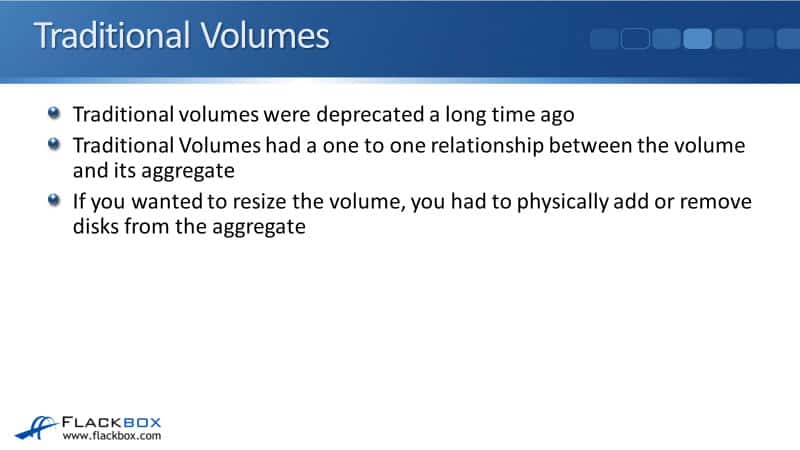
Traditional Volumes
Why do we have that term? There used to be traditional volumes way back in the day. They were deprecated a long time ago and you can’t even use them anymore. When ONTAP first came out it only supported traditional volumes. These traditional volumes had a one-to-one relationship between the volume and its aggregate.
So, if it was one volume, one aggregate. You could not put multiple volumes in the same aggregate, and if you wanted to resize the volume because it was tied to the aggregate you had to physically add or remove disks from that aggregate.
Flexible Volumes
Then, NetApp came out with flexible volumes. When these first came out you had the choice, you could either use traditional volumes or flexible volumes. There were no advantages at all to using traditional volumes, so NetApp kept support for both for a while to maintain backward compatibility. However, nobody would ever choose to use traditional volumes so they were phased out.
FlexVols break that one-to-one relationship between an aggregate and a volume, therefore, now you can have multiple volumes in the same aggregate. The way that they work now uses thin provisioning to allocate more space to the volumes than is actually physically available in the underlying aggregate.
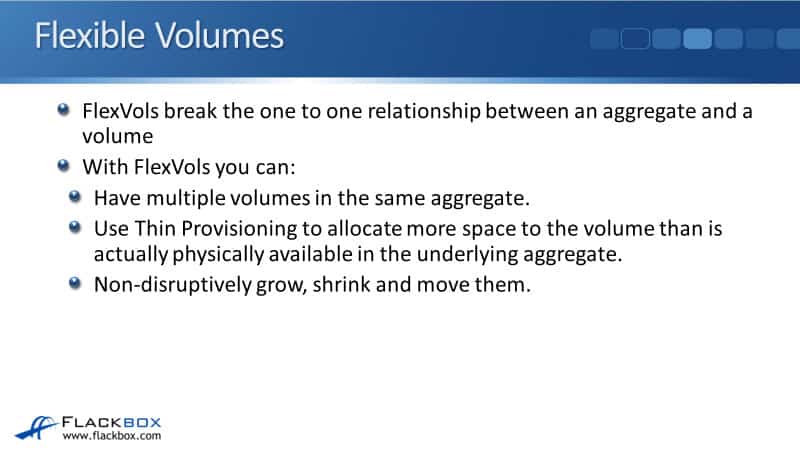
For example, you have got a 20 TB aggregate. You can make it look to the clients that there is 50 TB of available space there. You can make the amount of space look bigger than it is, and this allows you to buy the physical disks just when you need them.
Another thing you can do with your FlexVols is you can non-disruptively grow, shrink, and move them. All of those things you could not do with traditional volumes FlexVols are much more flexible. That's why they're called flexible volumes.
How Volumes are Allocated Space in an Aggregate
Let's look at how volumes are allocated space in an aggregate. So, as you just learned, you can have multiple volumes in the same aggregate. Let's say that we got Aggregate 1 here, and we've got three volumes using that aggregate. That's Volume 1 in SVM1, Volume 2 in SVM1, and we've also got Volume 1 in SVM2.
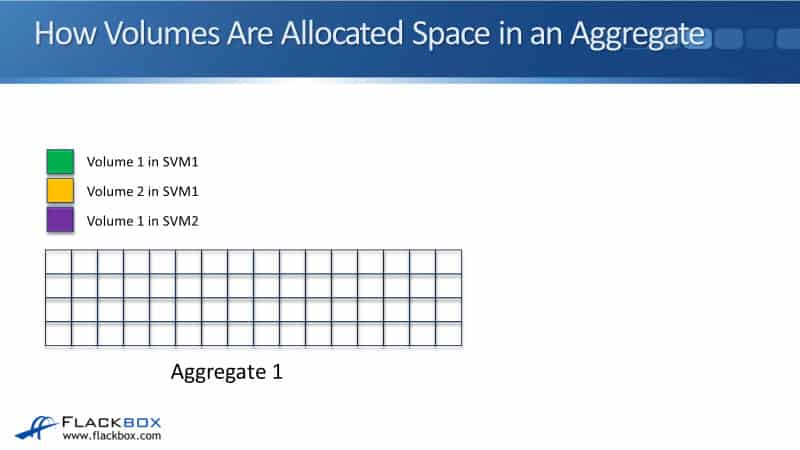
SVMs got their own set, but are independent namespaces, so there’s no problem to have a Volume 1 in SVM1. We could have another volume with the same name, Volume 1, in SVM2 as well. Since aggregates work at the cluster level, they're not assigned to a particular SVM. We can have different volumes from different SVMs all using shared aggregates.
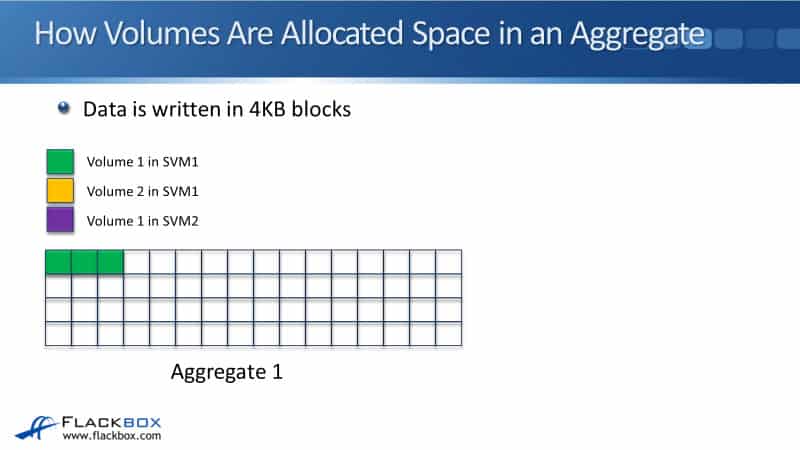
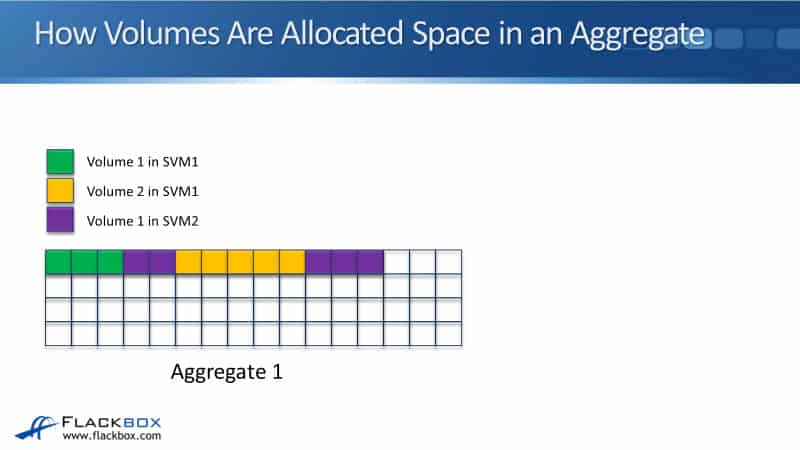
For our example, we write some data for Volume 1 in SVM1. It will use the first blocks that are available in the aggregate, and with ONTAP, data is written in 4K blocks. Then we write some data into Volume 1 in SVM2, it will use the next available blocks.
We then write some data for Volume 2 and then we write some data for Volume 1 in SVM2 again. The point here is that the available space on the aggregate is shared by all the volumes, and the space is given out on a first-come, first-serve basis.
Flexible Volumes
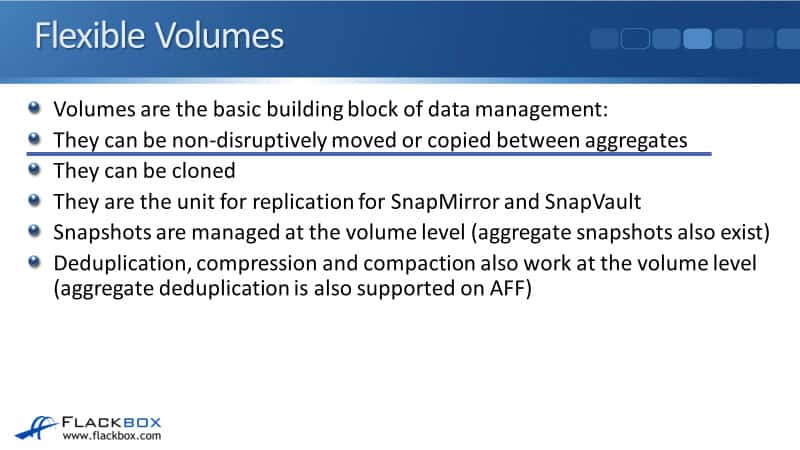
Flexible volumes are the basic building block of data management. They can be non-disruptively moved or copied between different aggregates. They can be cloned and they're the unit of replication for SnapMirror and SnapVault.
The Snapshots are managed at the volume level. There's an aggregate level snapshot support as well, but for your day-to-day snapshots that you're going to be using, they're going to be volume level snapshots. Deduplication, compression, and compaction, also works at the volume level.
A new feature is the aggregate deduplication is also supported just on AFF systems. Volumes are very important in ONTAP and the basic unit for most management.
Data SVM Namespace
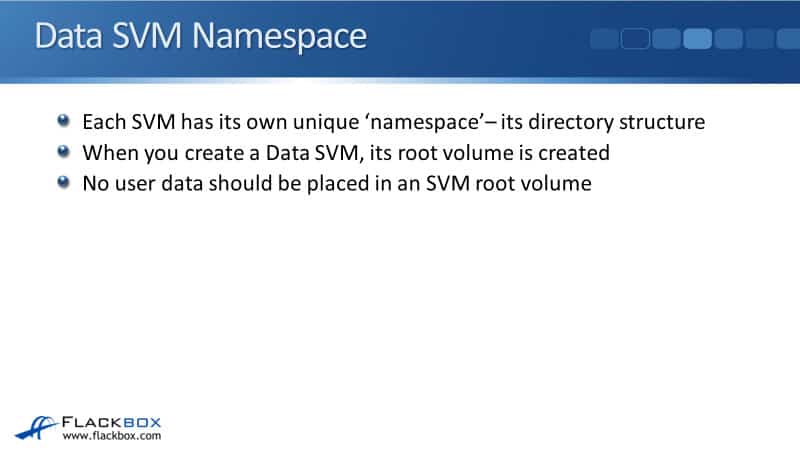
Each SVM has its own unique namespace, which is its directory structure. When you create a data SVM its root volume is created. Each data SVM has got its own independent root volume and namespace. No user data should be placed in an SVM root volume. It's possible to do that, but it's bad practice to do so.
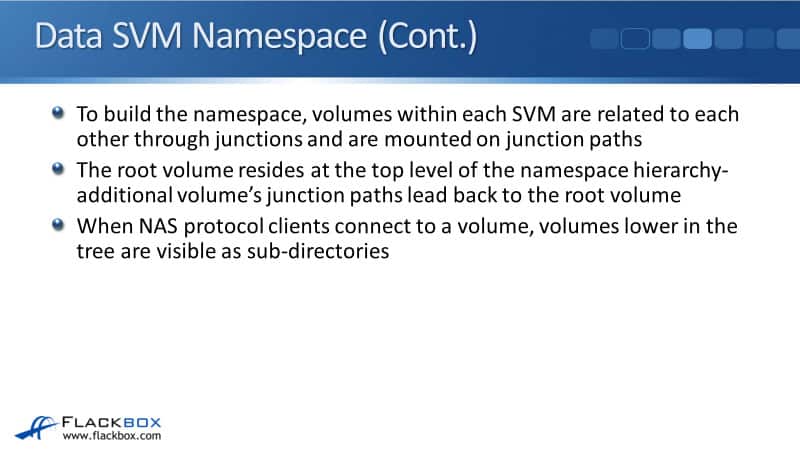
To build the namespace, volumes within each SVM are related to each other through junctions and are mounted on junction paths. The root volume resides at the top level of a namespace hierarchy. Additional volumes junction paths lead back to the root volume, and when NAS protocol clients connect to a volume, volumes lower in the tree are visible at subdirectories.
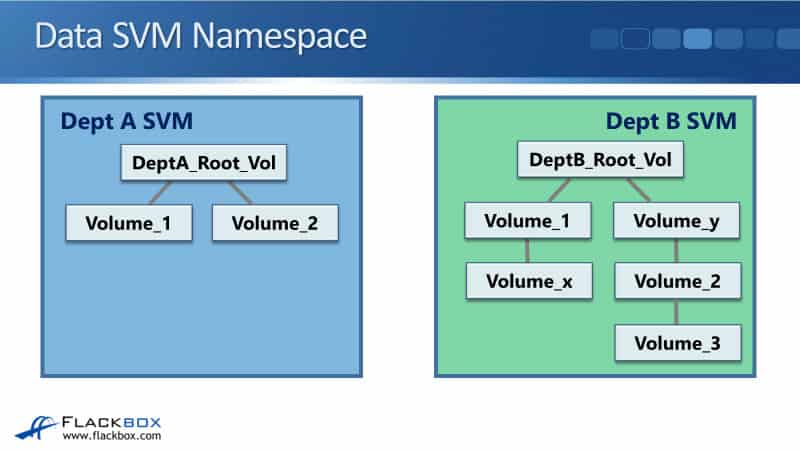
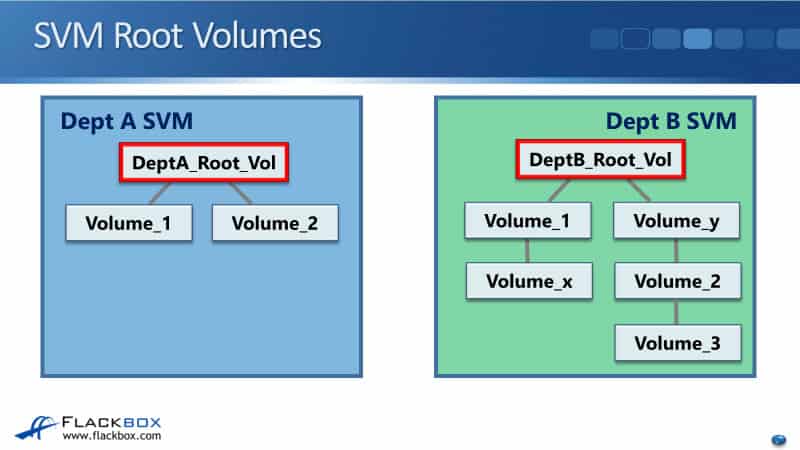
So how are the volumes are going to be visible to NAS clients? In the example below, we’ve got two different SVMs. We've got Dept A SVM, it has a root volume, and it's got Volume_1 and Volume_2 under. We've also got Dept B SVM. It has its own root volume, and it's got its own volume structure under there. Obviously, the SVMs and the volumes will have been created by you, the administrator.
Now, let's say that a Windows client mapped a network drive to the Dept B root volume, it will see everything under there as a subdirectory. A client has mapped a drive, for this example, it's mapped its Z drive to the Dept B root volume.
To be able to do that you need to have shared the root volume. So, that's been done, the user has mapped the drive, and because you've got these volumes underneath there the user will see that namespace as a directory structure underneath where they have connected.
In our example, Volume_1 and Volume_y are directly under the root volume. Volume_x is under Volume_1. Volume_2 is under Volume_y, and Volume_3 is under Volume_2, so that's exactly how it's going to loop to the client.
Data SVM Namespace – NAS Client View
In this next example, the client has mapped a drive to Volume_y, so they will see all the volumes underneath there as subdirectories. They've mapped their Y drive to Volume_y and they can see Volume_2 as a subdirectory in the Volume_y. They can see Volume_3 as a subdirectory of Volume_2, so they see everything below that point.
They do not have any visibility of anything higher up in the tree or hanging off of different branches, so they can't see the root volume, they can't see Volume_1, and they cannot see Volume_x. That’s how it looks for our NAS clients.

Data SVM Namespace – SAN Client View
Looking at SAN clients, our LUNs go into either a volume or into a QTree. In the example below, the administrator has created LUN_1, and we've put it in Volume_y. Then, we've got a SAN client which is using LUN_1.
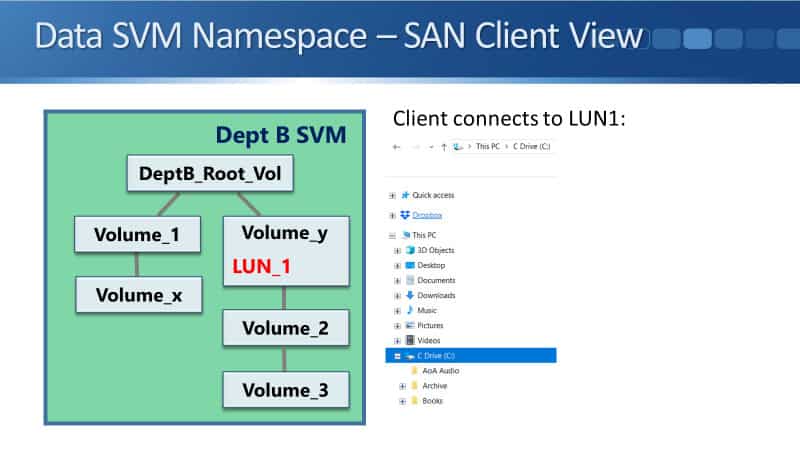
In our example, it's using LUN_1 as its C Drive. The LUN is a completely self-contained unit. The LUN is how the storage system presents a virtual drive to the client. It can put its own files and folders under there. As you can see here, it's got no visibility of the rest of the structure of the namespace, so LUN, completely self-contained.
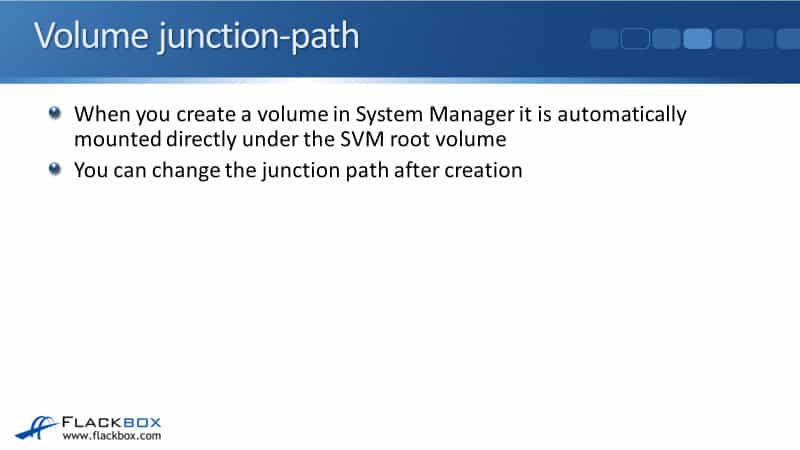
Volume junction-path
When you create a volume in System Manager, that volume is going to be automatically mounted directly under the SVM root volume. You can change the junction path later if you want to.
Let's say that you are the administrator, or working on the Department B SVM, if you create Volume_1 in the GUI, it's going to be automatically mounted directly under the root volume. If you create Volume_y it will also be mounted directly under the root volume.
If you then create Volume_x in the GUI, it is also going to be directly mounted underneath the root volume, not under Volume_1. So, if you wanted to change that and wanted to have it mounted under Volume_1 instead, what you would do is, first of, you would unmount it. Then, you would remount it again with a different path under Volume_1 rather than directly under the root volume.
When you do create a volume in the command line it is going to be unmounted by default, meaning it is inaccessible to clients. For clients to be able to access a volume, you need to create the volume. You also need to mount it into the namespace, and you need to configure your NAS protocol to make it available to clients.
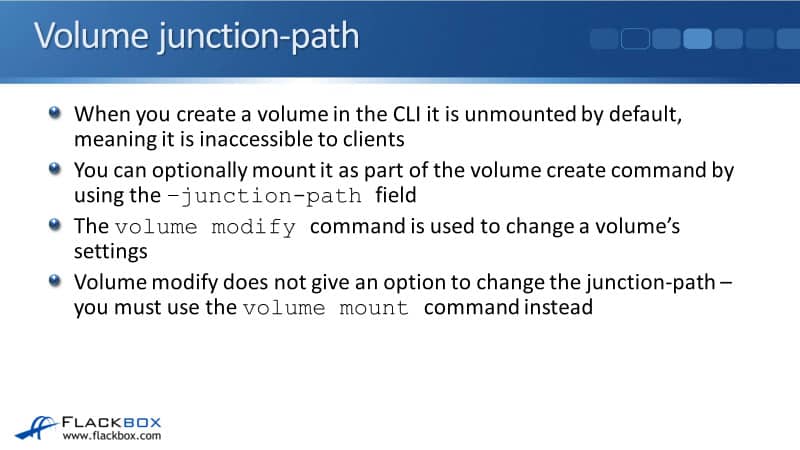
With the command line, it's not mounted by default. You need to explicitly do that. You can optionally do it as part of the ‘volume create’ command when you first create the volume. When you do that, you use the ‘-junction-path’ field as part of a volume create command.
When you do it, you say ‘volume create’, you specify the vserver this volume is going to associated with, then you specify the name of the volume, the aggregate that it's going to be in, and the size of the volume. Optionally, you can add the ‘-junction-path’ field to specify how it's going to be mounted in the namespace.
Now, if you forget to add that junction path field, it's not possible to add it with the ‘volume modify’ command. We have to use a different command, and that is the ‘volume mount’ command. To mount the volume in the namespace, either do it during initial creation with the ‘volume create’ command and use the ‘-junction-path’ field, or you can use the ‘volume mount’ command later.
Also, if you want to move it later then use the ‘volume unmount’ command to unmount it first, and then the ‘volume mount’ command to change the location.
Data SVM Root Volume vs Node Root Volume
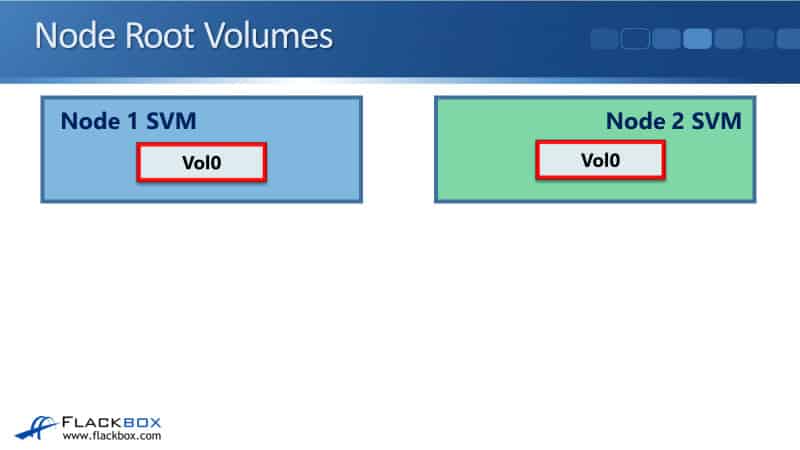
The last thing to talk about in this lecture is the data SVM root volumes versus the node root volumes. It's really easy to get confused between the two. We've got the cluster and we've got also the node SVMs as well, one for each node. We've got Vol0, which is where the system information is saved, and that is associated with our node SVMs.
Vol0 for the system information is known as the node root volume. That is different from the SVM root volumes. Each node in the cluster has its own Vol0 node root volume. The node root volumes are owned by the node SVMs. They also contain the system information and logs.
The information is replicated between all the Vol0's and all the nodes in the cluster, and node user data can be stored in Vol0. It's just used for system management.

Node Root Volumes
If we look at the node root volumes for our two node cluster, in this example, we've got a node 1 SVM and a node 2 SVM. They have both got a Vol0. That is the only thing in their namespace, and that is the node root volumes.
SVM Root Volumes
Whenever you hear me talk about it, I just call it Vol0 because I think that's clearer, but in other documentation, you'll often see that being described as the node root volumes. We can compare that with our SVM root volumes for our data SVMs.
As you see here, we've got our Department A SVM with its root volume, the Department B SVM with its root volume, those data SVM root volumes are very different than Vol0, the node root volumes.
NetApp Flexible Volumes (FlexVols) Configuration Example
This configuration example is an excerpt from my ‘NetApp ONTAP 9 Complete’ course. Full configuration examples using both the CLI and System Manager GUI are available in the course.
Want to practice this configuration for free on your laptop? Download your free step-by-step guide ‘How to Build a NetApp ONTAP Lab for Free’

- Check which volumes currently exist in the cluster.
cluster1::> volume show
Vserver Volume Aggregate State Type Size Available Used%
--------- ------------ ------------ ---------- ---- ---------- ---------- -----
DeptA DeptA_root aggr1_C1N1 online RW 20MB 18.76MB 1%
DeptB DeptB_root aggr1_C1N2 online RW 20MB 18.75MB 1%
cluster1-01
vol0 aggr0_cluster1_01
online RW 1.66GB 1.10GB 30%
cluster1-02
vol0 aggr0_cluster1_02
online RW 807.3MB 467.3MB 39%
4 entries were displayed.
The vol0 node root volumes and the SVM root volumes for the newly created SVMs are present.
2. Create a 100MB volume named DeptA_vol1 in the DeptA SVM, using aggregate aggr1_C1N1. Mount the volume directly under the SVM root volume, using the volume’s name as the junction path. Ignore any warning messages.
cluster1::> volume create -vserver DeptA -volume DeptA_vol1 -aggregate aggr1_C1N1 -size 100MB -junction-path /DeptA_vol1
Warning: The export-policy "default" has no rules in it. The volume will therefore be inaccessible over NFS and CIFS protocol.
Do you want to continue? {y|n}: y
[Job 43] Job succeeded: Successful
3. Verify the volume was created and mounted successfully.
cluster1::> volume show
Vserver Volume Aggregate State Type Size Available Used%
--------- ------------ ------------ ---------- ---- ---------- ---------- -----
DeptA DeptA_root aggr1_C1N1 online RW 20MB 18.75MB 1%
DeptA DeptA_vol1 aggr1_C1N1 online RW 100MB 94.78MB 0%
DeptB DeptB_root aggr1_C1N2 online RW 20MB 18.75MB 1%
cluster1-01
vol0 aggr0_cluster1_01
online RW 1.66GB 1.05GB 33%
cluster1-02
vol0 aggr0_cluster1_02
online RW 807.3MB 466.6MB 39%
5 entries were displayed.
4. Create a 2nd 100MB volume named DeptA_vol2 in the DeptA SVM, using aggregate aggr2_C1N1. Do not enter any configuration to mount the volume.
cluster1::> volume create -vserver DeptA -volume DeptA_vol2 -aggregate aggr2_C1N1 -size 100MB
[Job 44] Job succeeded: Successful
5. Verify the volume was created successfully.
cluster1::> volume show
Vserver Volume Aggregate State Type Size Available Used%
--------- ------------ ------------ ---------- ---- ---------- ---------- -----
DeptA DeptA_root aggr1_C1N1 online RW 20MB 18.75MB 1%
DeptA DeptA_vol1 aggr1_C1N1 online RW 100MB 94.78MB 0%
DeptA DeptA_vol2 aggr2_C1N1 online RW 100MB 94.78MB 0%
DeptB DeptB_root aggr1_C1N2 online RW 20MB 18.75MB 1%
cluster1-01
vol0 aggr0_cluster1_01
online RW 1.66GB 1.04GB 34%
cluster1-02
vol0 aggr0_cluster1_02
online RW 807.3MB 474.6MB 38%
6. Verify where the volume is mounted in the SVM namespace.
cluster1::> volume show -vserver DeptA -volume DeptA_vol2 -fields junction-path
vserver volume junction-path
------- ---------- -------------
DeptA DeptA_vol2 -
The volume is not mounted in the namespace by default when created using the CLI.
Additional Resources
Creating FlexVol Volumes: https://library.netapp.com/ecmdocs/ECMP1196986/html/GUID-42439010-686A-4D24-91CC-3F7249E9A5FB.html
How FlexVol Volumes Work: https://library.netapp.com/ecmdocs/ECMP1196986/html/GUID-AE9B67AB-DE96-4A3A-A110-34320754407E.html
Commands for managing FlexVol volumes: https://docs.netapp.com/us-en/ontap/volumes/commands-manage-flexvol-volumes-reference.html
Libby Teofilo

Text by Libby Teofilo, Technical Writer at www.flackbox.com
Libby’s passion for technology drives her to constantly learn and share her insights. When she’s not immersed in the tech world, she’s either lost in a good book with a cup of coffee or out exploring on her next adventure. Always curious, always inspired.