In this NetApp tutorial, I’ll explain some of the operations that you’re going to be carrying out on your FlexVols. Scroll down for the video and also text tutorial.
NetApp Flexible Volume Operations Video Tutorial
Kyung Pastino

I took Netapp ONTAP classroom training about a month ago and then watched your tutorials 3 times each. Your tutorials were much better than the class. I took the test last week and passed it. I don’t think I could have done that without your tutorials. Thank you so much!!!
Basic FlexVol Commands
Starting out with the basic commands, if you're doing this at the command line to create a volume, the command is ‘volume create’. The mandated parameters are the Vserver that the volume is associated with, the name of the volume, the aggregate it's going to be in, and the name of the volume.
If you want to change any of those parameters later, for example, the size of the volume, the command is ‘volume modify’. To rename a volume, it's ‘volume rename’. To mount a volume in the SVM namespace it's ‘volume mount’. To unmount it, it's ‘volume unmount’. If you wanted to change a junction path, you would unmount it first and then you would remount it again.
We can configure everything in the command line and we can do all of these tasks in system manager as well.

Volume Autosize
Now, there are other operations that we can carry out on our volumes. The first one is ‘volume autosize’. This allows your volumes to be automatically growing or shrunk based on configurable thresholds. This is configured at the volume level, so different volumes can have different settings.
There are three modes are available, which are all pretty self-explanatory by their name. There's off, which is the default. There's also grow and grow shrink.
If you use grow, then the volume will grow if it's running out of space. If you use grow shrink, then the volume can both grow when it's running out of space. It can also shrink if it's not using much space in the volume.
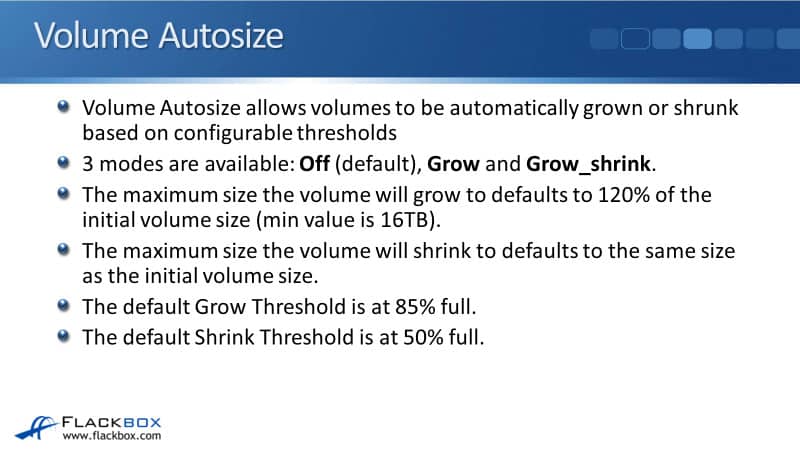
The maximum size a volume will grow to will to defaults to 120% of the initial volume size. You can change all of these different settings. The minimum value there is 16 terabytes.
The maximum size the volume will shrink to defaults to the same size as the initial volume size. What this means is, if you do enable shrink on there, you're going to have to change that setting because if you don't, it's never going to get any smaller than the initial size anyway.
The default Grow Threshold is at 85% full and the default Shrink Threshold is at 50% full. Meaning if it drops below 50% full, then, the volume will shrink.
Now, if you're thinking, "Well, wait a minute. How about when the volume is first created? It doesn't have any data in there." Yes, so this is something that you would turn on later. You've been using the volume for a while, it's already over 50% full but you think that it might drop.
In that case, you can turn on grow shrink as the mode on the volume. Again, all of these are configurable so you could set the grow threshold and the shrink threshold to a different percentage.
Volume Move
The next one is ‘volume move’. You can non-disruptively move volumes to another aggregate in the cluster. One reason that you would want to do that would be maybe the current aggregate is getting full.
Let's say that you have got four volumes in an aggregate right now. The aggregate is running out of disk space. Well, you could move one of the volumes off of that aggregate to free up space.
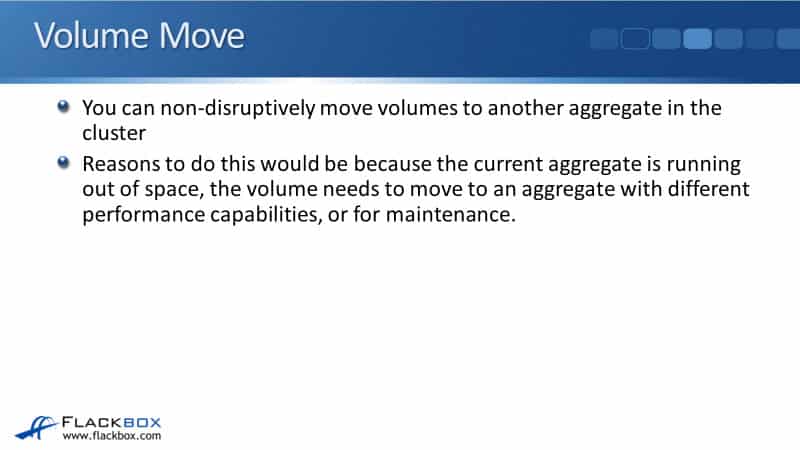
Another reason would be the volume needs to move to an aggregate with different performance capabilities. For example, we were running a project and we had a volume related to that project. It needed high performance, so we put it on SSDs. Now, the data is not being accessed real frequently, it doesn't need high performance anymore. We could then move the volume from an SSD aggregate to an HDD aggregate.
One more reason we would do this is for maintenance. Maybe we need to take a node down. In that case, we would move all of the volumes off all of its aggregates. We could move them back later after the maintenance is complete.
Volume Move Process
The way that a volume move works is non-disruptive to clients. A snapshot is taken of the volume at first and replicated to the new aggregate. A snapshot is a point-in-time copy of the active file system. It's taken very quickly.
With the ‘volume move’ we take a snapshot first, then we replicate that to the new aggregate. When the snapshot replication completes, client access is temporarily blocked during the final replication of any recent changes. As I said, this is a non-disruptive process so the volume stays up the whole time.
While that initial replication is happening, it's quite likely there's going to be new rights coming into that volume. When we do the cutover, we need to make sure that the volume is completely up to date.
So, we take the snapshot. The snapshot gets replicated. That's going to take some time and there's going to be some new rights coming in during that time. When that has finished, we need to replicate volumes on the latest changes as well and make sure that there aren't any other rights coming in so the volume is going to be consistent.
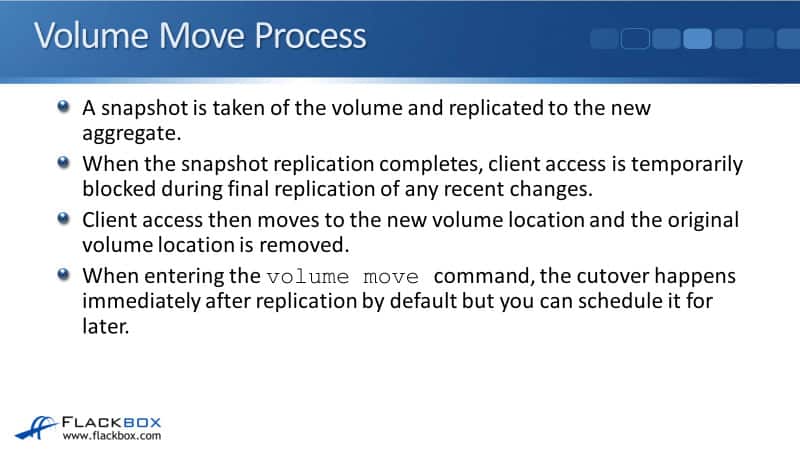
For a short period of time, there is going to be no access to clients to the volume. Client access then moves to the new volume location and the original volume location is removed. Therefore, it is non-disruptive but there will be that short time window when clients cannot access the volume.
When entering the volume move command, the cutover happens immediately after replication by default but you can schedule it for later. Because of that short time when there will be no access, maybe you want to do that during a maintenance window.
You could do the bulk of the volume move over replication, which is what takes some time. You could do that during business hours and then out of business hours during a maintenance window you could do the actual cutover, which is going to happen very quickly.
When you do a ‘volume move’, the volume is still owned by the same SVM. SVMs are our unit of secure multi-tenancy. If we've got a department A SVM and a department B SVM, we want to make sure that they don't have access to each other's data.
Volumes are associated with a particular SVM and when we do a ’volume move’ it moves to a different aggregate but it's still associated with the same SVM. So, the ‘volume move‘ command only works with moving a volume within the same SVM.
Volume Rehost
It is now possible to move a volume to a different SVM. That uses a different command, which is ‘volume rehost’. It is a disruptive command unlike ‘volume move’.

Deleting Flexible Volumes and Aggregates
The last thing to tell you about here is deleting your flexible volumes and aggregates. If you want to delete a volume or aggregate you must take it offline first. To delete an aggregate, you must move all or delete all of it is volumes first.
Let's say you just wanted to destroy all of the data in a particular aggregate and the aggregate as well. What you would do is you would take all the volumes offline. You would then be able to delete the volumes. You would then take the aggregate offline and you would then be able to delete the aggregate.
Another thing that you might want to do is to shrink an aggregate. It's not possible to do that on the fly. So what you'd have to do is move all of the volumes off that aggregate. You would then be able to take the aggregate offline and delete the aggregate. Then you could recreate it with a smaller size and move the volumes back that you want to be on there.
NetApp Flexible Volume Operations Configuration Example
This configuration example is an excerpt from my ‘NetApp ONTAP 9 Complete’ course. Full configuration examples using both the CLI and System Manager GUI are available in the course.
Want to practice this configuration for free on your laptop? Download your free step-by-step guide ‘How to Build a NetApp ONTAP Lab for Free’

- Change the size of DeptA_vol2 to 200MB, accepting all other defaults. Verify the change is successful.
cluster1::> volume modify -vserver DeptA -volume DeptA_vol2 -size 200MB
Volume modify successful on volume DeptA_vol2 of Vserver DeptA.
cluster1::> volume show
Vserver Volume Aggregate State Type Size Available Used%
--------- ------------ ------------ ---------- ---- ---------- ---------- -----
DeptA DeptA_root aggr1_C1N1 online RW 20MB 18.75MB 1%
DeptA DeptA_vol1 aggr1_C1N1 online RW 100MB 94.78MB 0%
DeptA DeptA_vol2 aggr2_C1N1 online RW 200MB 189.8MB 0%
DeptB DeptB_root aggr1_C1N2 online RW 20MB 18.74MB 1%
cluster1-01
vol0 aggr0_cluster1_01
online RW 1.66GB 1.10GB 30%
cluster1-02
vol0 aggr0_cluster1_02
online RW 807.3MB 473.4MB 38%
6 entries were displayed.
2. Mount DeptA_vol2 directly under DeptA_vol1. Use a junction name of vol2. Ignore any warning messages. Verify the change when completed.
cluster1::> volume mount -vserver DeptA -volume DeptA_vol2 -junction-path /DeptA_vol1/vol2
Warning: The export-policy "default" has no rules in it. The volume will therefore be inaccessible over NFS and CIFS protocol.
Do you want to continue? {y|n}: y
cluster1::> volume show -vserver DeptA -volume DeptA_vol2 -fields junction-path
vserver volume junction-path
------- ---------- ----------------
DeptA DeptA_vol2 /DeptA_vol1/vol2
3. What volume autosize mode is applied to DeptA_vol2?
cluster1::> volume show -vserver DeptA -volume DeptA_vol2 -fields autosize-mode
vserver volume autosize-mode
------- ---------- -------------
DeptA DeptA_vol2 off
4. Enable the Grow autosize mode on the volume, accepting all the default settings.
cluster1::> volume modify -vserver DeptA -volume DeptA_vol2 -autosize-mode grow
Volume modify successful on volume DeptA_vol2 of Vserver DeptA.
5. Move DeptA_vol2 to aggr3_C1N1.
cluster1::> volume move start -vserver DeptA -volume DeptA_vol2 -destination-aggregate aggr3_C1N1
[Job 49] Job is queued: Move "DeptA_vol2" in Vserver "DeptA" to aggregate "aggr3_C1N1". Use the "volume move show -vserver DeptA -volume DeptA_vol2" command to view the status of this operation.
6. Verify the volume move is in progress and then completes.
cluster1::> volume move show
Vserver Volume State Move Phase Percent-Complete Time-To-Complete
--------- ---------- -------- ---------- ---------------- ----------------
DeptA DeptA_vol2 healthy replicating
7% Mon Jan 28 06:17:30 2019
cluster1::> volume move show
Vserver Volume State Move Phase Percent-Complete Time-To-Complete
--------- ---------- -------- ---------- ---------------- ----------------
DeptA DeptA_vol2 healthy cutover 38% Mon Jan 28 06:17:56 2019
cluster1::> volume move show
Vserver Volume State Move Phase Percent-Complete Time-To-Complete
--------- ---------- -------- ---------- ---------------- ----------------
DeptA DeptA_vol2 healthy finishing 38% Mon Jan 28 06:18:06 2019
cluster1::> volume move show
This table is currently empty.
cluster1::> volume move show -vserver DeptA -volume DeptA_vol2
Vserver Name: DeptA
Volume Name: DeptA_vol2
Actual Completion Time: Mon Jan 28 06:17:36 2019
Bytes Remaining: -
Destination Aggregate: aggr3_C1N1
Detailed Status: Successful
Estimated Time of Completion: -
Managing Node: cluster1-01
Percentage Complete: 100%
Move Phase: completed
Estimated Remaining Duration: -
Replication Throughput: -
Duration of Move: 00:00:21
Source Aggregate: aggr2_C1N1
Start Time of Move: Mon Jan 28 06:17:15 2019
Move State: done
Is Source Volume Encrypted: false
Encryption Key ID of Source Volume:
Is Destination Volume Encrypted: false
Encryption Key ID of Destination Volume:
cluster1::> volume show
Vserver Volume Aggregate State Type Size Available Used%
--------- ------------ ------------ ---------- ---- ---------- ---------- -----
DeptA DeptA_root aggr1_C1N1 online RW 20MB 18.72MB 1%
DeptA DeptA_vol1 aggr1_C1N1 online RW 100MB 94.73MB 0%
DeptA DeptA_vol2 aggr3_C1N1 online RW 200MB 189.6MB 0%
DeptB DeptB_root aggr1_C1N2 online RW 20MB 18.72MB 1%
cluster1-01
vol0 aggr0_cluster1_01
online RW 1.66GB 1.08GB 31%
cluster1-02
vol0 aggr0_cluster1_02
online RW 807.3MB 459.7MB 40%
6 entries were displayed.
7. Move the DeptA_vol2 volume to DeptB.
You need to unmount the volume before you can move it to another SVM.
cluster1::> volume unmount -vserver DeptA -volume DeptA_vol2
cluster1::> volume rehost -vserver DeptA -volume DeptA_vol2 -destination-vserver DeptB
Warning: Rehosting a volume from one Vserver to another Vserver does not change the security information on that volume.
If the security domains of the Vservers are not identical, unwanted access might be permitted, and desired access might be denied. An attempt to rehost a volume will disassociate the volume from all volume policies and policy rules. The volume must be reconfigured after a successful or unsuccessful rehost operation.
Do you want to continue? {y|n}: y
[Job 48] Job is queued: Volume rehost operation on volume "DeptA_vol2" on Vserver "DeptA" to [Job 48] Job succeeded: Successful
Info: Volume is successfully rehosted on the target Vserver.
Set the desired volume configuration - such as the export policy and QoS policy - on the target Vserver.
8. Rename the volume to DeptB_vol2 and mount it directly under the SVM root volume.
cluster1::> volume rename -vserver DeptB -volume DeptA_vol2 -newname DeptB_vol2
[Job 49] Job succeeded: Successful
cluster1::> volume mount -vserver DeptB -volume DeptB_vol2 -junction-path /DeptB_vol2
Warning: The export-policy "default" has no rules in it. The volume will therefore be inaccessible over NFS and CIFS protocol.
Do you want to continue? {y|n}: y
9. Verify the volume is renamed and mounted.
cluster1::> volume show
Vserver Volume Aggregate State Type Size Available Used%
--------- ------------ ------------ ---------- ---- ---------- ---------- -----
DeptA DeptA_root aggr1_C1N1 online RW 20MB 18.74MB 1%
DeptA DeptA_vol1 aggr1_C1N1 online RW 100MB 94.75MB 0%
DeptB DeptB_root aggr1_C1N2 online RW 20MB 18.71MB 1%
DeptB DeptB_vol2 aggr3_C1N1 online RW 200MB 189.6MB 0%
cluster1-01
vol0 aggr0_cluster1_01
online RW 1.66GB 1.05GB 33%
cluster1-02
vol0 aggr0_cluster1_02
online RW 807.3MB 466.0MB 39%
6 entries were displayed.
cluster1::> volume show -vserver DeptB -volume DeptB_vol2 -fields junction-path
vserver volume junction-path
------- ---------- -------------
DeptB DeptB_vol2 /DeptB_vol2
10. Delete the volume.
You need to take the volume offline before you can delete it.
cluster1::> volume modify -vserver DeptB -volume DeptB_vol2 -state offline
Warning: Volume "DeptB_vol2" on Vserver "DeptB" must be unmounted before being taken offline or restricted. Clients will not be able to access the affected volume and related junction paths after that. Do you still want to unmount the volume and continue?
{y|n}: y
Volume modify successful on volume DeptB_vol2 of Vserver DeptB.
cluster1::> volume delete -vserver DeptB -volume DeptB_vol2
Warning: Are you sure you want to delete volume "DeptB_vol2" in Vserver "DeptB" ?
{y|n}: y
[Job 50] Job succeeded: Successful
Additional Resources
Creating a FlexVol volume: https://library.netapp.com/ecmdocs/ECMP1196986/html/GUID-42439010-686A-4D24-91CC-3F7249E9A5FB.html
How Moving a FlexVol Volume Works: https://library.netapp.com/ecmdocs/ECMP1552961/html/GUID-810128A0-54FF-4048-8AFB-0F255FF28892.html
How FlexVol Volumes Work: https://library.netapp.com/ecmdocs/ECMP1196986/html/GUID-AE9B67AB-DE96-4A3A-A110-34320754407E.html
Libby Teofilo

Text by Libby Teofilo, Technical Writer at www.flackbox.com
Libby’s passion for technology drives her to constantly learn and share her insights. When she’s not immersed in the tech world, she’s either lost in a good book with a cup of coffee or out exploring on her next adventure. Always curious, always inspired.