In this Cisco CCNA tutorial, you’ll learn about the different EtherChannel Protocols. I’ll also discuss how to configure and verify them. Scroll down for the video and also text tutorial.
EtherChannel Protocols and Configuration Video Tutorial
Jacob Tomlin

I took your CCNA training. It is very informative and super helpful! I passed with a 95% on my first try. Thank you so much.
There are three available protocols:
- Link Aggregation Control Protocol (LACP)
- Port Aggregation Protocol (PAgP)
- Static EtherChannel
EtherChannel Protocols – LACP
LACP or the Link Aggregation Control Protocol is an open standard. It is supported in all vendor switches. With LACP, the switches on both sides negotiate the port channel creation and maintenance. Of the three available methods, this is the preferred one to use.

EtherChannel Protocols – PAgP
Next one we have is PAgP, which is Cisco's Proprietary Port Aggregation Protocol. This works similarly to LACP where the switches on both sides negotiate the port channel creation and maintenance. It's not recommended to use PAgP because it's proprietary.

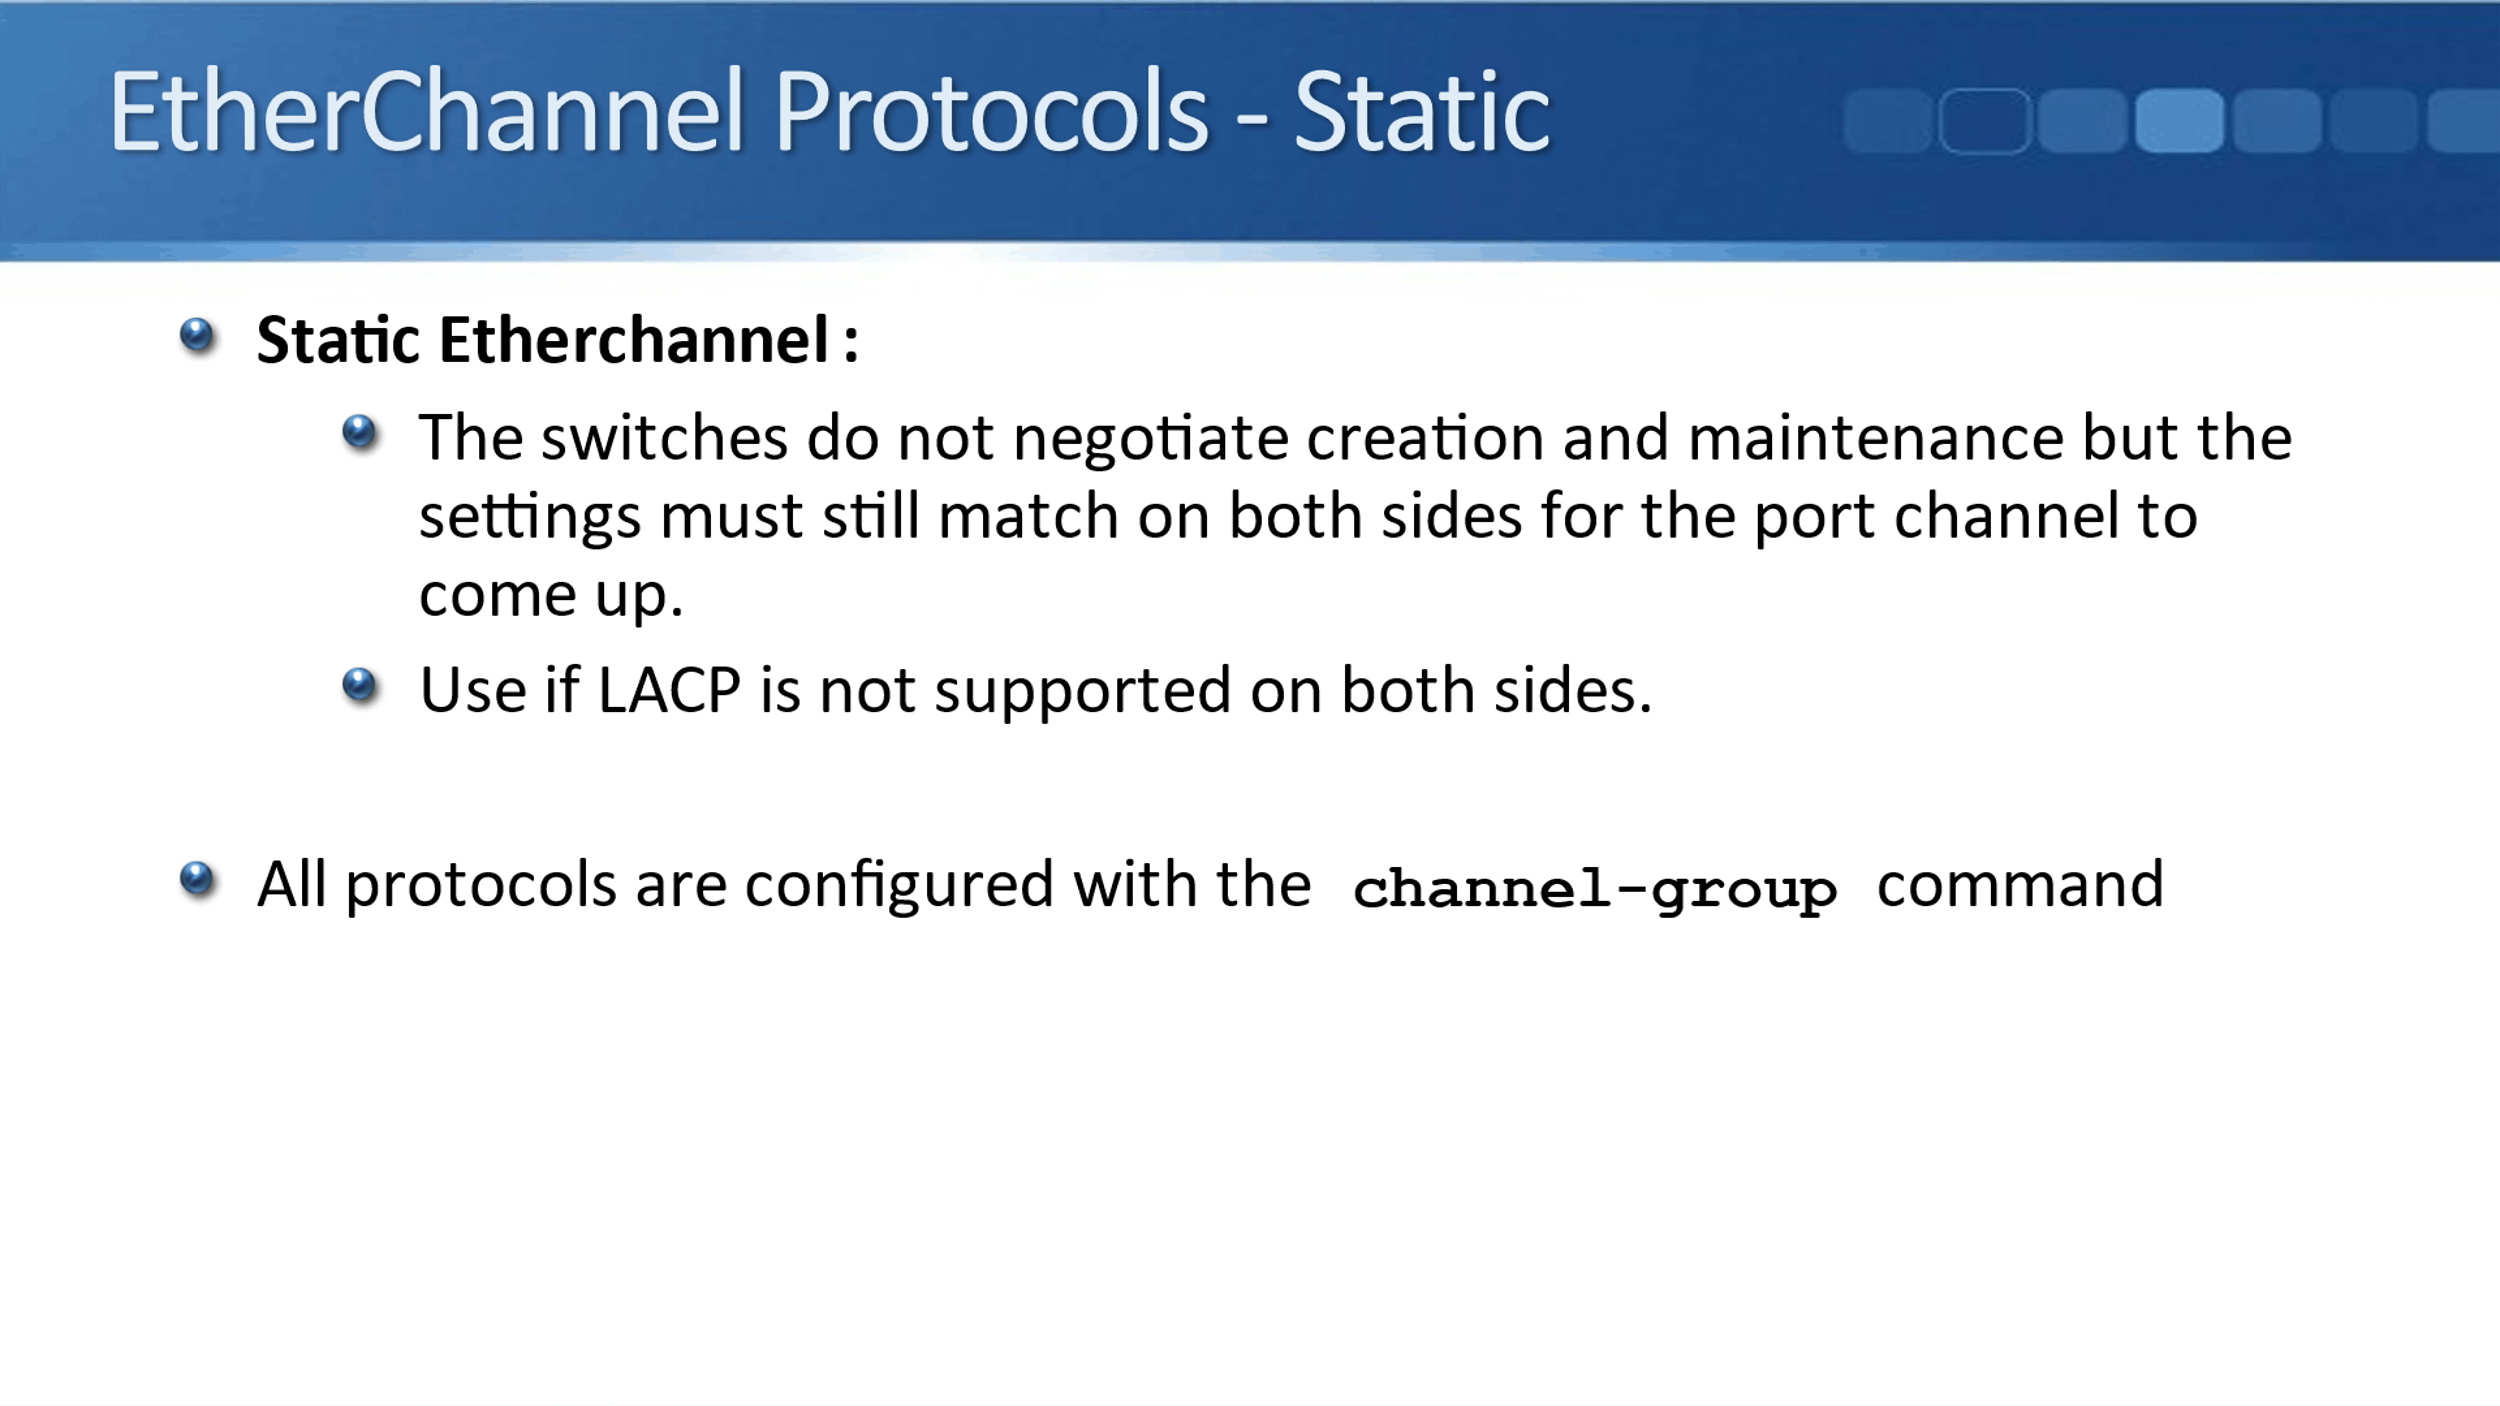
Finally, the third option we have is to configure a Static EtherChannel. With Static, the switches do not negotiate creation and maintenance, but the settings must still match on both sides for the port channel to come up.
With all three, you've got two switches that have got links going between them. You're going to configure those into a port channel and you need to configure the same settings on both sides, on both switches.
We will use Static if LACP is not supported on both sides. LACP will be supported on all Cisco switches, but maybe you're connecting to another vendor switch or server.
EtherChannel Parameters
The configuration for the protocols is really similar. They all actually use the same command, which is the ‘channel-group’ command. It's on the keywords that we use along with channel-group that decides which of the three protocols is going to be used.
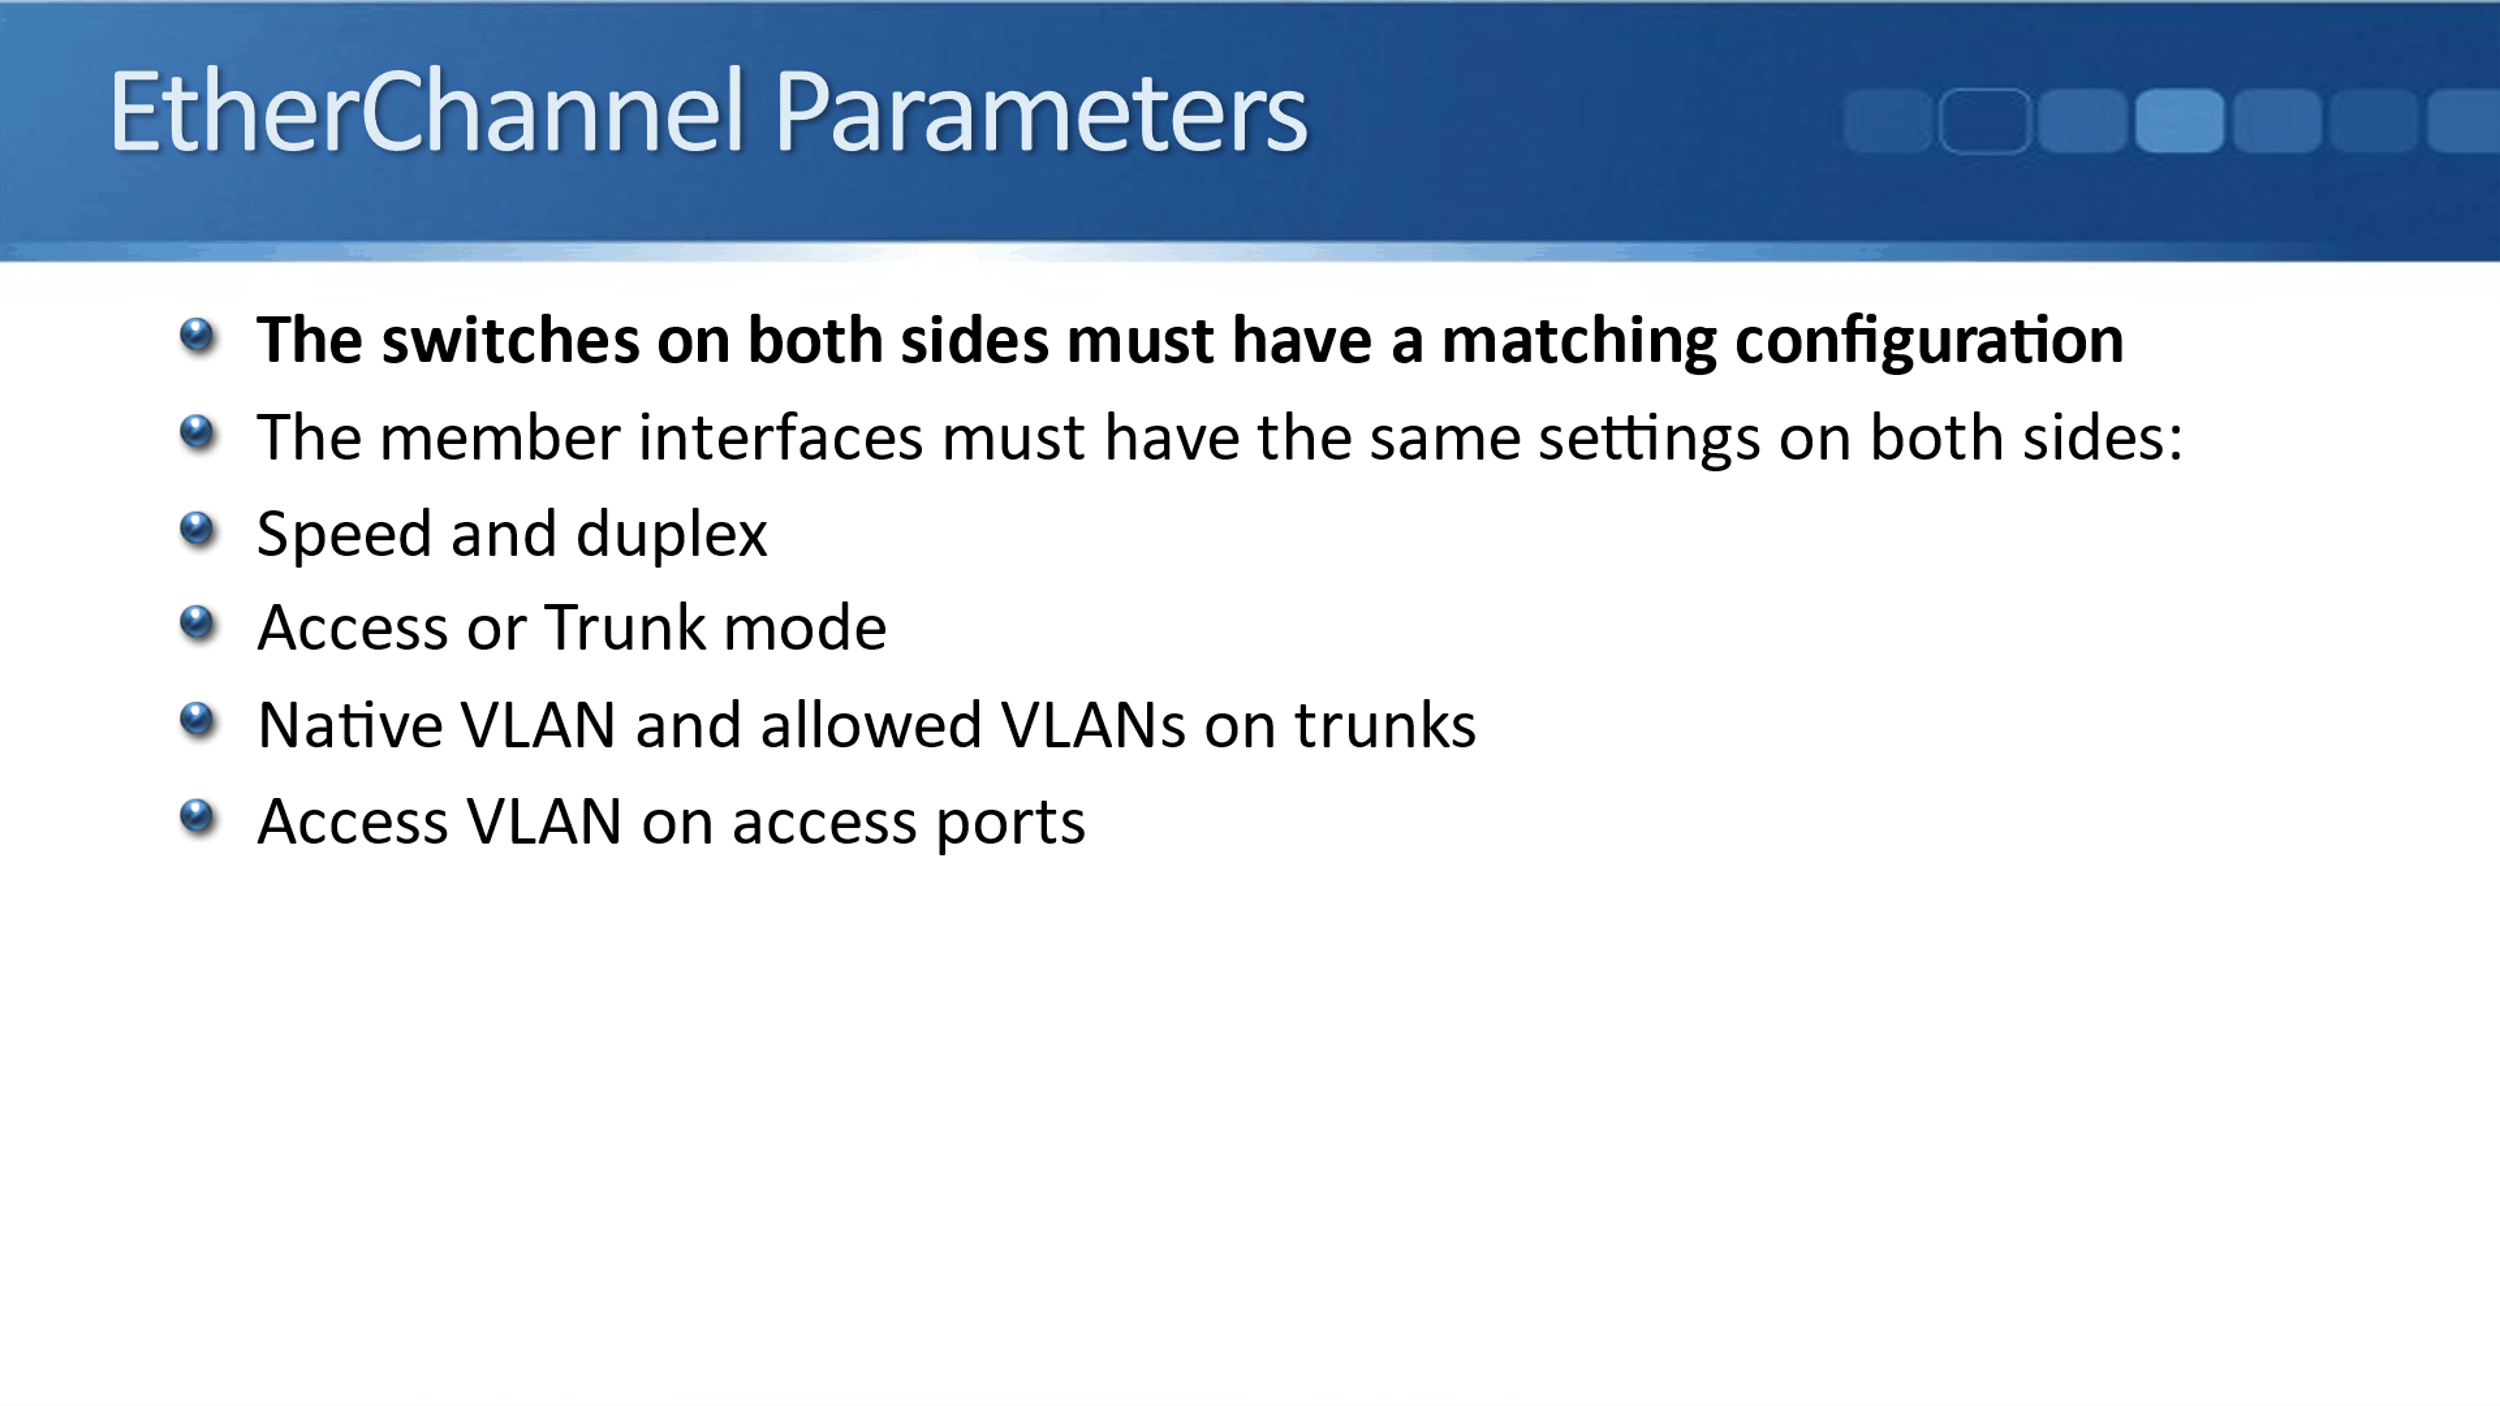
The parameters for EtherChannel has to match on both sides of the link. The interfaces need to have a matching configuration. The settings that have to be the same on both sides, include the speed and duplex, whether the port is set to Access or Trunk mode, the native VLAN, the allowed VLANs, and the Access VLAN if it's an access port.
LACP Configuration
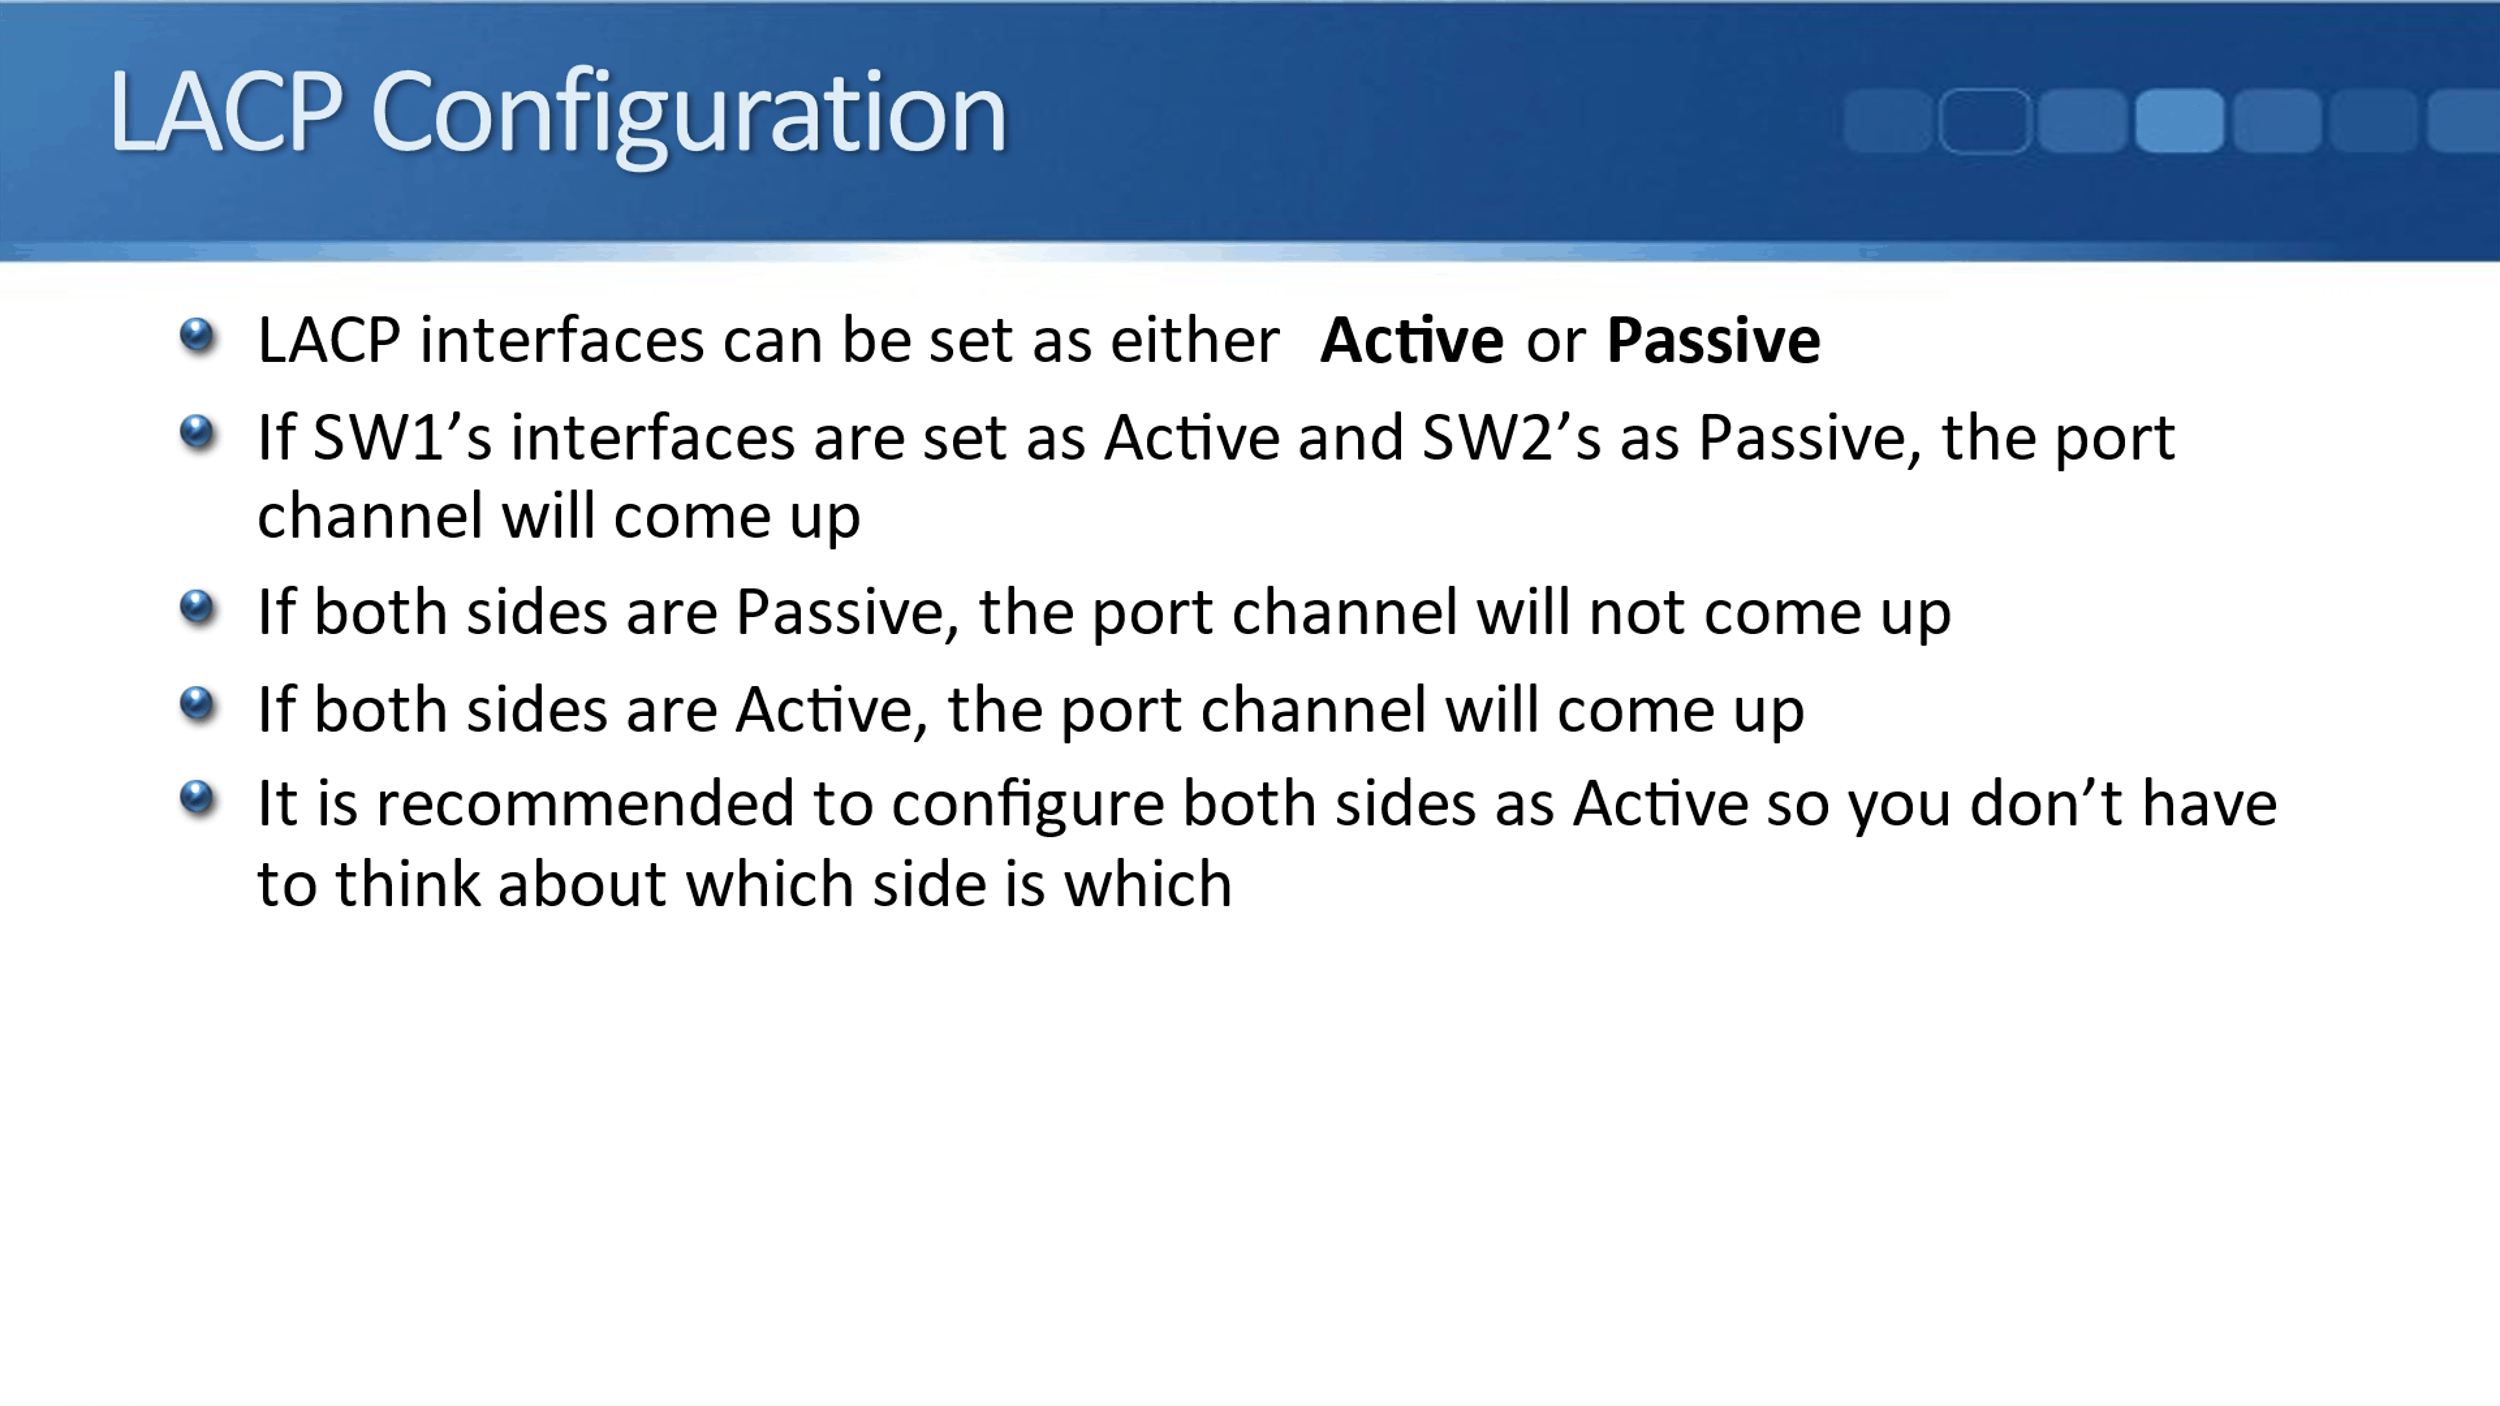
LACP interfaces can be set as either Active or Passive. Let's say we're going to configure a port-channel between SW1 and SW2. If SW1’s interfaces are set as Active and SW2’s as Passive, the port channel will come up. But if both sides are set as Passive, the port channel will not come up, and if both sides are Active, the port channel will come up.
It's recommended to configure both sides as Active. Your choices are, either both sides as Active or one side as Active and one side as Passive. It's easiest just to configure both as Active because you don't need to worry about which is the Active side and which is the Passive side.
It is configured at the interface level, therefore, specify the interfaces you want to group into the port channel. Here, we enter the commands:
interface range f0/23 - 24
channel-group 1 mode active
As soon as you enter the commands, it will create a new logical interface which is your port channel interface. Here, we're configuring channel-group 1 so that would create port channel 1. The reason that there's a number here is that you might have different port channels going to different neighbor switches.
Let’s say that we are SW1 and we've got a port channel going to SW2. We could make that port channel 1. If we've also got you a port channel going to SW3, we could make that port channel 2.
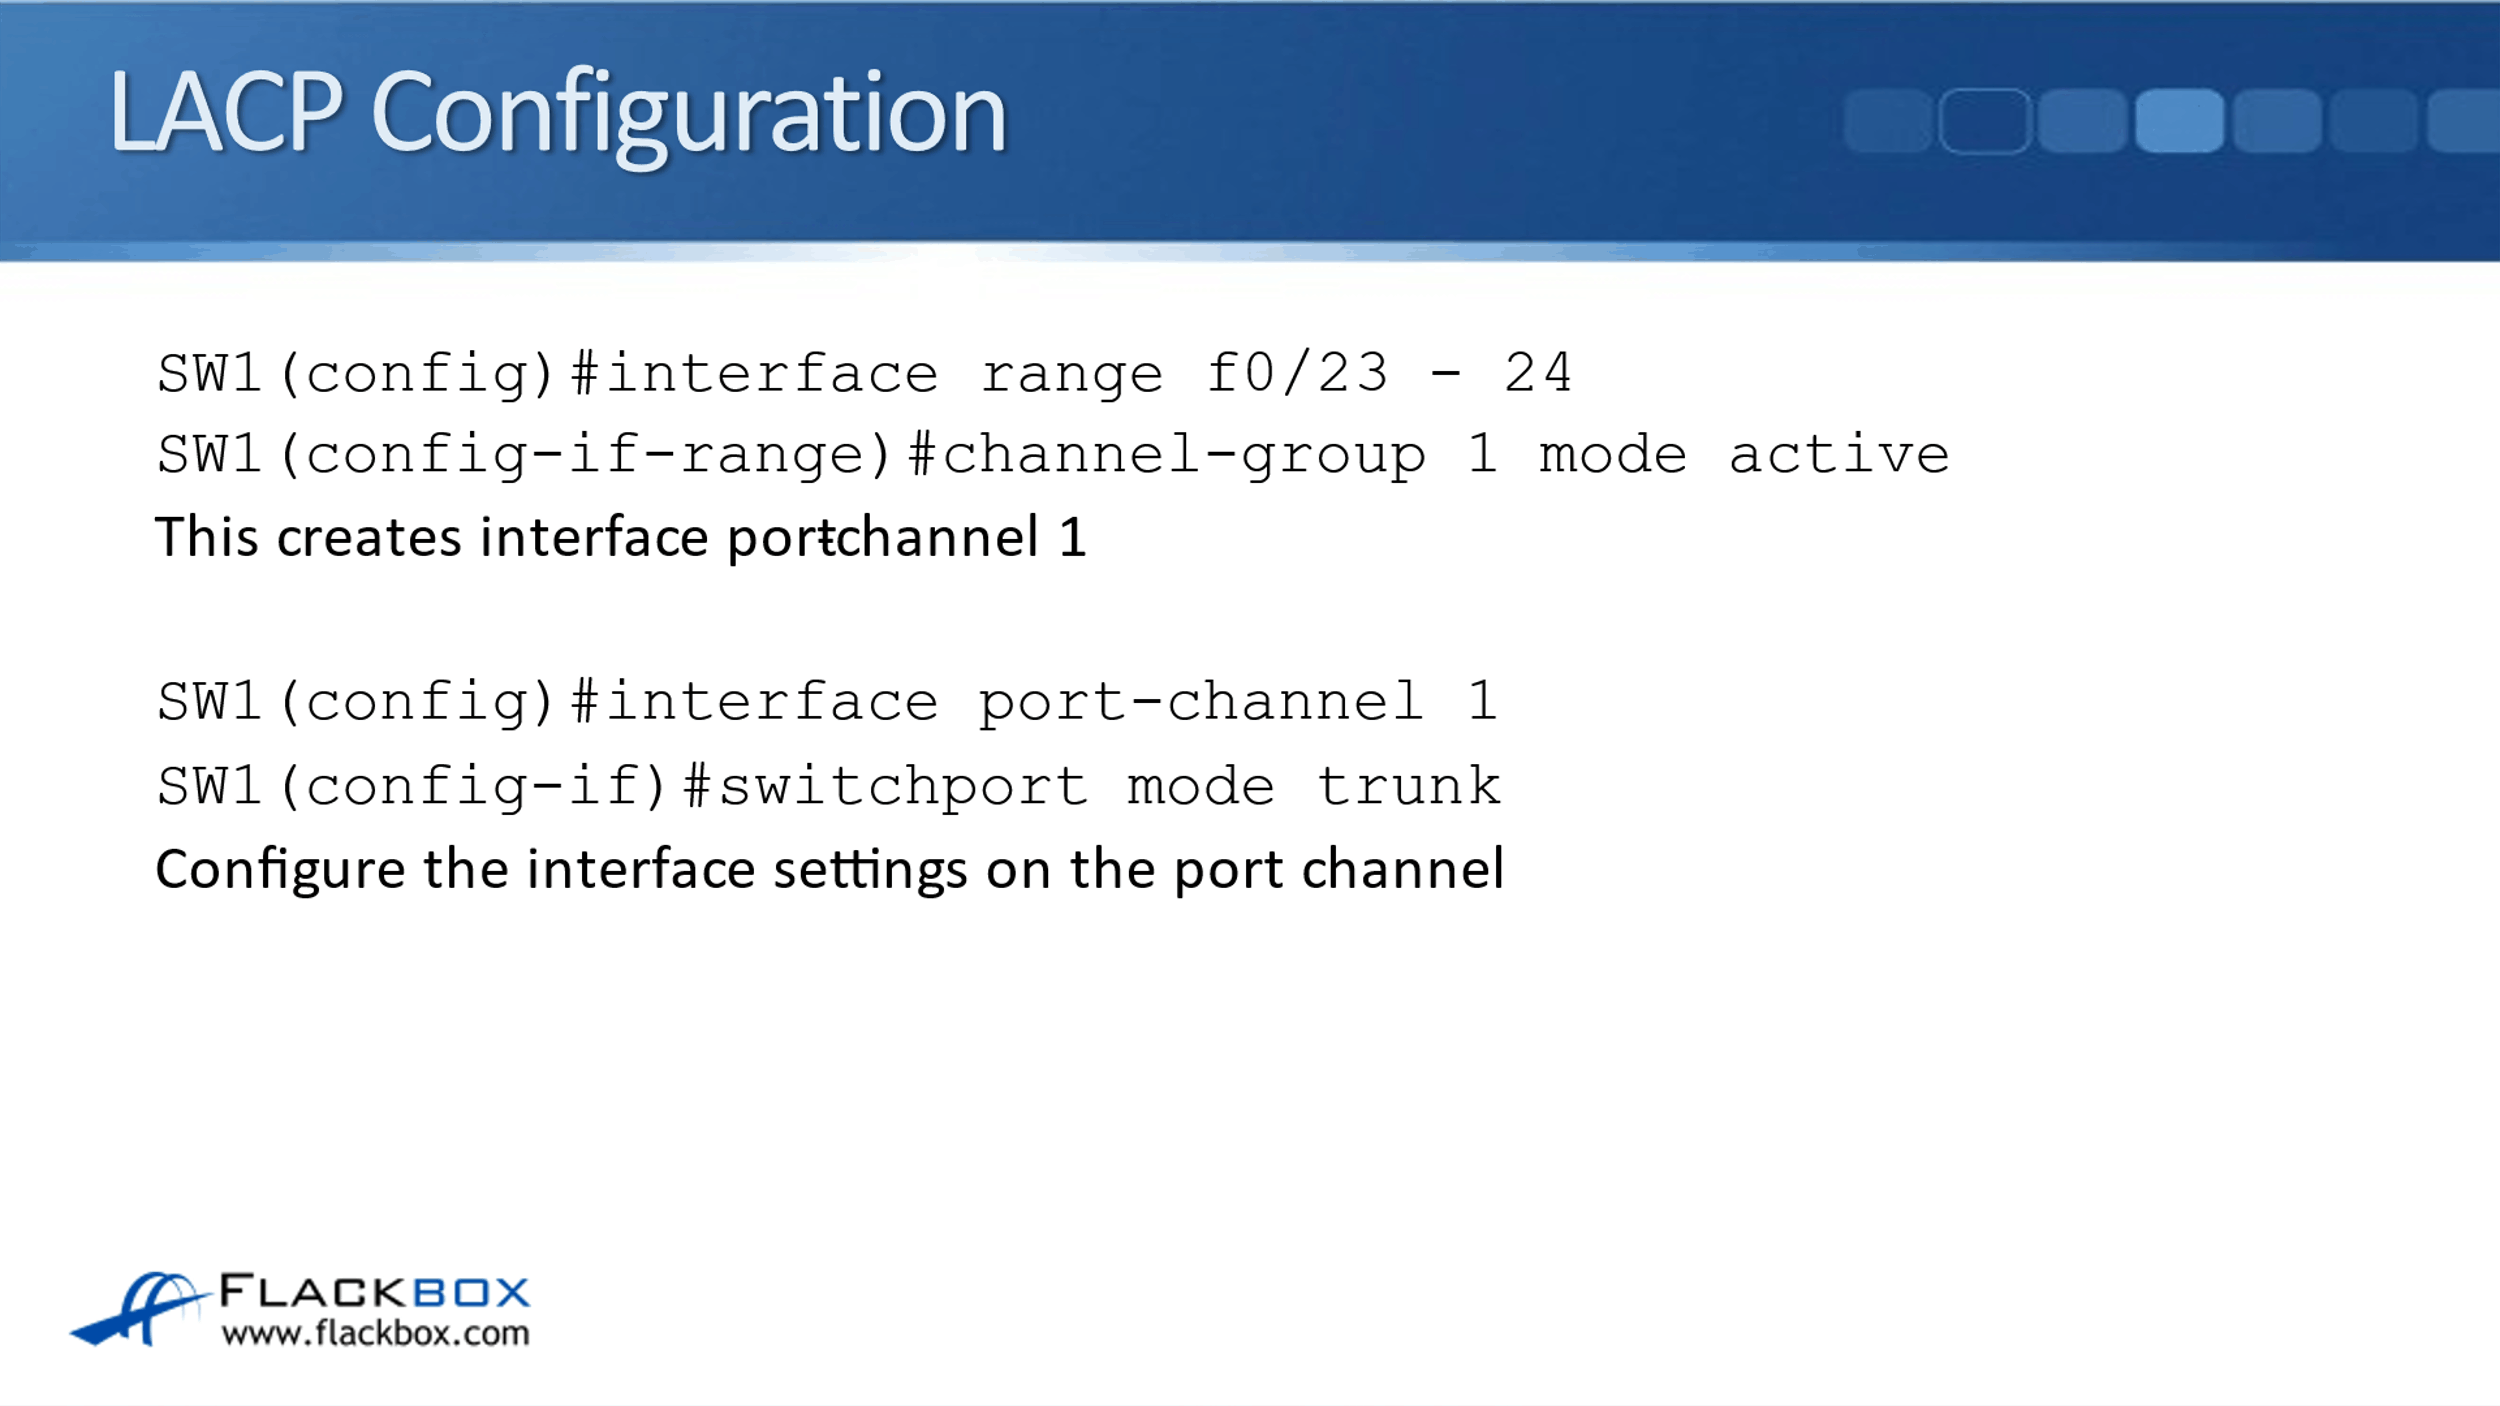
After the port channel has been created, most of your interface settings are set at the port channel level. To do that, we say:
interface port-channel 1
switchport mode trunk
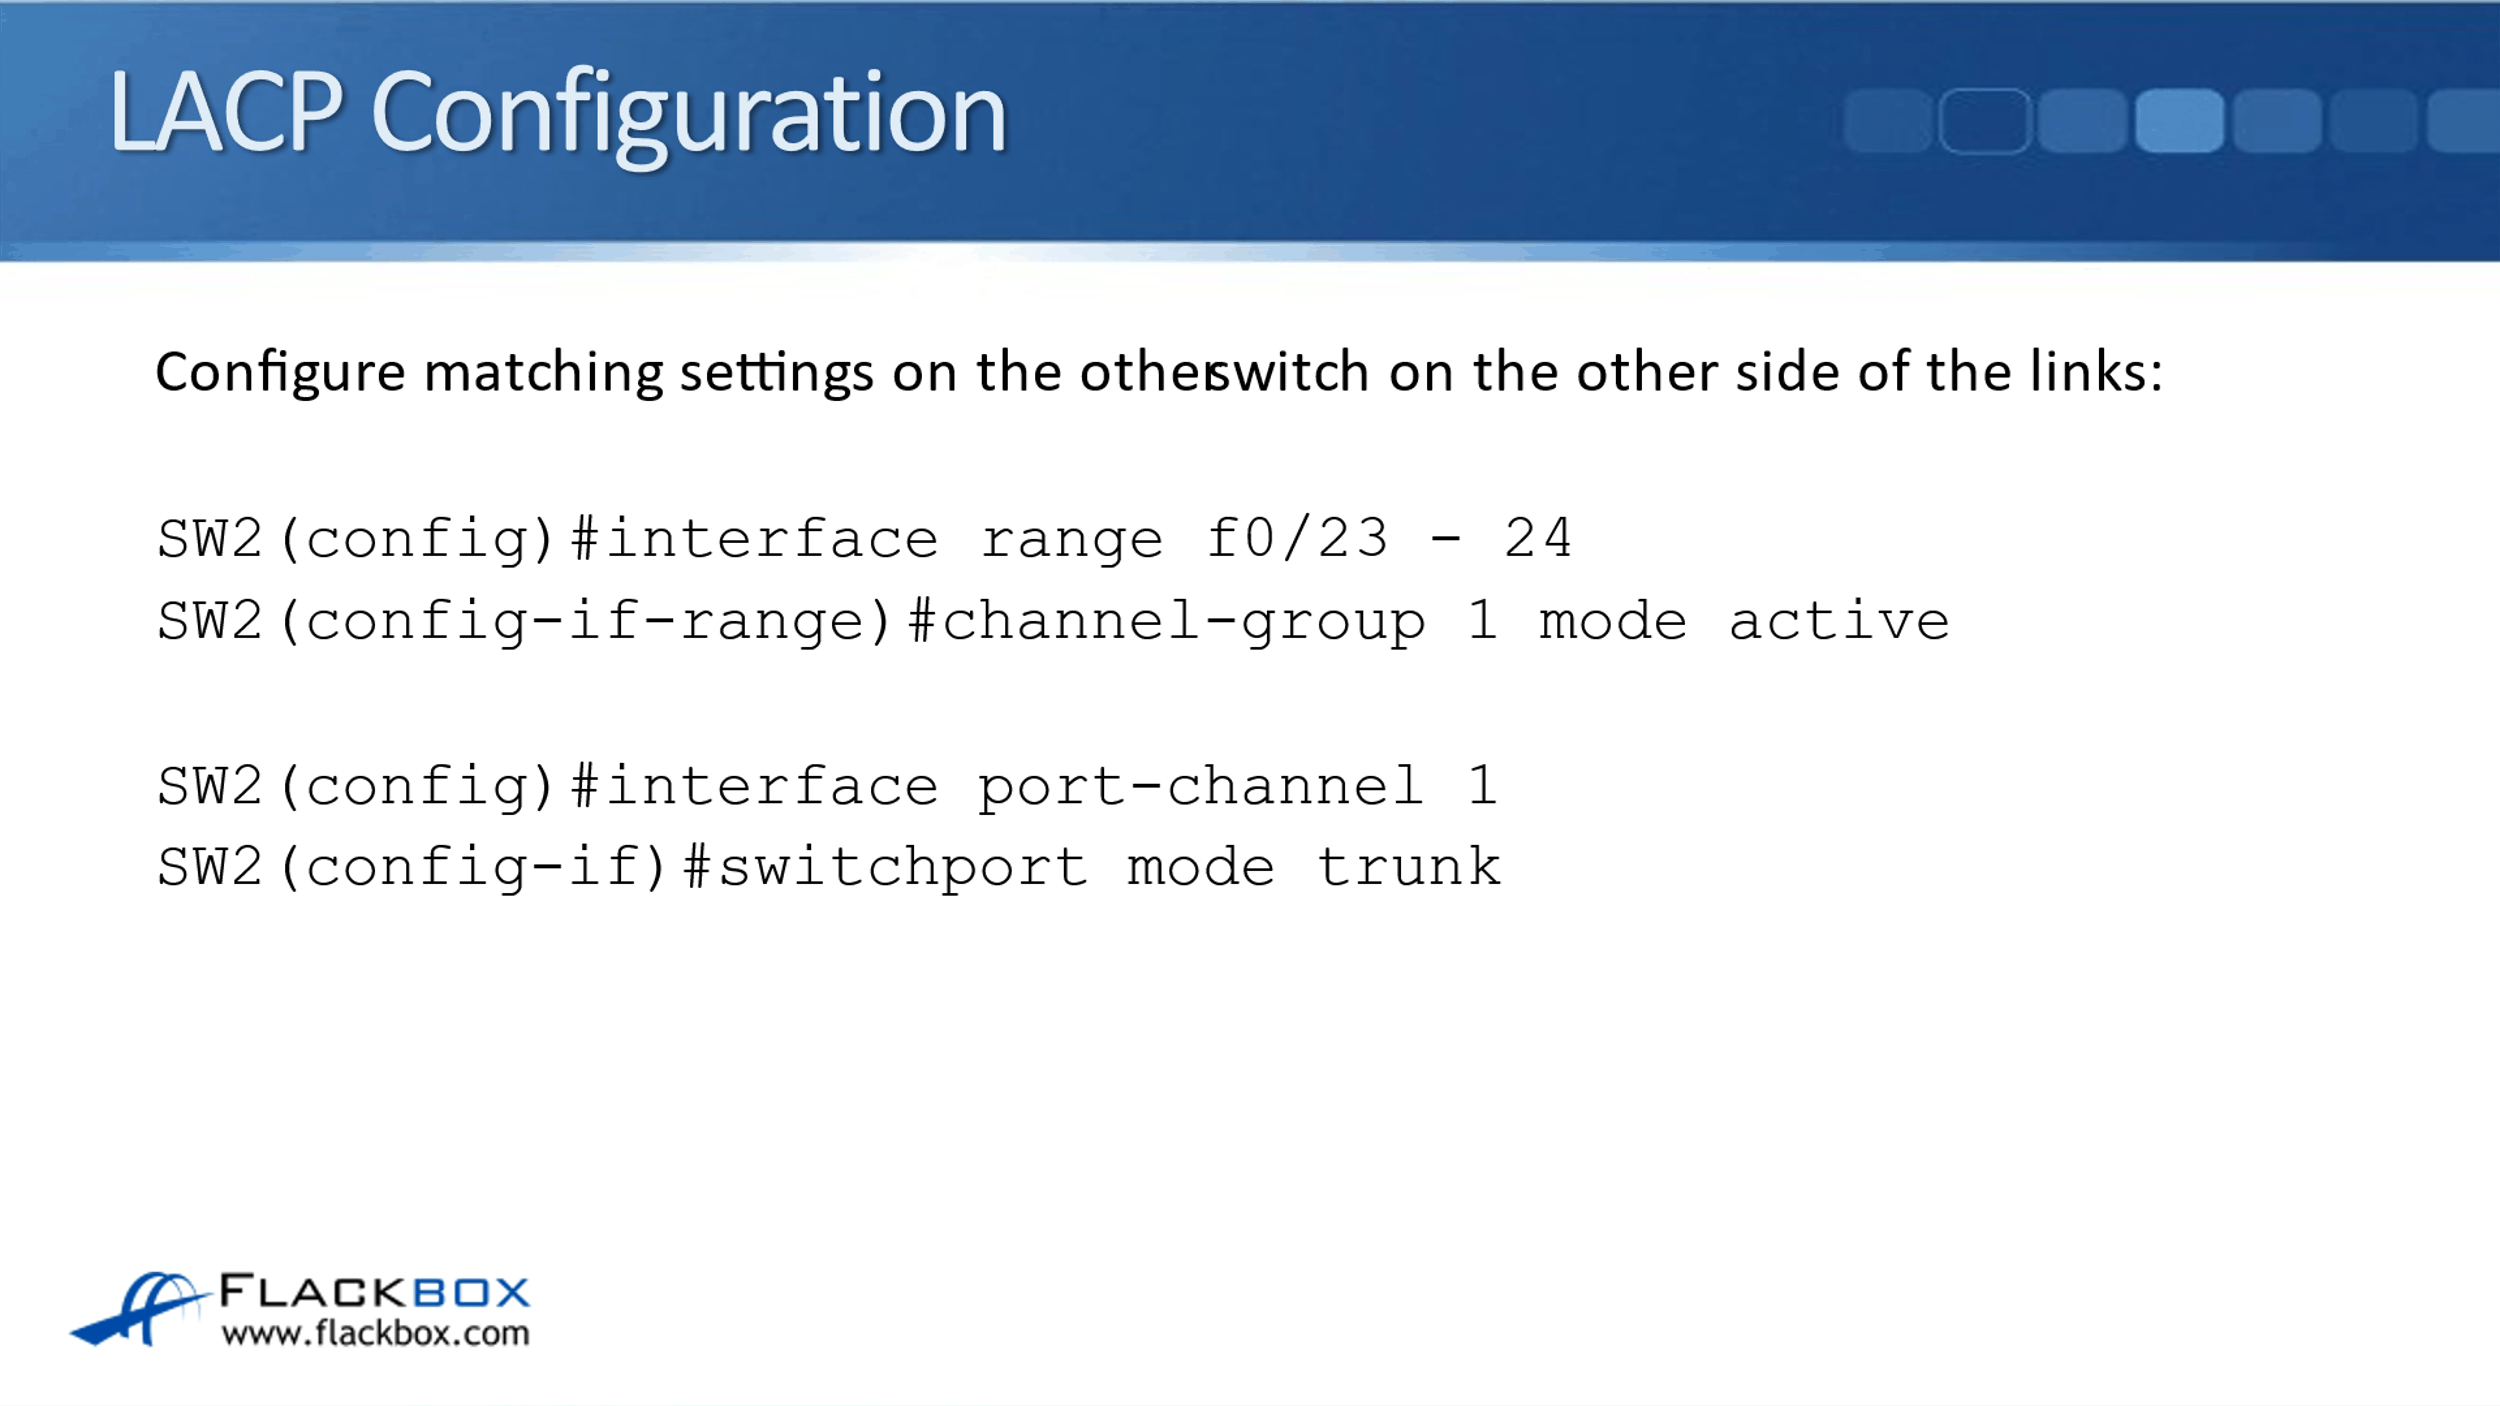
We would also set native VLAN, the allowed VLANs, etc., at this level. We need to configure those matching settings on the switch on the other side as well. We did it first on SW1, and then we do a matching configuration on SW2.
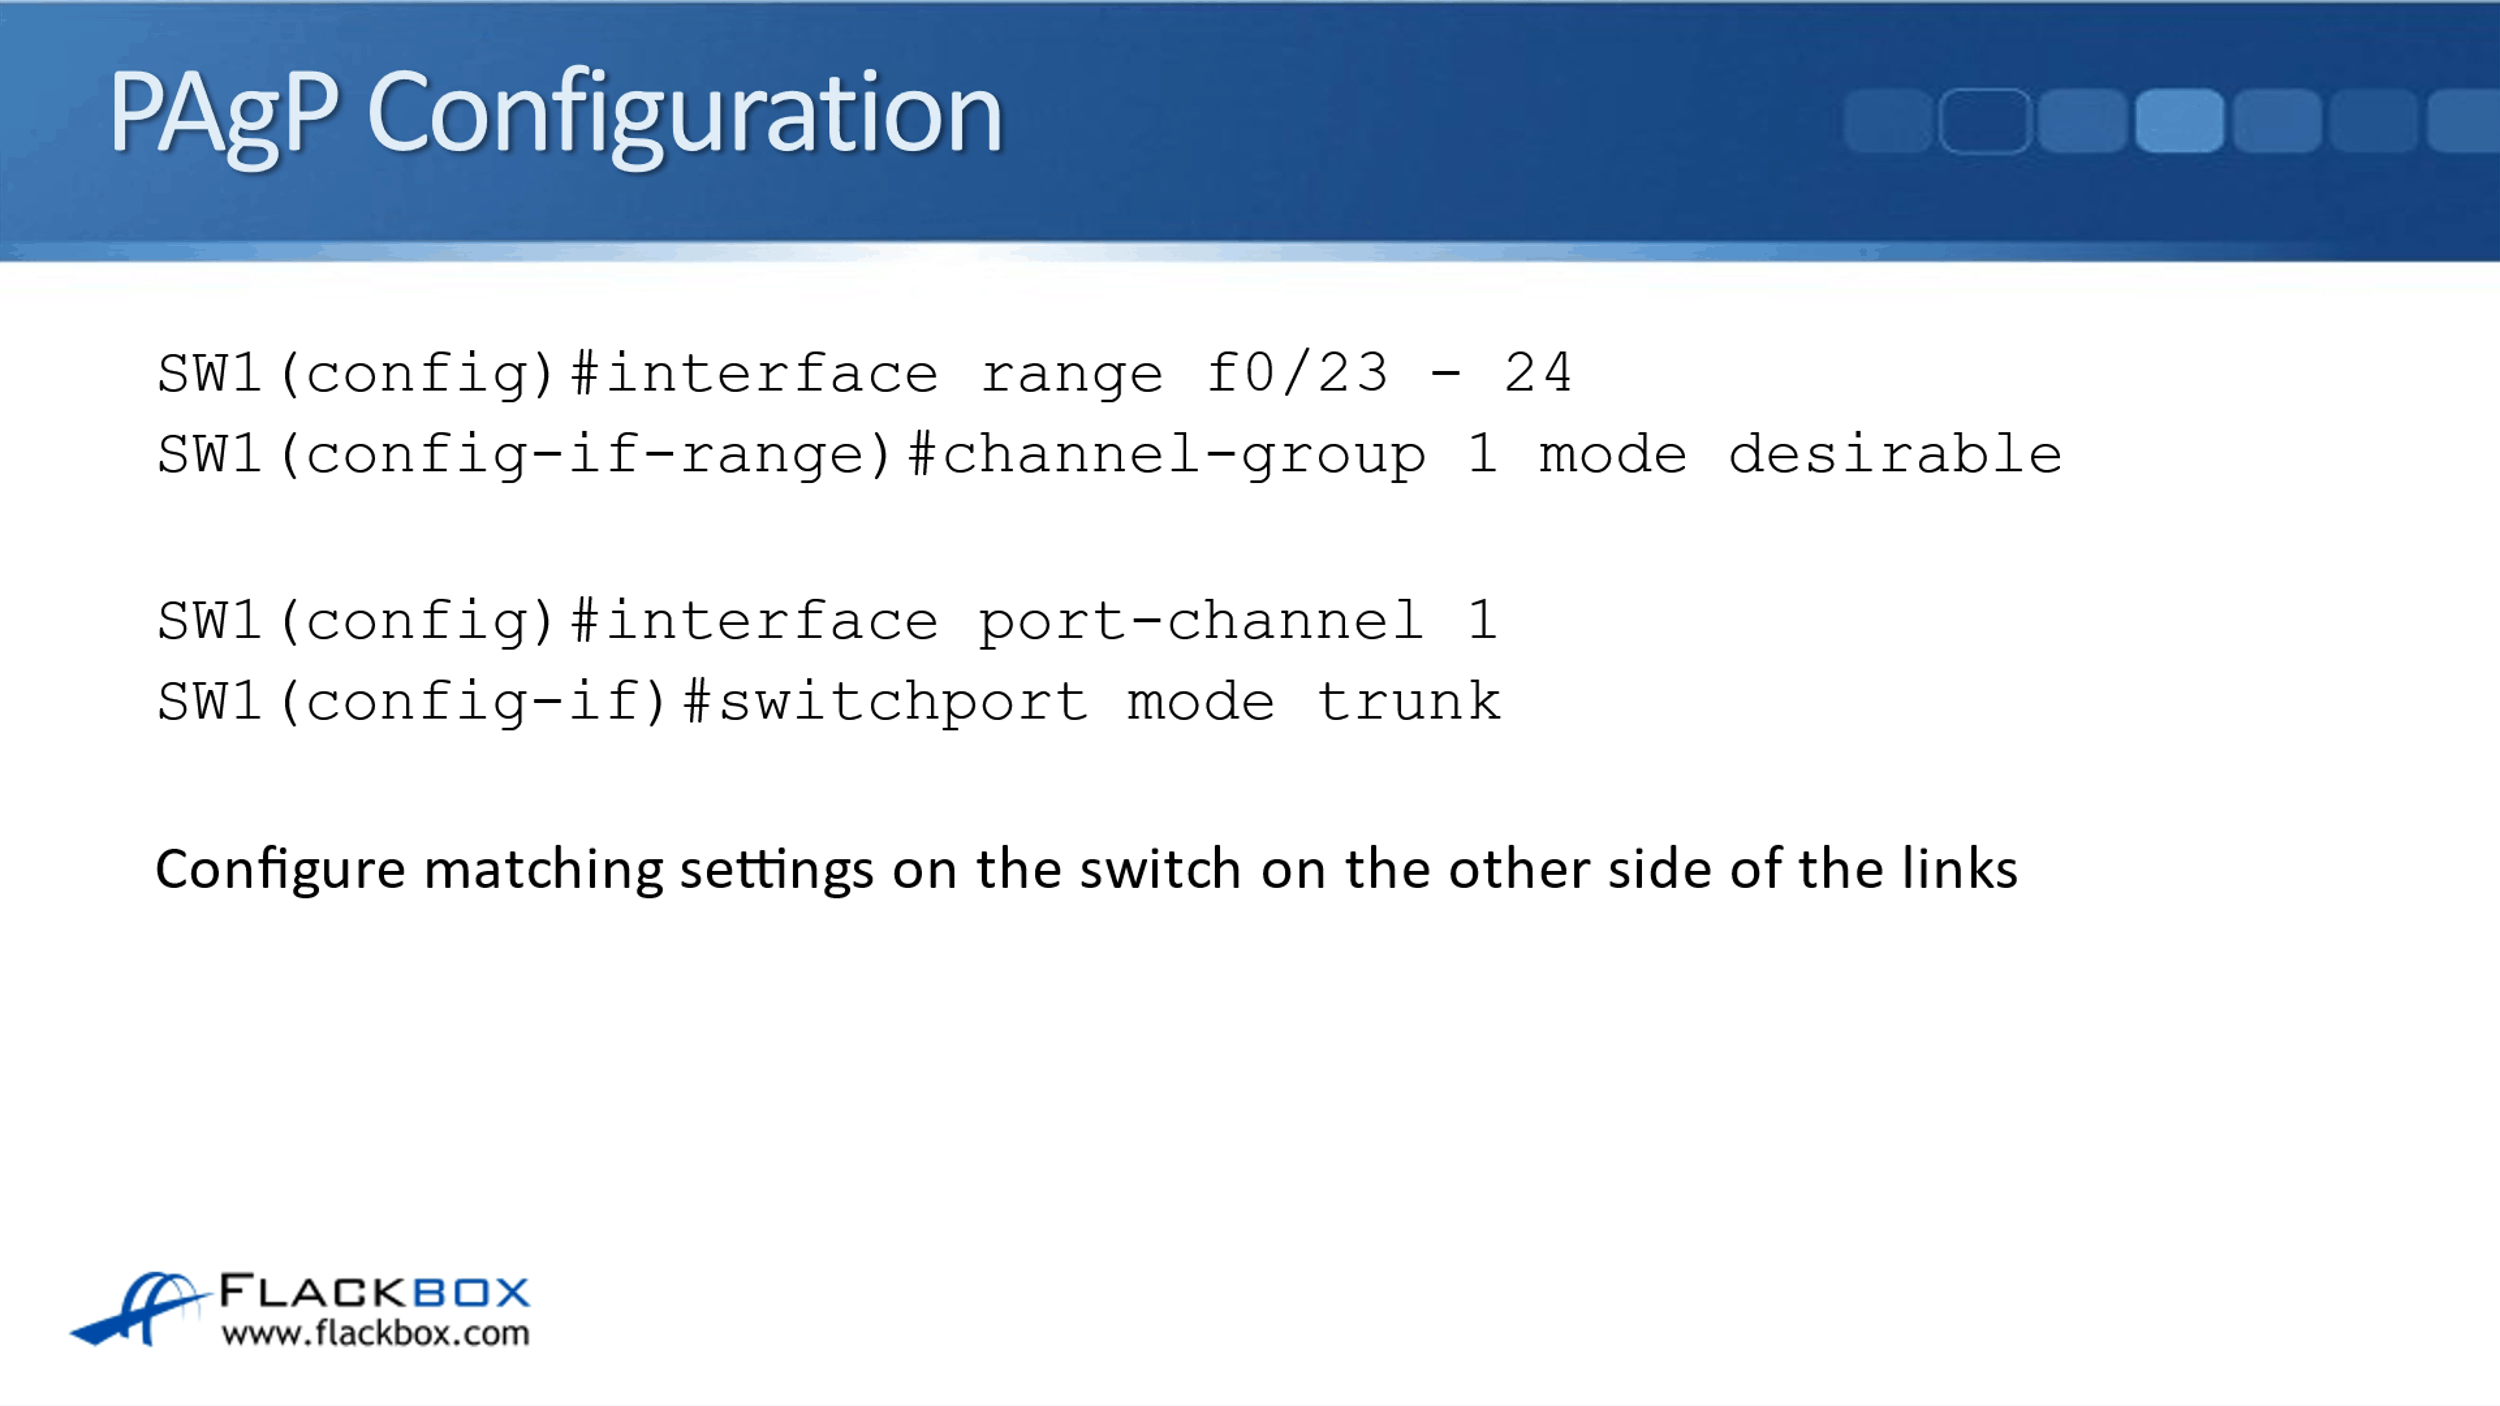
PAgP Configuration
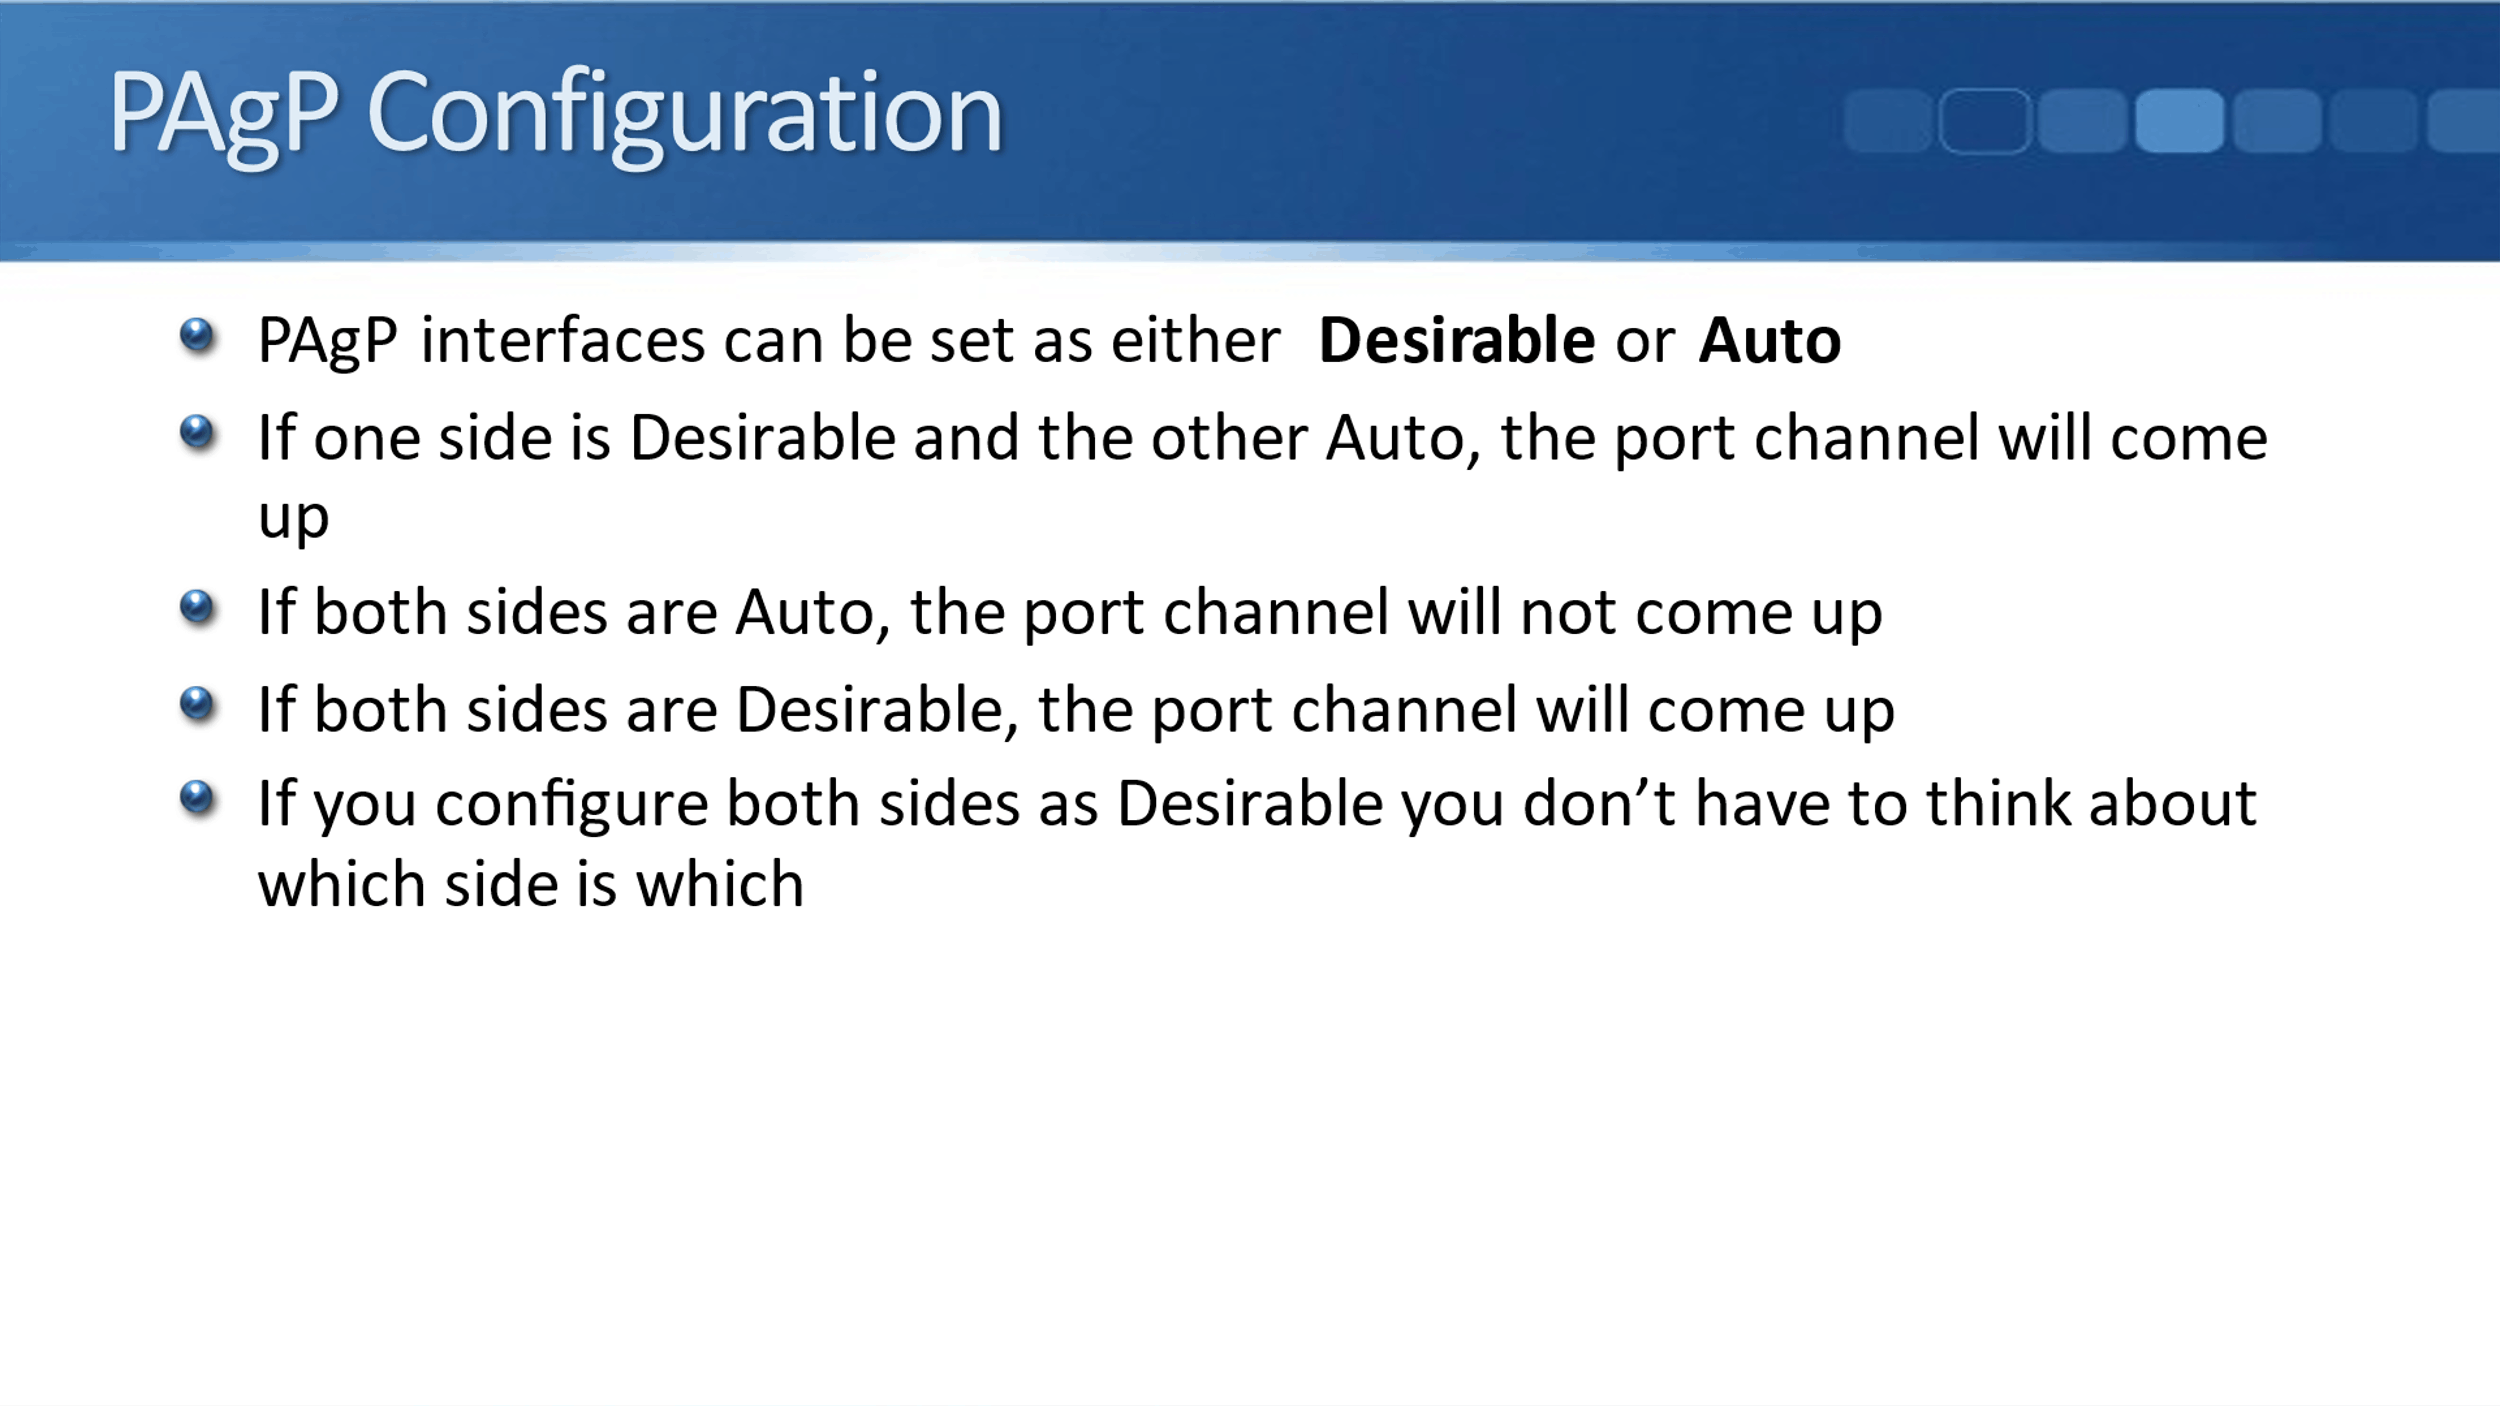
The configuration for PAgP is the same, but rather than using Active or Passive, we use Desirable or Auto. It’s similar to the rules that we had with LACP where if one state is Desirable and the other is Auto, then the port channel will come up. If both sides are Auto, it won't and if both sides are Desirable, it will.
Again, if you are going to use PAgP, which is not recommended, then set both sides as Desirable. In such a way, you don't need to worry about which is Desirable and which is Auto.
Looking at the config below, it is exactly the same as it was for LACP. But here, we say:
channel-group1 mode desirable
You can tell by the keyword at the end whether it's going to be LACP, PAgP, or Static.
Static Configuration
For Static, again, it's exactly the same configuration, but we say:
channel-group 1 mode on
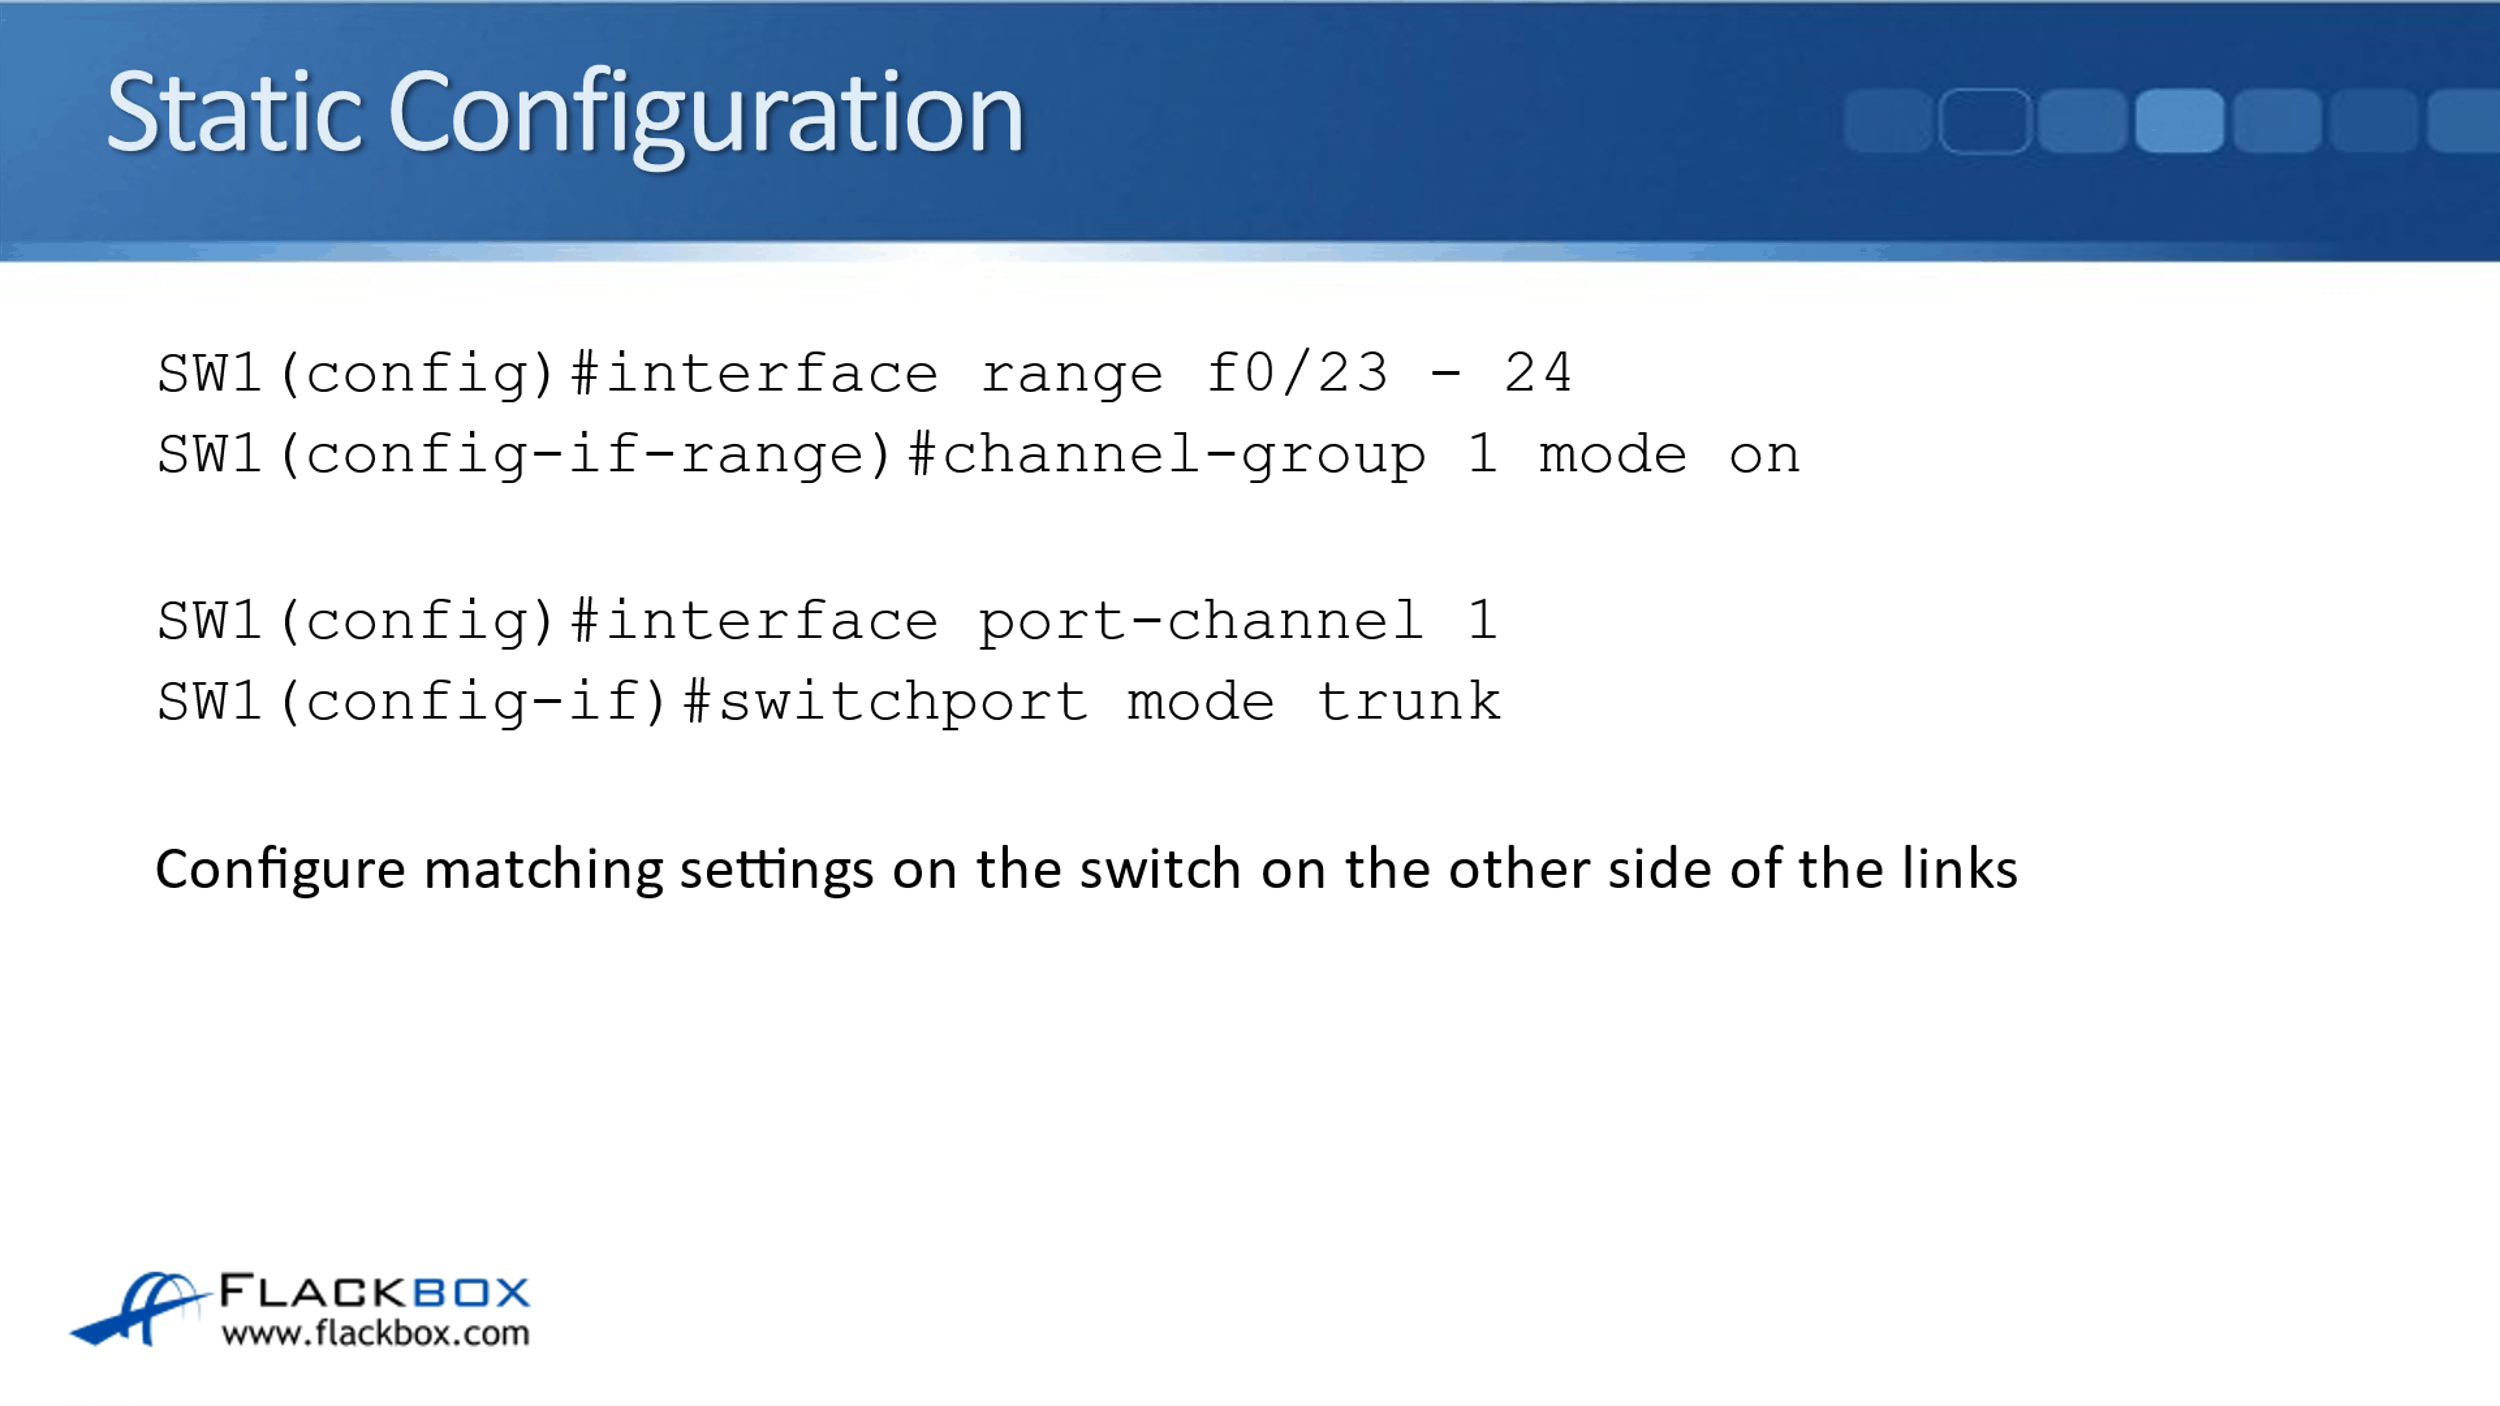
The rest of the configuration, exactly the same for all of the protocols, except for the channel group mode:
- LACP – active
- PAgP – desirable
- Static – on
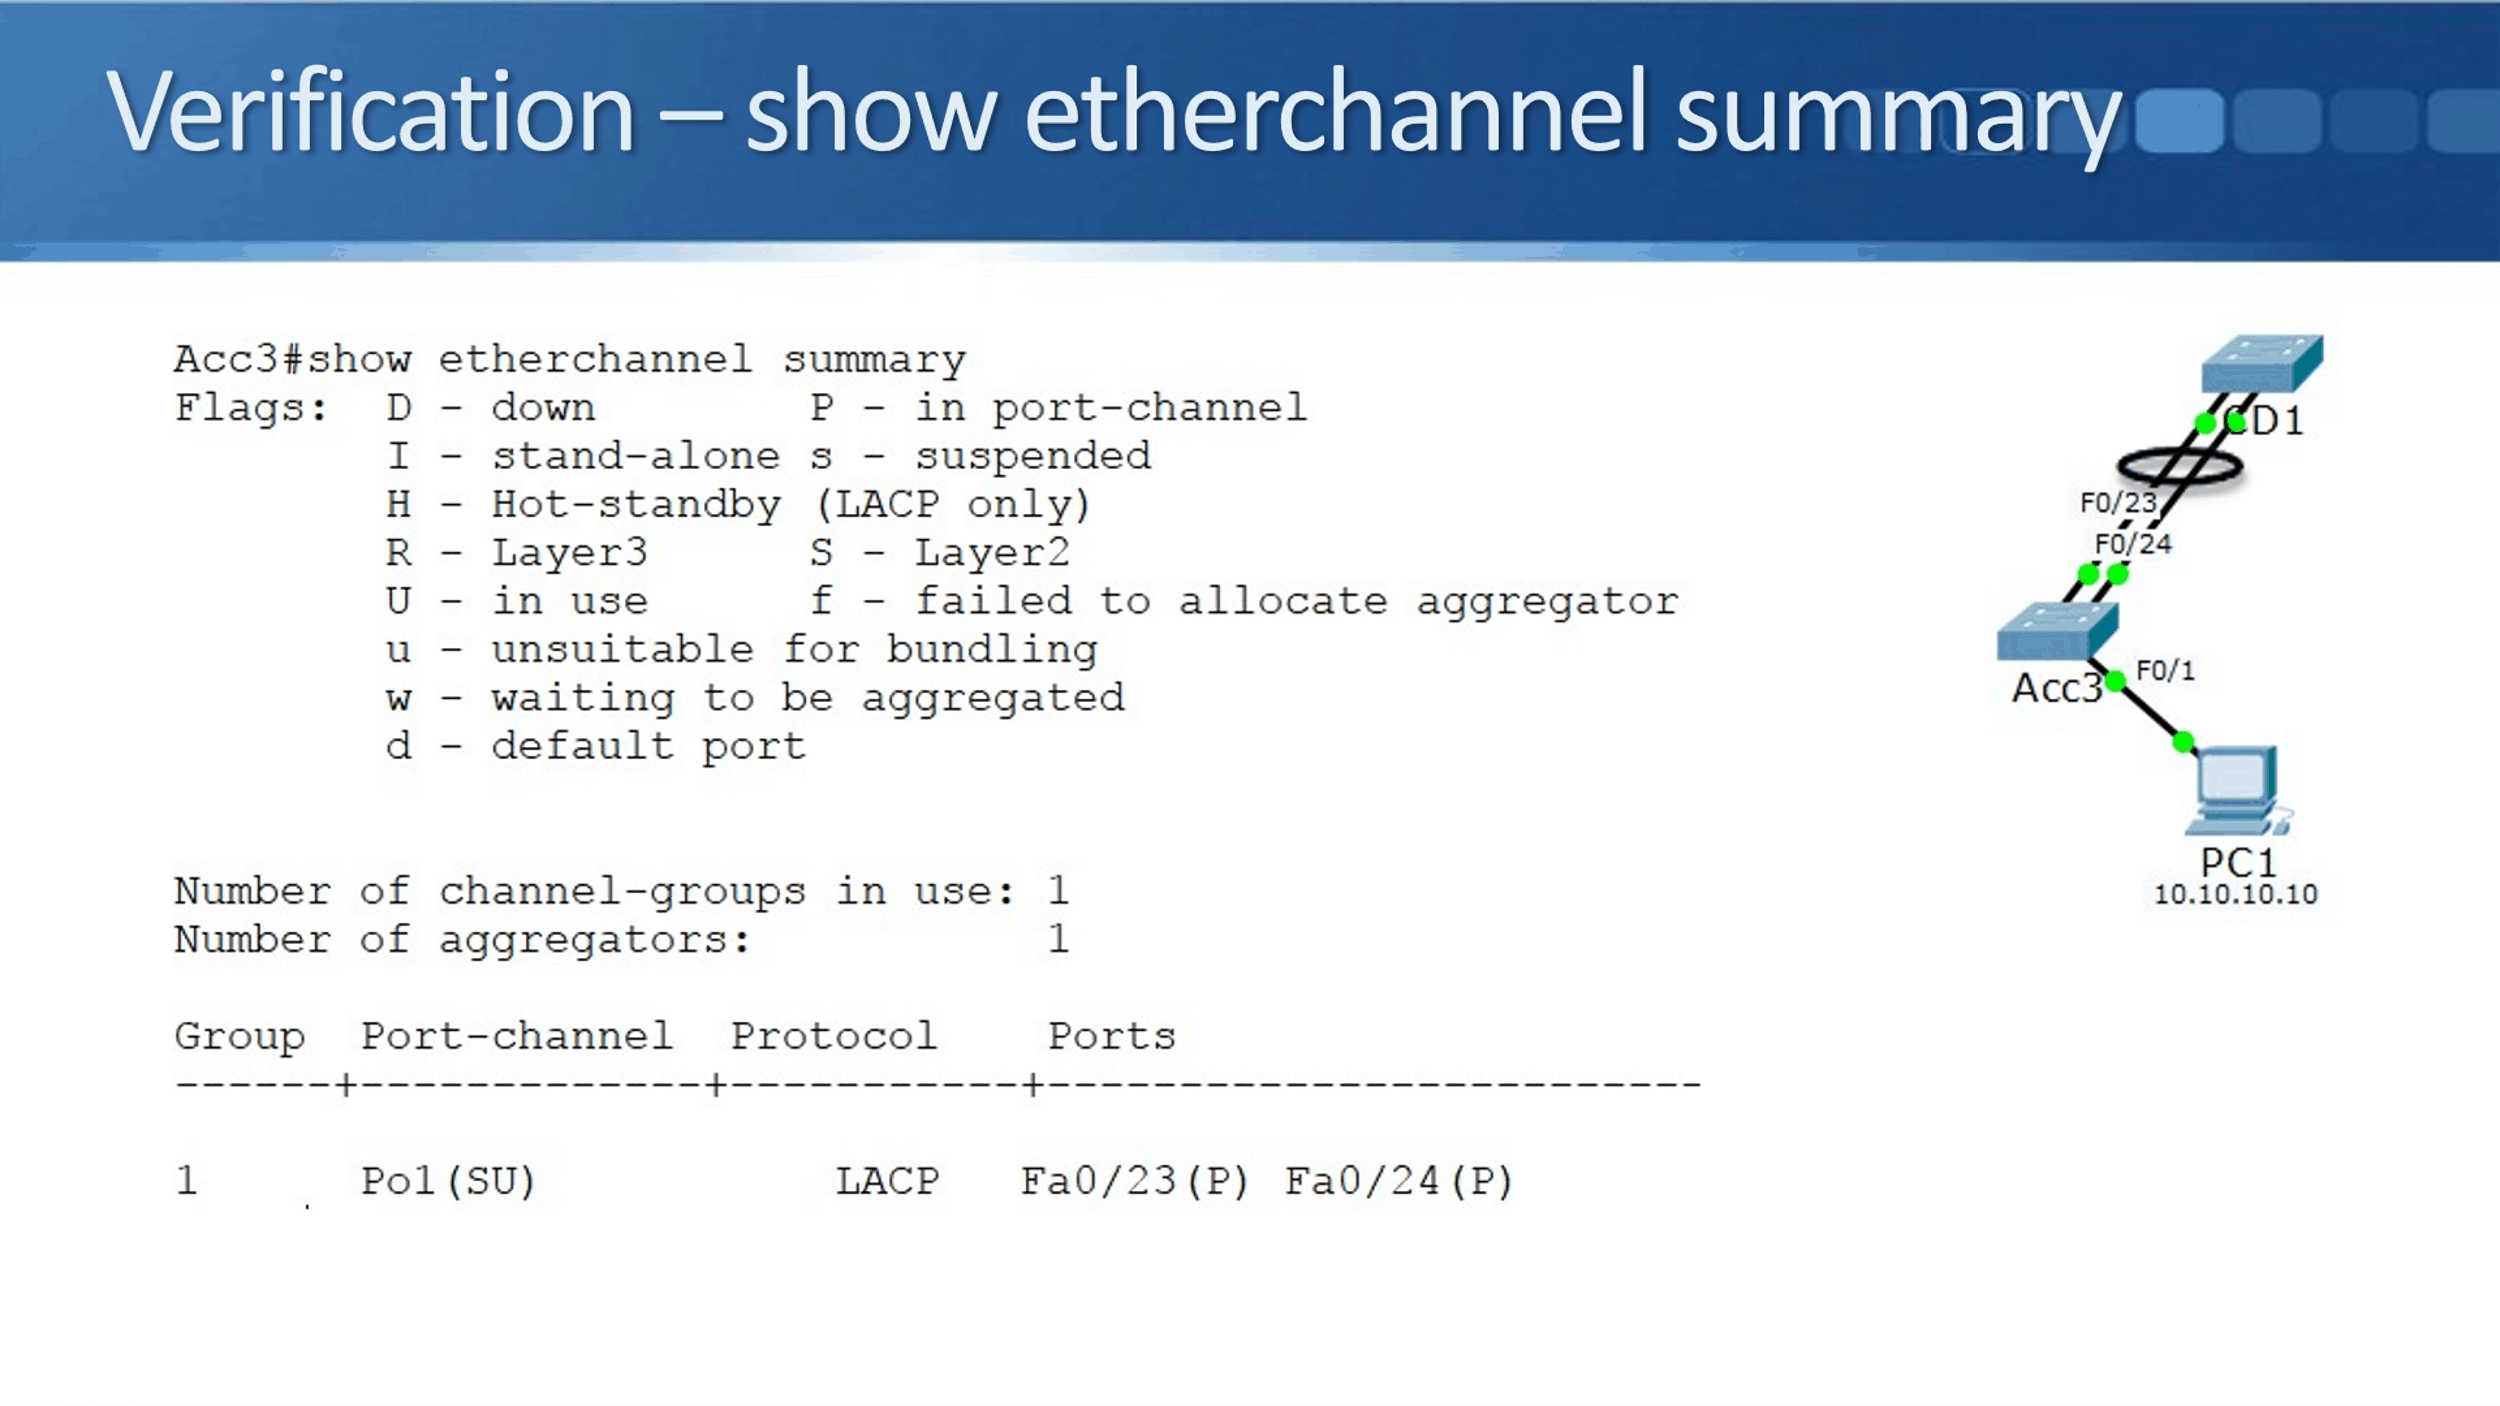
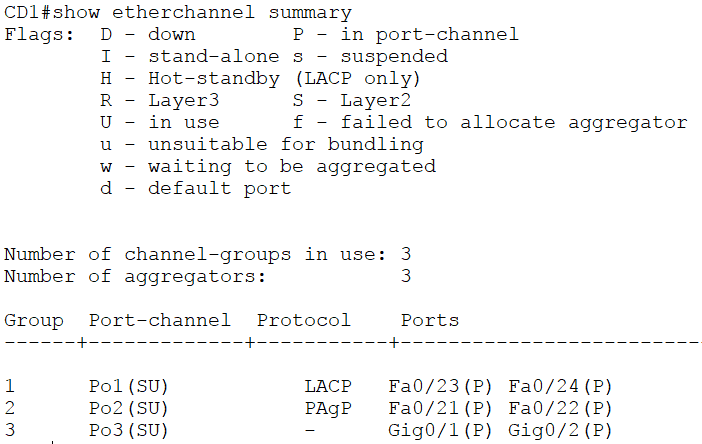
Verification – show etherchannel summary
For the verification, there's one Swiss Army knife command for checking EtherChannel. That is:
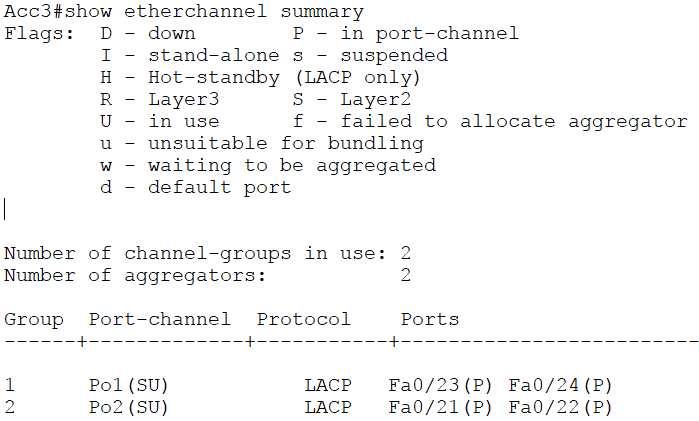
show etherchannel summary
The Flags below tells you what all the letters actually mean. Looking down at the bottom, we can see that this is group 1 and our 1st port channel. The port channel interface is port channel 1, and in brackets, I see a capital letter S and U.
The capital letter S means that it's a Layer 2 port channel. You can configure a Layer 3 port channel as well. That's where on the interface, you would say ‘no switchport’ and put an IP address on there. More commonly, it's going to be a Layer 2 port channel.
The capital letter U means it's in use, which basically means that it is up. I can see that the protocol is LACP, and over on the right, I can see that my ports are FastEthernet 0/23 and 0/24. A capital P means that they are in the port channel.
For a layer two port channel, if you see any letters other than exactly what you see here, there is a problem with the port channel and it's not going to come up. If there is a problem with your port channel, by far, the most common issue is that your settings do not match on both sides.
So, look at the interface, both at the physical interface level and also at the port channel interface level. Make sure that the settings are exactly the same on both sides. Also, make sure that you've selected the correct interfaces that are cabled to each other as well.
You can also do a ‘show etherchannel’. That will give you more verbose output, but the summary really tells you everything that you need to know.
Verification – show spanning-tree vlan
The last command to look at is the ‘show spanning-tree vlan’. As we explained before, the reason for using EtherChannel is to avoid spanning-tree shutting down some of your links. So, after you've configured EtherChannel, you want to check that spanning-tree is working as you would like.
The example below is before we've configured EtherChannel. If you look at the picture over on the right, we've got a switch Acc3 with uplinks going to our switch CD1, the core distribution 1. CD1 is the root bridge for spanning-tree.
If we look at Acc3, it's got 2 links going up to CD1. If we don't put those into a port channel, then spanning-tree sees them as a potential loop and it's going to block one of the links.
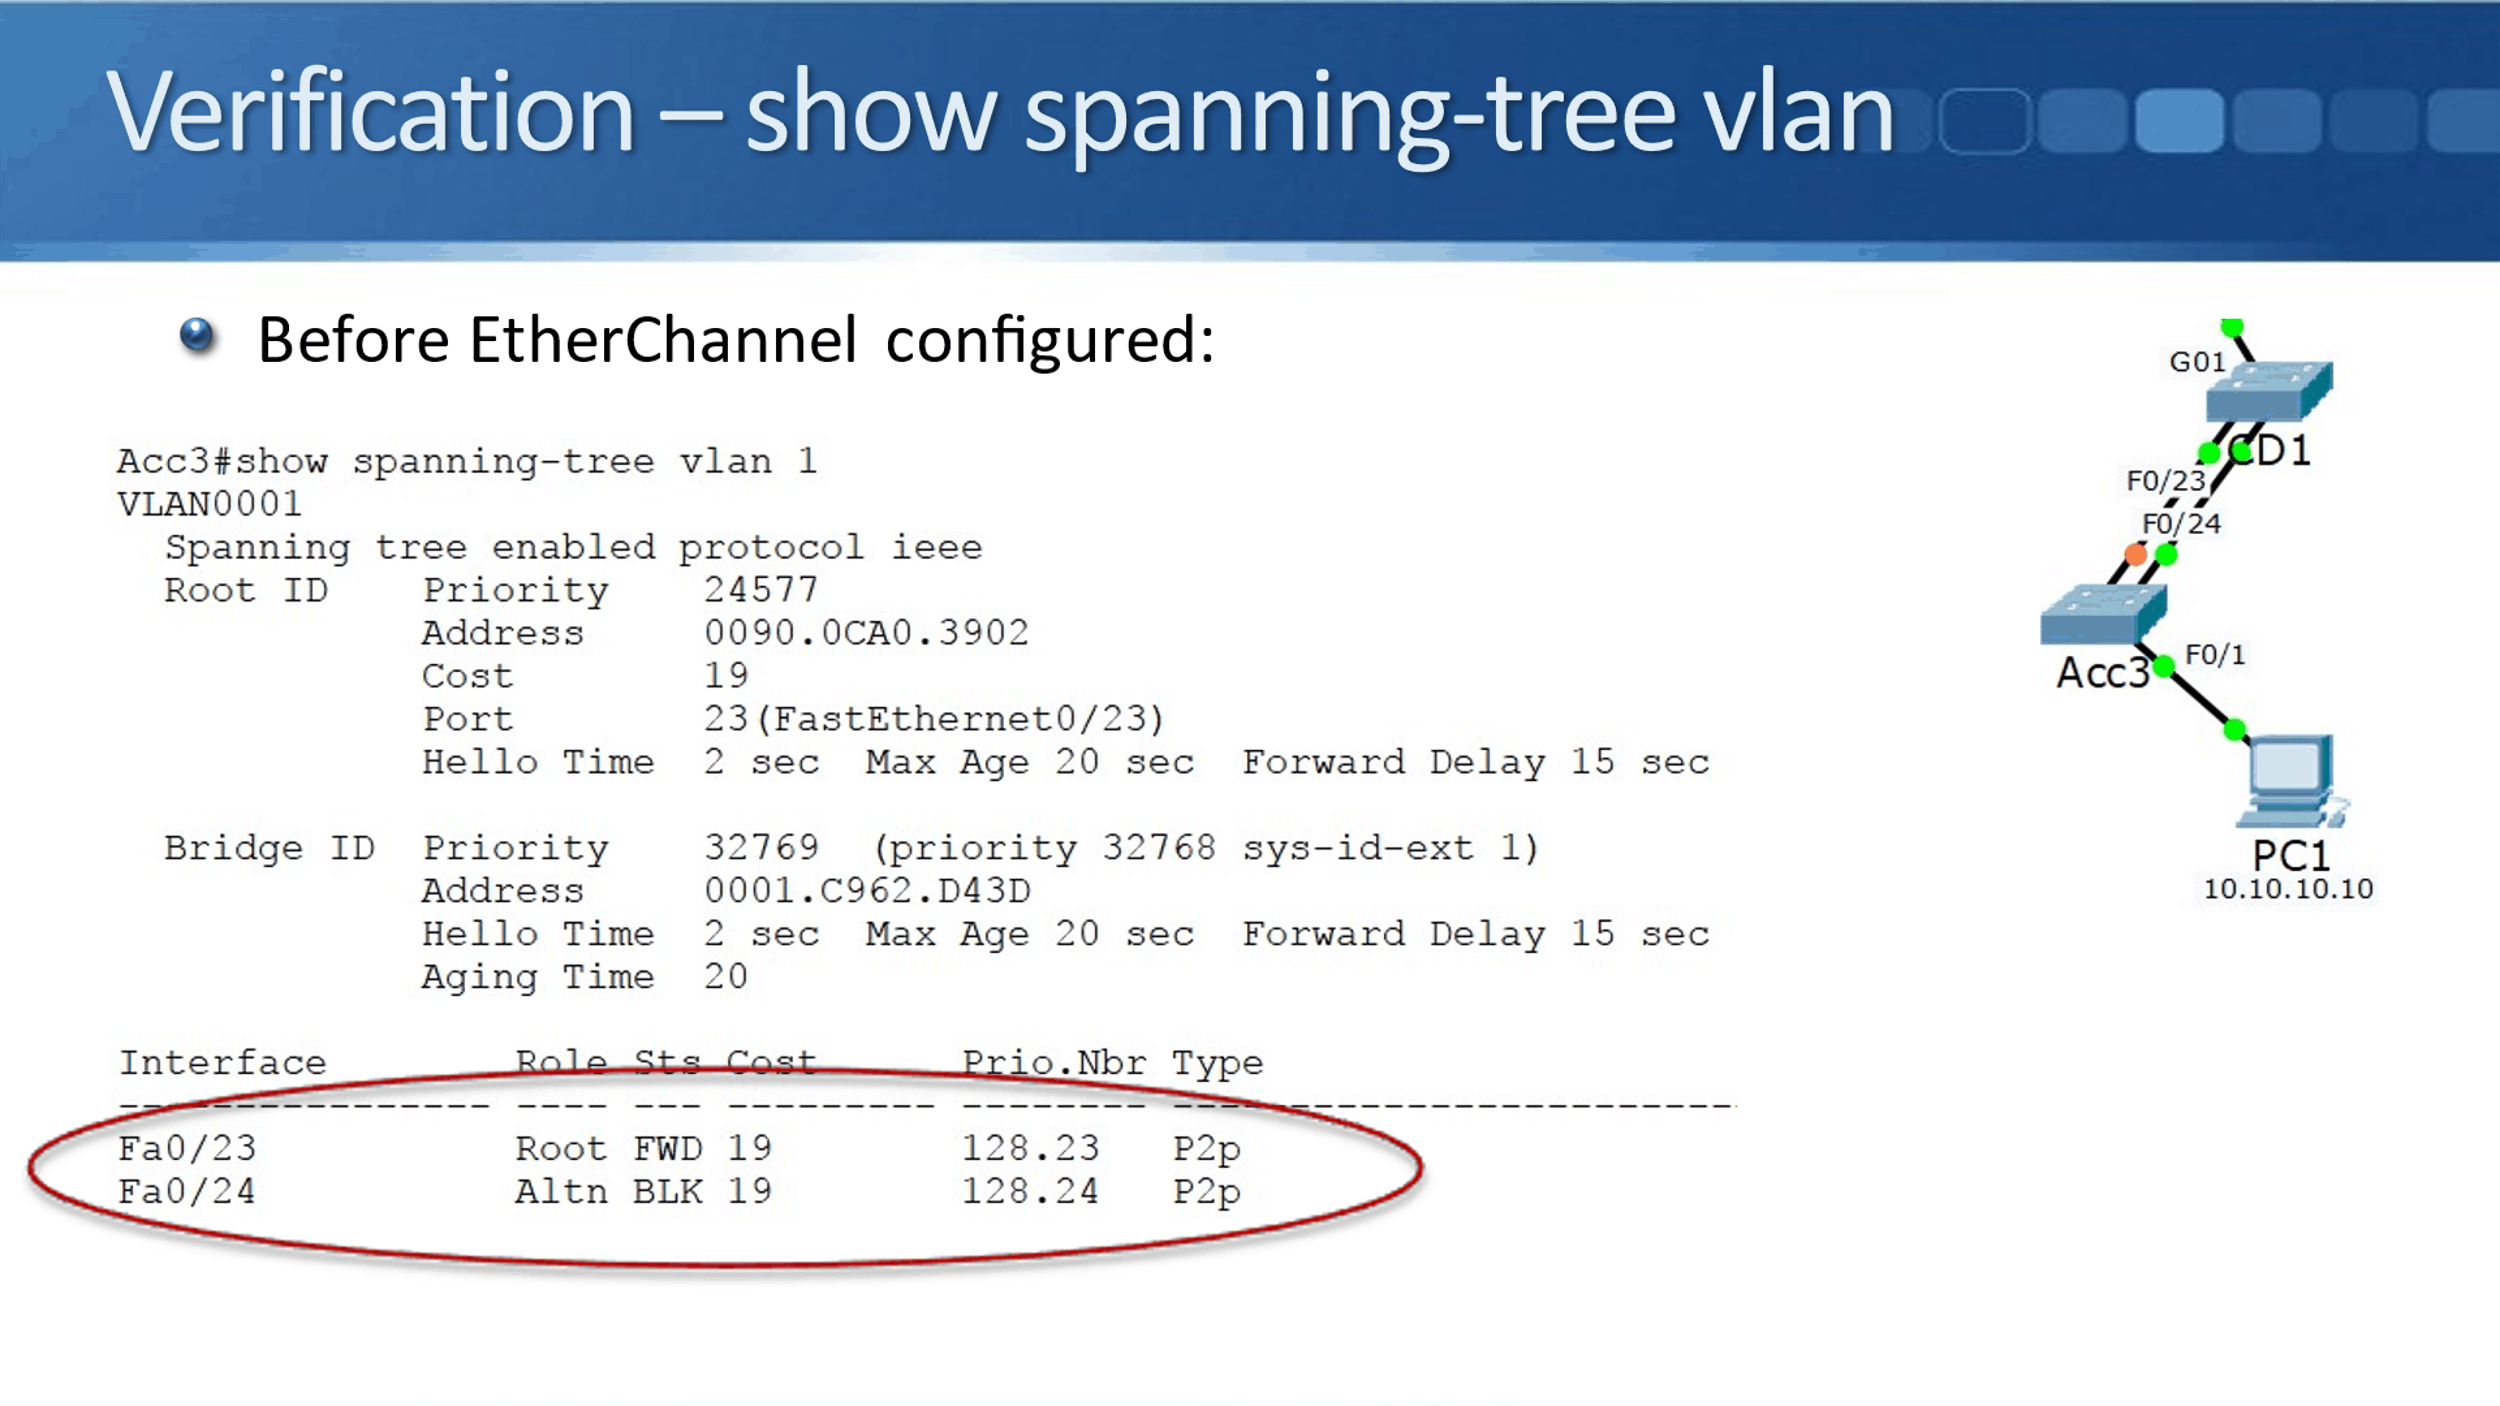
Looking at the output of our ‘show spanning-tree vlan 1’ command, down on the bottom I can see that Fa0/23 is forwarding. It's the root port on Acc3, and Fa0/24 is blocking to prevent the loop. I'm only getting 100 Mbps of uplink bandwidth, rather than 200 Mbps with my 2 ports. To fix that, we configure EtherChannel.
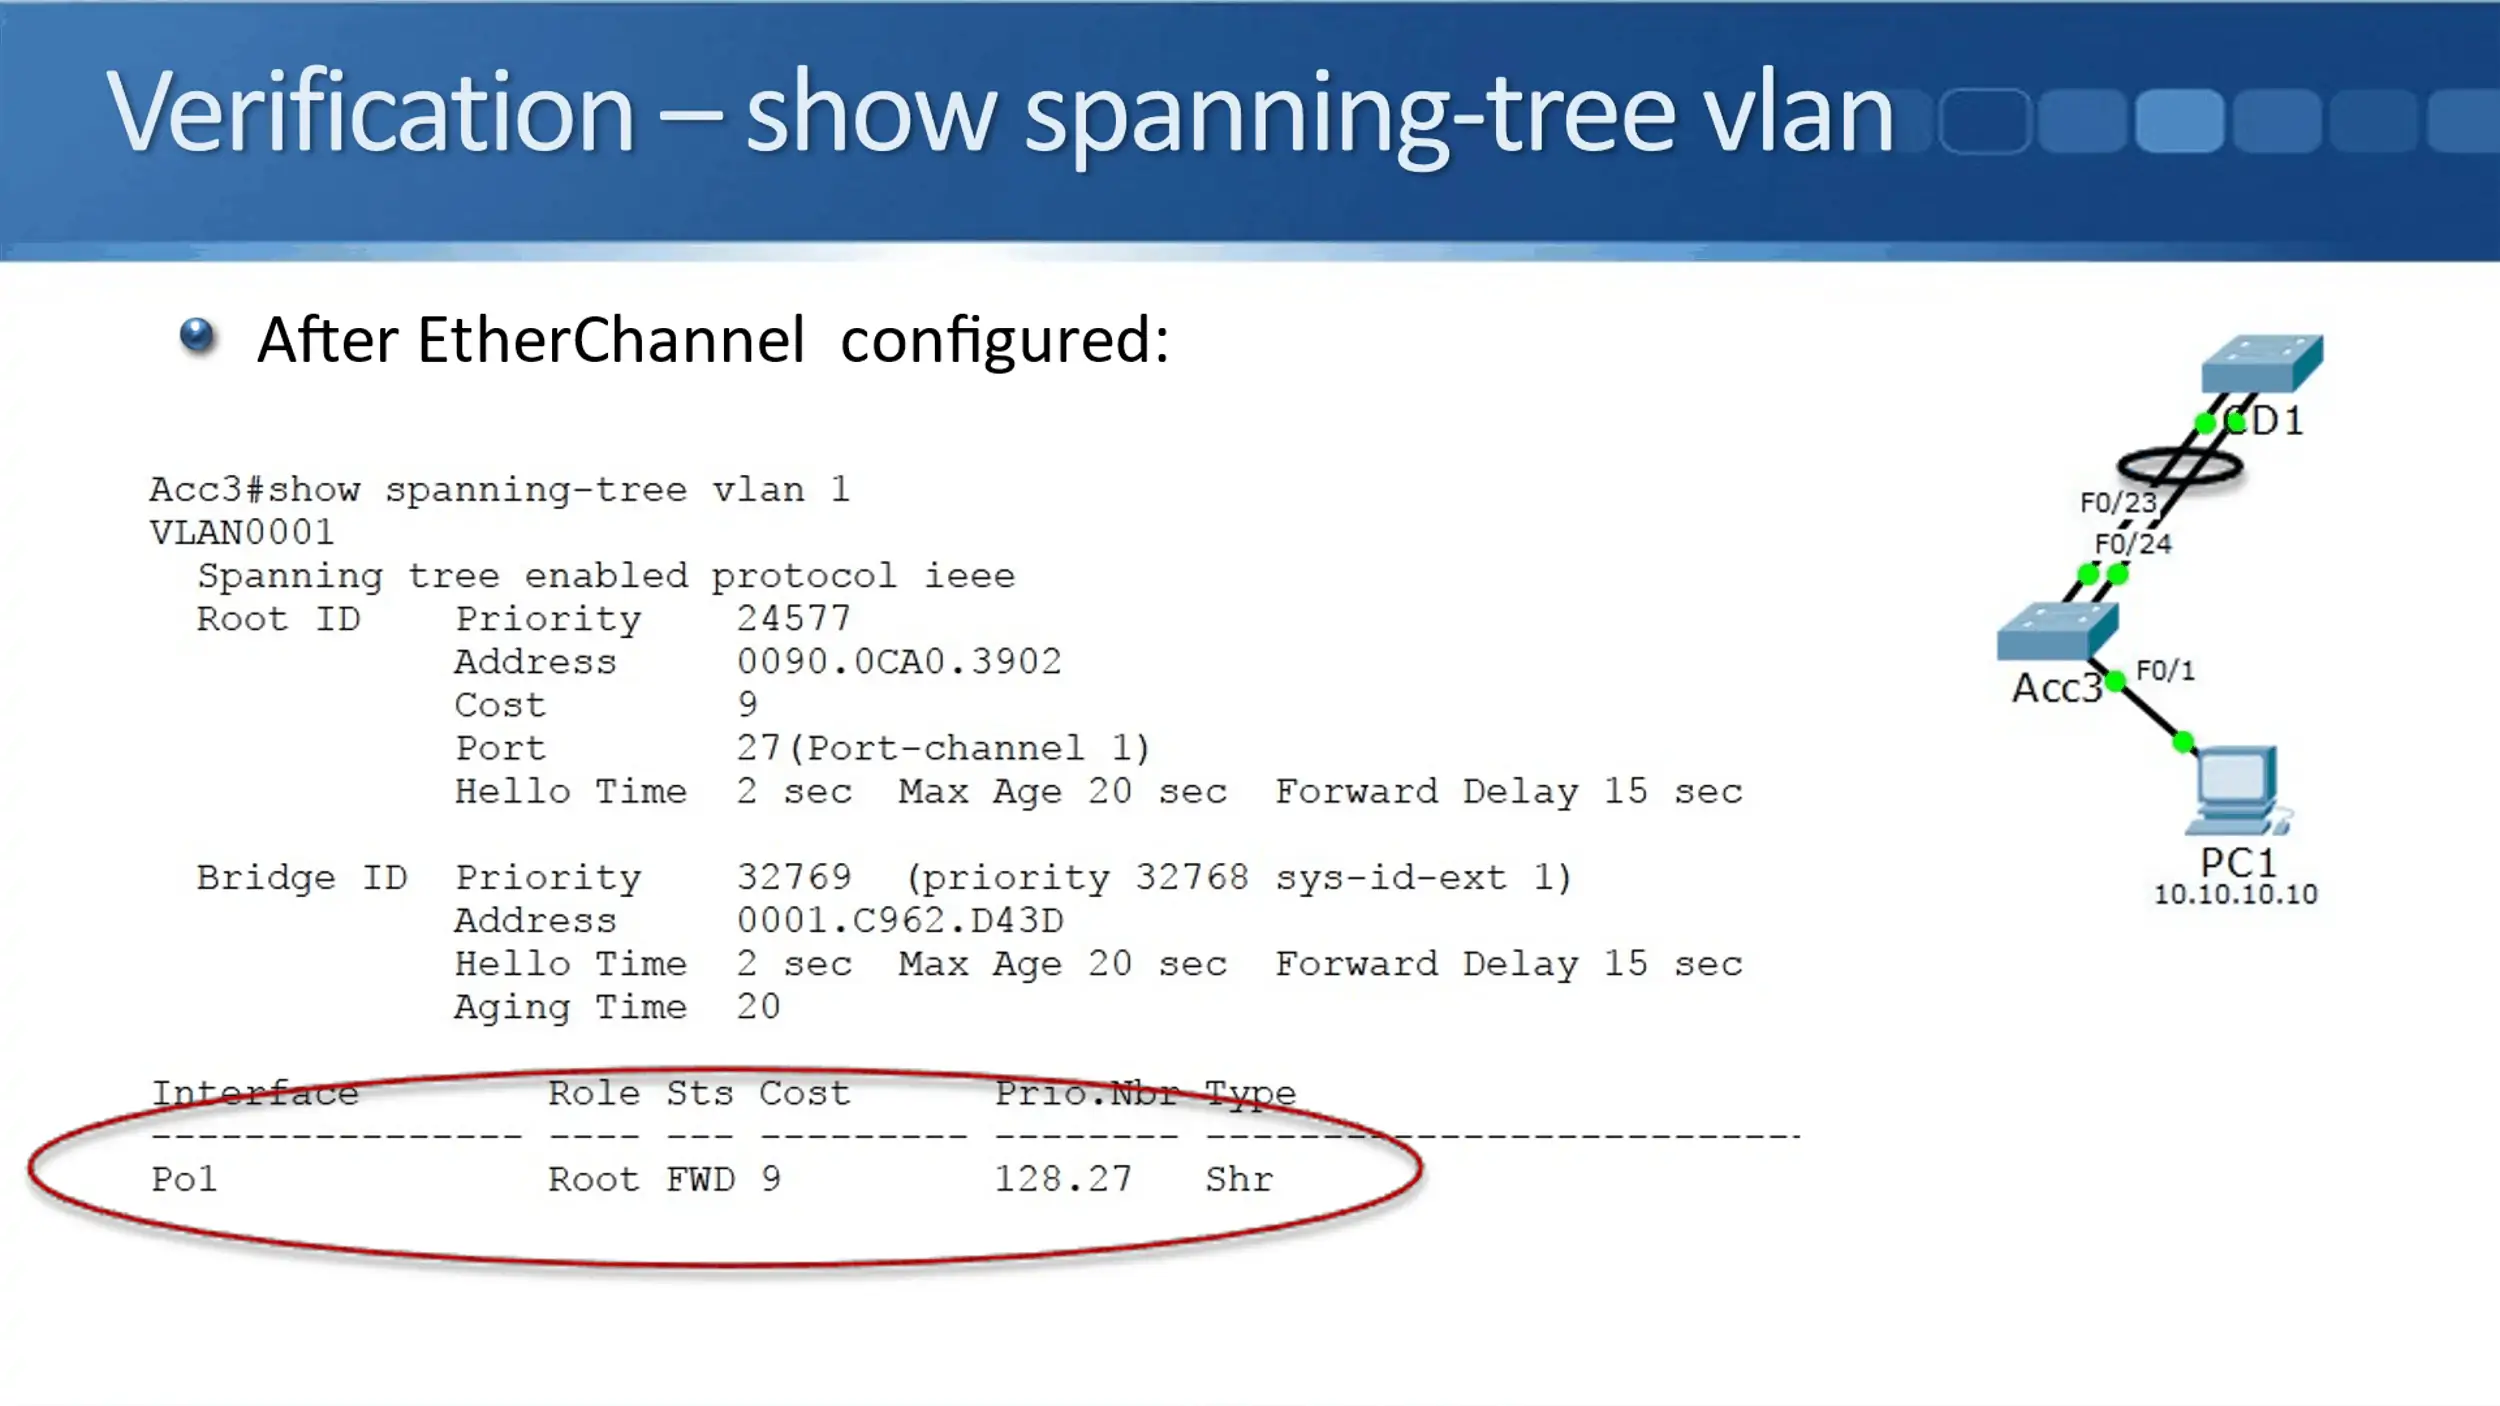
After configuring EtherChannel, we can put the same command in again:
show spanning-tree vlan 1
Before the port channel, you see that spanning-tree still has the physical interfaces, Fa0/23 and Fa0/24. When we put those in a port channel, spanning-tree just sees that one logical interface. It sees one link which is not a potential loop as far as spanning-tree is concerned.
Now on the port channel, it is forwarding. I don't have any ports that are blocking. I get the full bandwidth of both physical interfaces.
Cisco EtherChannel Protocols Configuration Example
This configuration example is taken from my free ‘Cisco CCNA Lab Guide’ which includes over 350 pages of lab exercises and full instructions to set up the lab for free on your laptop.
Click here to download your free Cisco CCNA Lab Guide.


LACP EtherChannel Configuration
- The access layer switches Acc3 and Acc4 both have two FastEthernet uplinks. How much total bandwidth is available between the PCs attached to Acc3 and the PCs attached to Acc4?
Spanning tree shuts down all but one uplink on both switches so the total bandwidth available between them is a single FastEthernet link – 100 Mbps.
2. Convert the existing uplinks from Acc3 to CD1 and CD2 to LACP EtherChannel. Configure descriptions on the port channel interfaces to help avoid confusion later.
The uplinks go to two separate redundant switches at the core/distribution layer so we need to configure two EtherChannels, one to CD1 and one to CD2.
We’ll configure the Acc3 side of the EtherChannel to CD1 first. Don’t forget to set the native VLAN on the new port channel interface.
Acc3(config)#interface range f0/23 - 24
Acc3(config-if-range)#channel-group 1 mode active
Acc3(config-if-range)#exit
Acc3(config)#interface port-channel 1
Acc3(config-if)#description Link to CD1
Acc3(config-if)#switchport mode trunk
Acc3(config-if)#switchport trunk native vlan 199
Then configure switch CD1 with matching settings.
CD1(config)#interface range f0/23 - 24
CD1(config-if-range)#channel-group 1 mode active
CD1(config-if-range)#exit
CD1(config)#interface port-channel 1
CD1(config-if)#description Link to Acc3
CD1(config-if)#switchport mode trunk
CD1(config-if)#switchport trunk native vlan 199
Next configure the Acc3 side of the EtherChannel to CD2. Remember to use a different port channel number.
Acc3(config)#interface range f0/21 - 22
Acc3(config-if-range)#channel-group 2 mode active
Acc3(config-if-range)#exit
Acc3(config)#interface port-channel 2
Acc3(config-if)#description Link to CD2
Acc3(config-if)#switchport mode trunk
Acc3(config-if)#switchport trunk native vlan 199
Then configure switch CD2 with matching settings.
CD2(config)#interface range f0/21 - 22
CD2(config-if-range)#channel-group 2 mode active
CD2(config-if-range)#exit
CD2(config)#interface port-channel 2
CD2(config-if)#description Link to Acc3
CD2(config-if)#switchport mode trunk
CD2(config-if)#switchport trunk native vlan 199
3. Verify the EtherChannels come up.
The port channels should show flags (SU) (Layer 2, in use) with member ports (P) (in port-channel). Verify on both sides of the port channel.

PAgP EtherChannel Configuration
4. Convert the existing uplinks from Acc4 to CD1 and CD2 to PAgP EtherChannel. (Note that in a real world environment you should always use LACP if possible.)
It’s good practice to use the same port channel number on both sides of the link. CD1 is already using port channel 1 to Acc3, and CD2 is using port channel 2 to Acc3. From Acc4 to CD1 we’ll use port channel 2, and from Acc4 to CD2 we’ll use port channel 1.
We’ll configure the Acc4 side of the EtherChannel to CD2 first.
Acc4(config)#interface range f0/23 - 24
Acc4(config-if-range)#channel-group 1 mode desirable
Acc4(config-if-range)#exit
Acc4(config)#interface port-channel 1
Acc4(config-if)#description Link to CD2
Acc4(config-if)#switchport mode trunk
Acc4(config-if)#switchport trunk native vlan 199
Then configure switch CD2 with matching settings.
CD2(config)#interface range f0/23 - 24
CD2(config-if-range)#channel-group 1 mode desirable
CD2(config-if-range)#exit
CD2(config)#interface port-channel 1
CD2(config-if)#description Link to Acc4
CD2(config-if)#switchport mode trunk
CD2(config-if)#switchport trunk native vlan 199
Next configure the Acc4 side of the EtherChannel to CD1. Remember to use a different port channel number.
Acc4(config)#interface range f0/21 - 22
Acc4(config-if-range)#channel-group 2 mode desirable
Acc4(config-if-range)#exit
Acc4(config)#interface port-channel 2
Acc4(config-if)#description Link to CD1
Acc4(config-if)#switchport mode trunk
Acc4(config-if)#switchport trunk native vlan 199
Then configure switch CD1 with matching settings.
CD1(config)#interface range f0/21 - 22
CD1(config-if-range)#channel-group 2 mode desirable
CD1(config-if-range)#exit
CD1(config)#interface port-channel 2
CD1(config-if)#description Link to Acc4
CD1(config-if)#switchport mode trunk
CD1(config-if)#switchport trunk native vlan 199
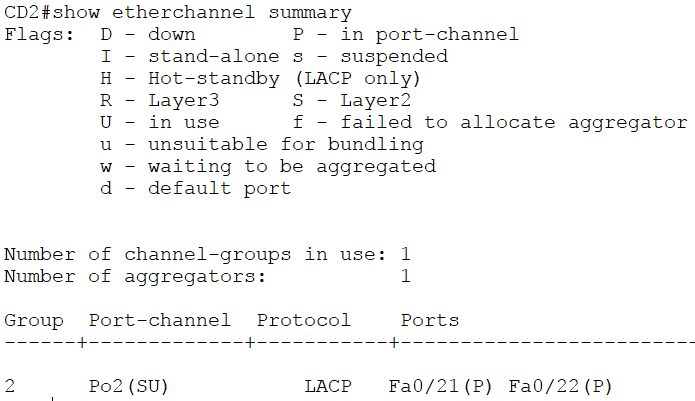
5. Verify the EtherChannels come up.
The port channels should show flags (SU) (Layer 2, in use) with member ports (P) (in port-channel). Verify on both sides of the port channel.
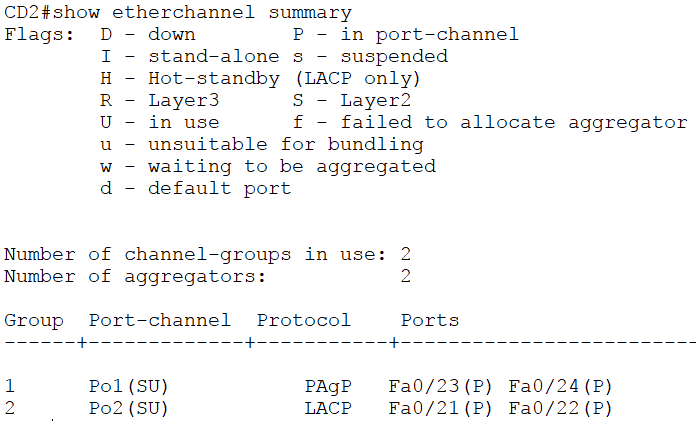
On the core/distribution layer switches you should see both the LACP and PAgP port channels up.


Static EtherChannel Configuration
6. Convert the existing uplinks between CD1 and CD2 to static EtherChannel.
Port channels 1 and 2 are already in use so we’ll use port channel 3.
Configure the CD1 side first.
CD1(config)#interface range g0/1 - 2
CD1(config-if-range)#channel-group 3 mode on
CD1(config-if-range)#exit
CD1(config)#interface port-channel 3
CD1(config-if)#description Link to CD2
CD1(config-if)#switchport mode trunk
CD1(config-if)#switchport trunk native vlan 199
Then configure switch CD2 with matching settings.
CD2(config)#interface range g0/1 - 2
CD2(config-if-range)#channel-group 3 mode on
CD2(config-if-range)#exit
CD2(config)#interface port-channel 3
CD2(config-if)#description Link to CD1
CD2(config-if)#switchport mode trunk
CD2(config-if)#switchport trunk native vlan 199
7. Verify the EtherChannel comes up.

8. How much total bandwidth is available between the PCs attached to Acc3 and the PCs attached to Acc4 now?
The port channels from the Acc3 and Acc4 switches towards the root bridge CD1 are up and forwarding. Spanning tree shuts down the port channels toward CD2 to prevent a loop.
The port channels from Acc3 and Acc4 facing the root bridge comprise two FastEthernet interfaces, so the total bandwidth available between the PCs attached to the different access layer switches is 200 Mbps.
Additional Resources
Configuring EtherChannels: https://www.cisco.com/c/en/us/td/docs/switches/lan/catalyst3750x_3560x/software/release/12-2_55_se/configuration/guide/3750xscg/swethchl.html
Cisco Switch EtherChannel Configuration – LACP – PAgP: https://www.networkstraining.com/cisco-switch-etherchannel-configuration/
How to configure EtherChannel Port Aggregation Protocol (PAgP) in Cisco Switches: https://www.omnisecu.com/cisco-certified-network-associate-ccna/how-to-configure-etherchannel-port-aggregation-protocol-pagp-in-cisco-switch.php
How to Configure PAgP and LACP: https://networkustad.com/2019/11/08/etherchannel-protocols-pagp-and-lacp/
Libby Teofilo

Text by Libby Teofilo, Technical Writer at www.flackbox.com
Libby’s passion for technology drives her to constantly learn and share her insights. When she’s not immersed in the tech world, she’s either lost in a good book with a cup of coffee or out exploring on her next adventure. Always curious, always inspired.