In this Cisco CCNA training tutorial, you’ll learn about DNS, the Domain Name System. Scroll down for the video and also text tutorial.
DNS Domain Name System Simplified – Video Tutorial
Domingo Arturi

I’m a newly certified CCNA thanks to your video course. Your training is very nicely structured and that helped everything click in my head. I’m recommending it to anyone who asks how to pass the test.
Thank you, sir. I think I’m just one of the thousands of success stories that happened because of your videos.
DNS The Domain Name System
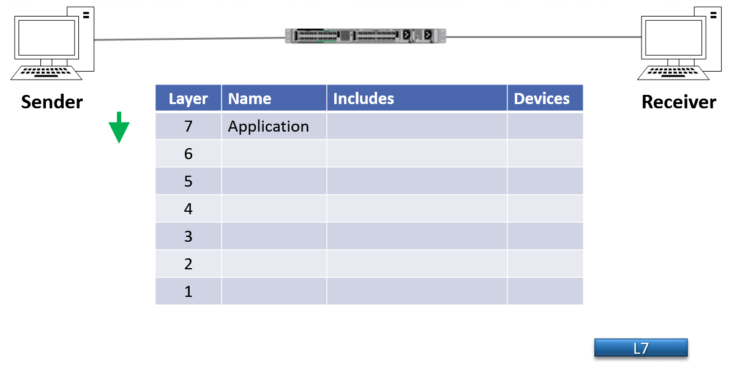
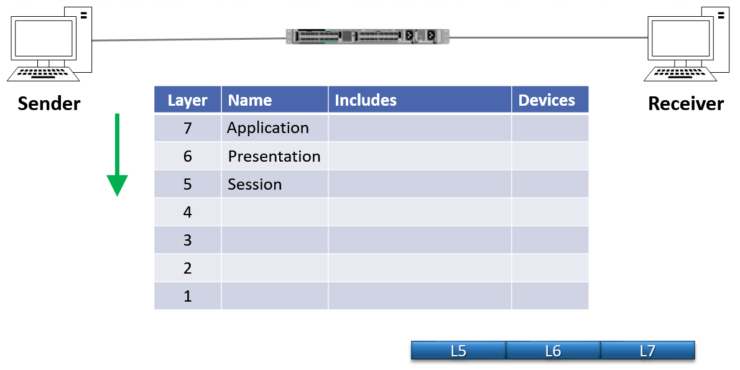
When two hosts communicate, the sender needs to form the packet. The packet is created starting with the Application Layer (Layer 7) information at the top of the OSI stack. If the host wanted to download information from a website, for example, this would include HTTP information like the Get request.
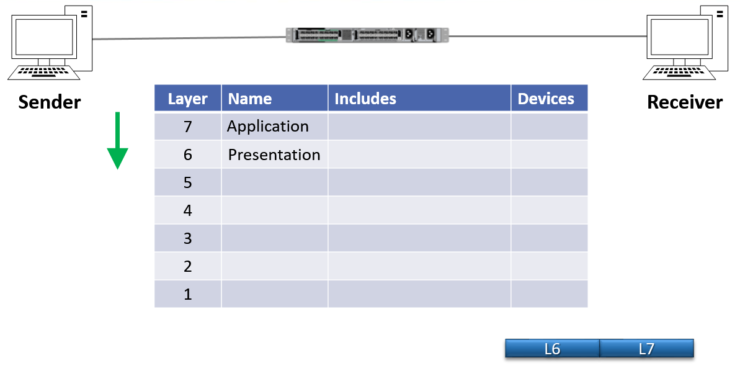
The host will then continue to form the packet and will encapsulate the Layer 7 header with the Presentation Layer (Layer 6) header.
The sender will continue forming the packet and will encapsulate it with the Session Layer (Layer 5) header next.
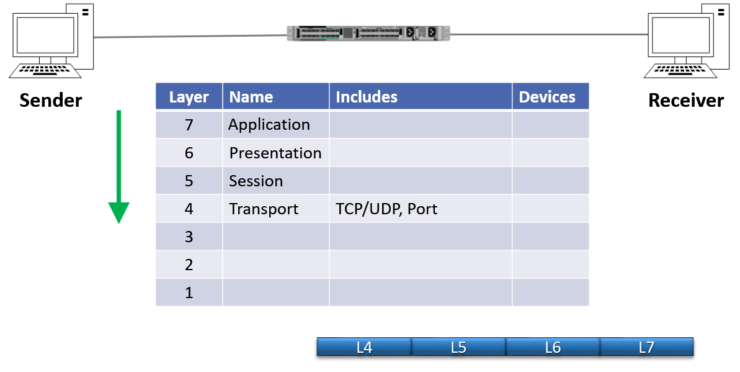
Next comes the Layer 4 (Transport Layer) header, which includes information like whether the transport is TCP or UDP, and the Port number. In our example, this would be TCP Port 80 for HTTP web traffic.
Next, the source host will encapsulate that with the Network Layer (Layer 3) information which is the IP header. This includes the source and destination IP addresses. Some applications will enter the IP address directly, but often an FQDN (Fully Qualified Domain Name) such as www.flackbox.com will be used. It’s a lot easier for humans to remember and type in www.flackbox.com than 108.179.200.210.
The FQDN has to be converted to an IP address for the network to be able to get the packet to its destination. That’s where the Domain Name System (DNS) comes in. DNS resolves the FQDN to an IP address.
Enterprises will typically have an internal DNS server or a cluster of internal DNS servers which will resolve the IP addresses of their internal hosts. For example, if I was working for an enterprise called www.flackbox.com, we would have our own internal DNS server which would be responsible for resolving all hosts that were in the www.flackbox.com domain.
However, that internal DNS server obviously can't hold FQDN to IP address mappings for absolutely everything on the entire internet, so it's going to need to forward requests for servers outside the organisation to an external public DNS server. Public DNS is distributed across many external service providers.
DNS requests are sent using UDP port 53. If UDP fails it can revert to TCP port 53, but UDP is the standard.
You can view your IP addressing information, including DNS, by using the ‘ipconfig /all’ command on a Windows host.
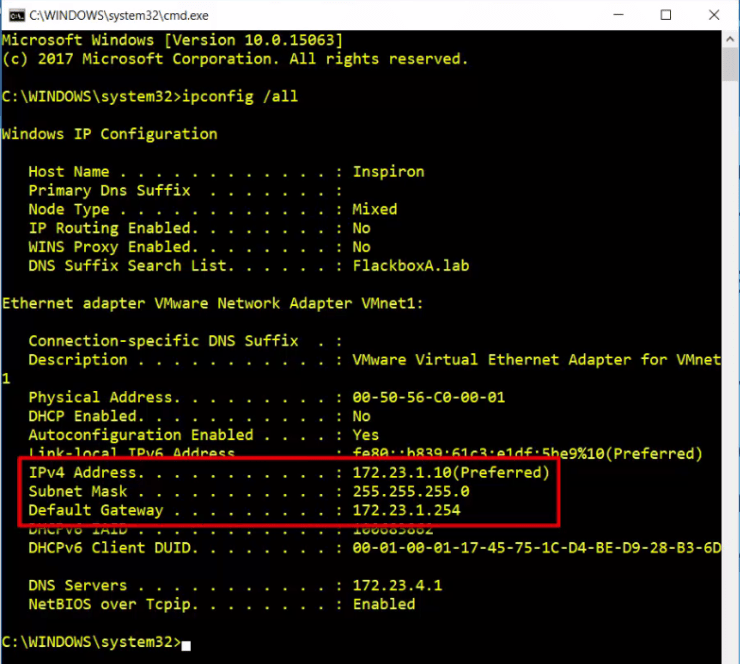
In the example here my IP address is 172.23.1.10 with a /24 subnet mask, and the default gateway is at 172.23.1.254.
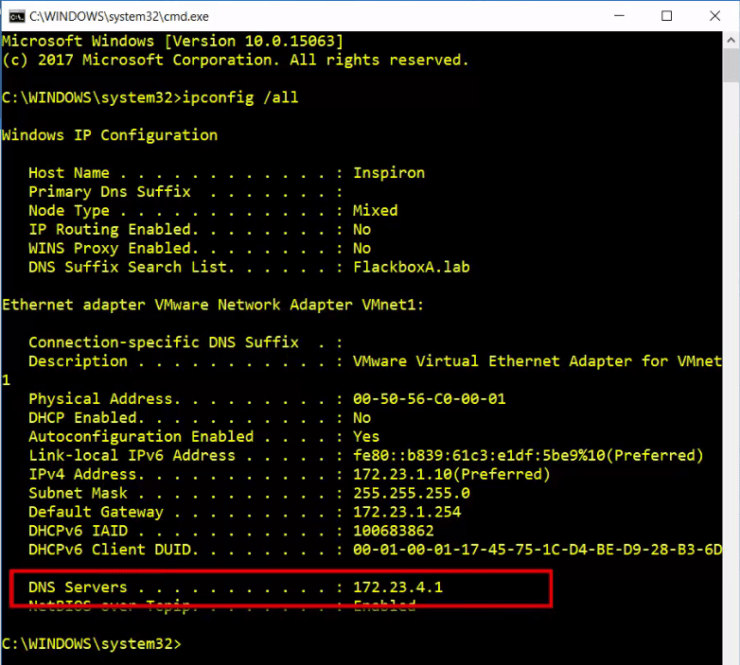
My DNS server is at 172.23.4.1.
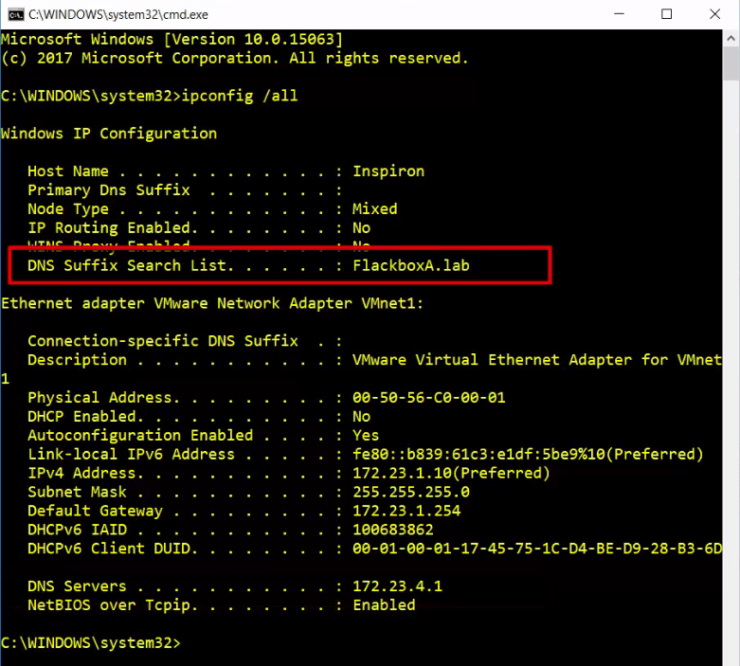
The DNS domain that I am a part of is flackboxa.lab.
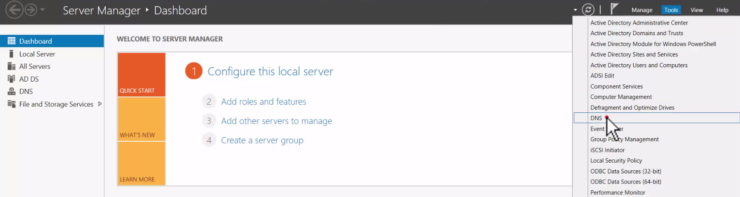
Lets have a look at the DNS server at 172.23.4.1 next. I'm using a Windows server as my DNS server. Within Server Manager, I can click on Tools and then open up DNS.
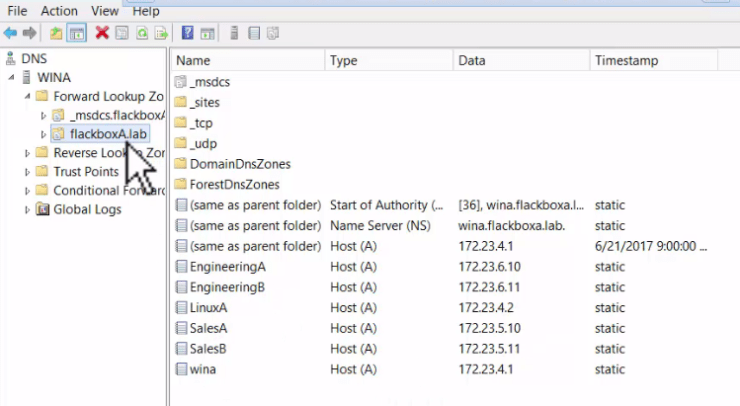
This server is authoritive for the domain flackboxa.lab and already has address records set up for some hosts. The host EngineeringA is at 172.23.6.10, EngineeringB is at 172.23.6.11, LinuxA is at 172.23.4.2 etc.
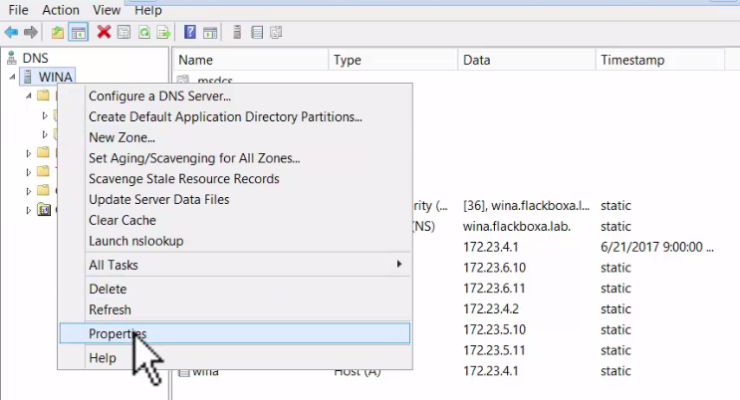
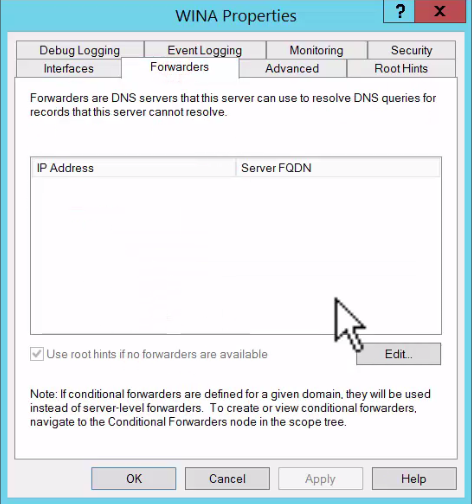
If this DNS server received a request for an FQDN that was in a different domain outside flackboxA.lab, it would need to forward that out to public DNS. To configure that, right-click on the server name on the top left here, select Properties and then Forwarders.
Click Edit and then enter the IP address of the public DNS server, which you will normally have received from your Internet Service Provider.
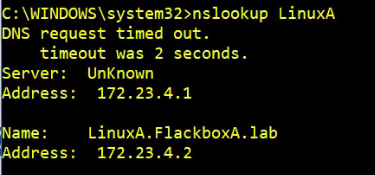
Okay, so that's DNS set up. If I come back to my local host now, I can do an nslookup for the host LinuxA. My DNS server at 172.23.4.1 resolves linuxa.flackboxa.lab to 172.23.4.2. My host can now communicate with LinuxA using it’s IP address, it’s hostname or it’s FQDN.
Additional Resources
How DNS Works in Six Steps - Verisign