
In this NetApp training tutorial, we will take a look at NetApp Thin Provisioning which makes it appear to your clients that they’ve got more storage available than the actual physical storage space that is really on their storage system. Scroll down for the video and also text tutorial.
NetApp Thin Provisioning Video Tutorial

Clive Bates

I had designed solutions, installed, maintained, and managed migrations and upgrades of legacy 7-mode NetApp systems for 12 years but had not gained much experience on clustered ONTAP until I found your course.
It took me 3 weeks to complete the course, due to the fun of doing it from home in between all the other things needed to be done around the house.
Now I have the NCDA certification and it will definitely help me to get further contracts.
The course helped me get the knowledge required for me to go forward and I’m very pleased with the confidence I have gained as part of this.
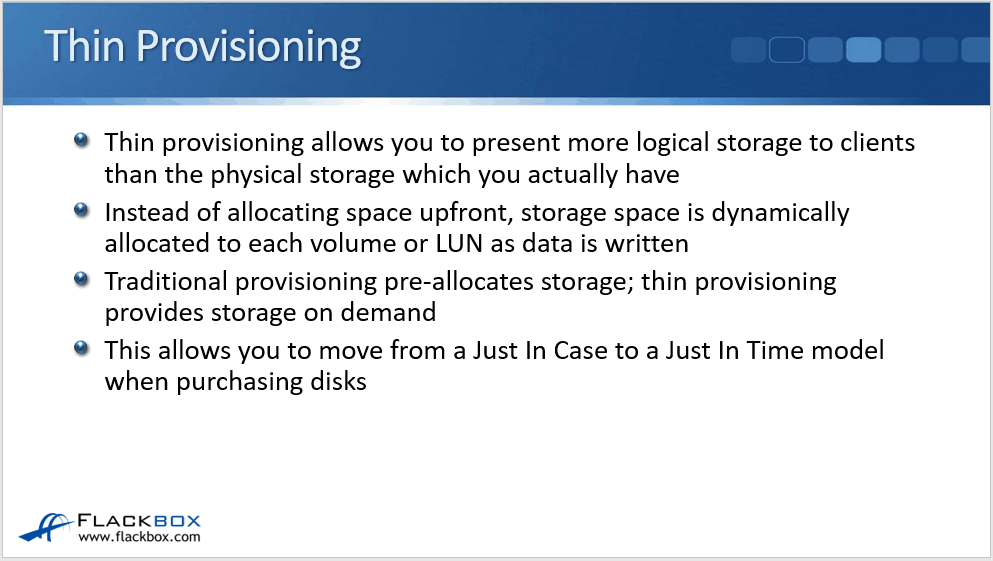
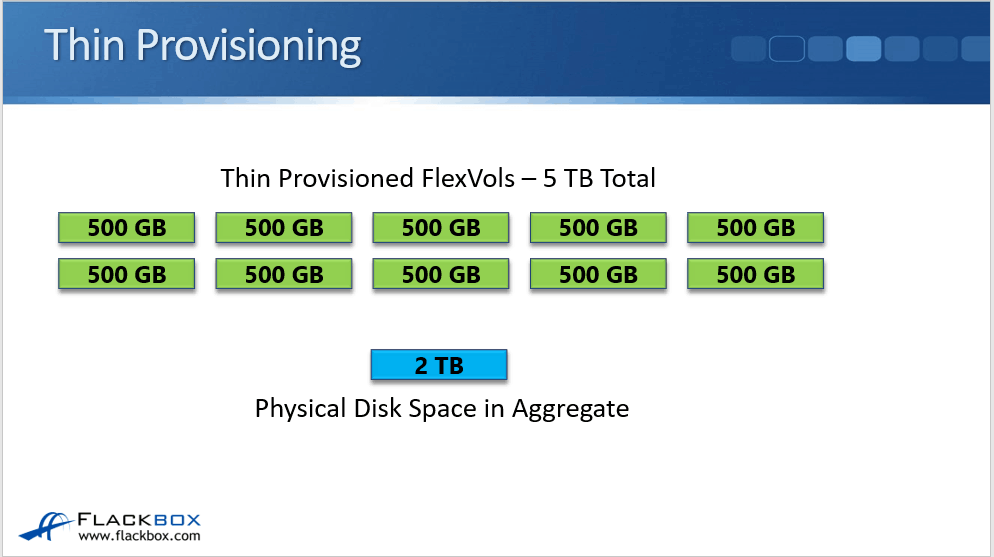
Thin provisioning allows you to present more logical storage to your clients than the amount of physical storage you actually have.
Let's say that you have got 20 terabytes available, you can actually make it look to your clients that they've got 40 terabytes of storage. Instead of allocating space upfront, storage space is dynamically allocated to each volume or LUN as the data is written.
Traditional provisioning pre-allocates storage whereas thin provisioning provides storage on demand. This allows you to move from a "just in case" to a "just in time" model when you're purchasing your disks.
Traditional Storage Allocation
So let's see how traditional storage allocation works. Let's say the organization that you're working in does not have a centralized storage system and instead, you're using disks inside the server's chassis themselves.
Now, I know that in a real-world environment, if you were doing that, you'd have multiple disks in each server in a RAID configuration. But to make things easy to explain and understand, let's say that we're just using one disk in each server.
For example, you are in charge of purchasing and the server team comes to you and they say that they want a new server and it's going to require 200 GB of storage space.
You've dealt with this server team before and you know that they commonly underestimate the required storage.
You're going to put in some overhead there just in case it is not enough. So, you're going to purchase 400 GB worth of storage for this server.
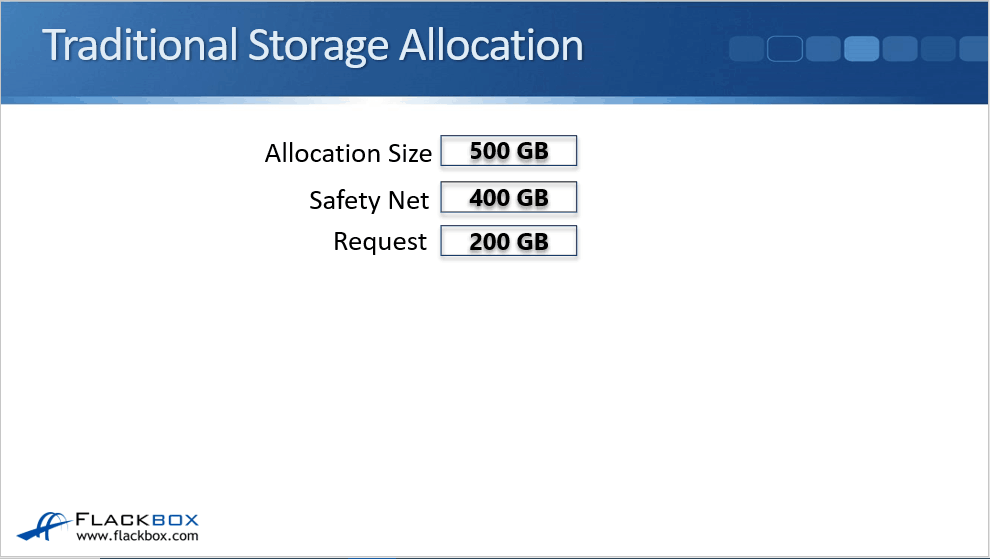
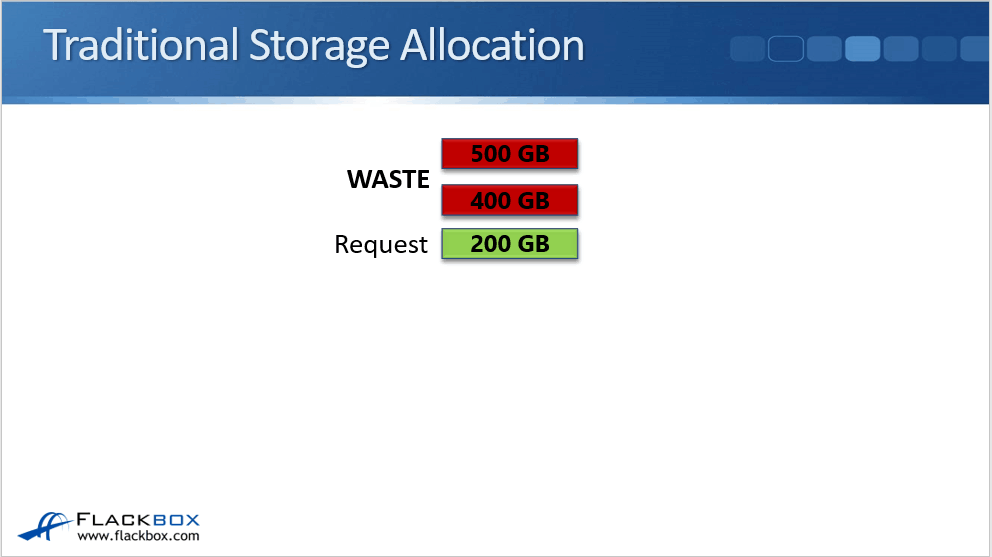
The problem here is that you can't buy 400 GB hard drives. Therefore, you end up buying a 500 GB hard drive for that server. If you look at the utilization now, the request was 200 GB. That's what's expected to actually be required.

However, you ended up paying for 500 GB worth of storage. So on that 500 GB, 300 GB is actual physical hardware that you've paid for may never be used and that is being wasted.
Even worse, if this organization doesn't just have one server, this problem is going to be multiplied. You can see that if they have 10 servers in the same situation, 10 servers times 200 GB is equal to 2 TB worth of disk space that is actually required.
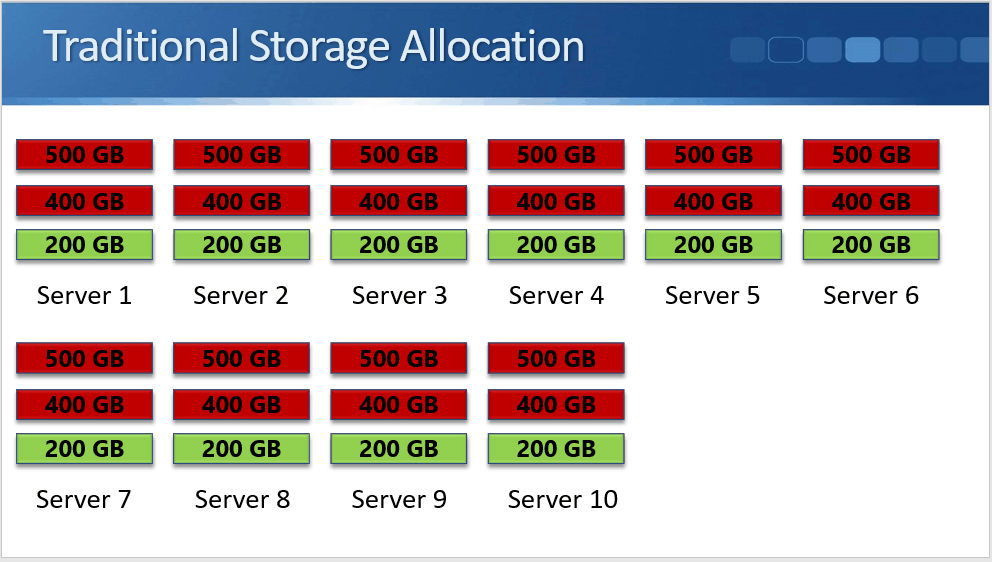
Just in case you need more than that, you would end up paying for 5 TB worth of storage. So, you've got 3 TB worth of storage that you bought and that is actually being wasted.
How Thin Provisioning Works
This is where thin provisioning comes in. When we use thin provisioning on our centralized storage system, we reconfigure those ten 500 GB volumes. We then present each of those 10 servers with 500 GB worth of logical space but actually underlying that, we've only paid for 2 TB worth of storage.
We will then buy what is actually going to be used. If later on, it does turn that the server team underestimated the amount of space that is required, we can then buy additional disks and add them. That's going to be completely transparent to the clients.
Rather than buying our hardware ahead of time "just in case", we end up buying the hardware as we need it. Therefore, it is "just in time" or not too much early.
We also get additional benefits such as disks' prices come down over time. Since we're buying them later, we're going to get more value for money. We're taking up less disk space that requires less power and cooling, so we get additional cost savings as well.
Thin Provisioning Monitoring
One caveat when you're using thin provisioning is you do have to monitor more carefully. When using thick provisioning, the free space reported in the volume is the same as the physically available space.
It's easy for storage admins and the actual users of this storage to see when this space is running out. The users themselves can see when they're running out of disk space and they can tell you, the storage administrator, that you need to correct that.
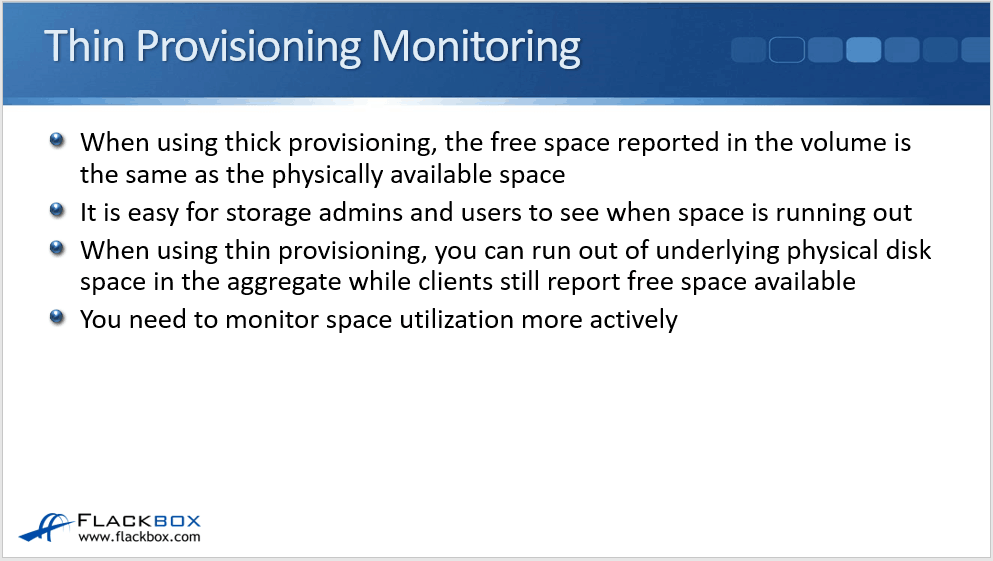
When using thin provisioning, you can run out of underlying physical disk space in the aggregate while clients still report free space available. The actual user of the storage might see that they've got disk space left available, but the aggregate fills up and then they've actually run out of disk space before they knew it was going to happen.
So this places the onus on you, the storage administrator. To make sure that you do not run into that problem, you need to monitor space utilization more actively. You need to make sure that when you are using thin provisioning, your aggregates do not run out of space.
How FlexVol Volumes Works
Let's see how it works down at the physical level. In the same aggregate, you can have multiple volumes in there. They can all be thin provisioned or you can have a mix of thick and thin provisioned volumes. The way it works is that the disk space is allocated to those volumes on a first-come, first-serve basis.
So let's say that we create volume one and volume two. We write some data for volume one to the storage system that will get written to the aggregate. Then we write some data for volume two, then for volume one, then for volume two and so on.
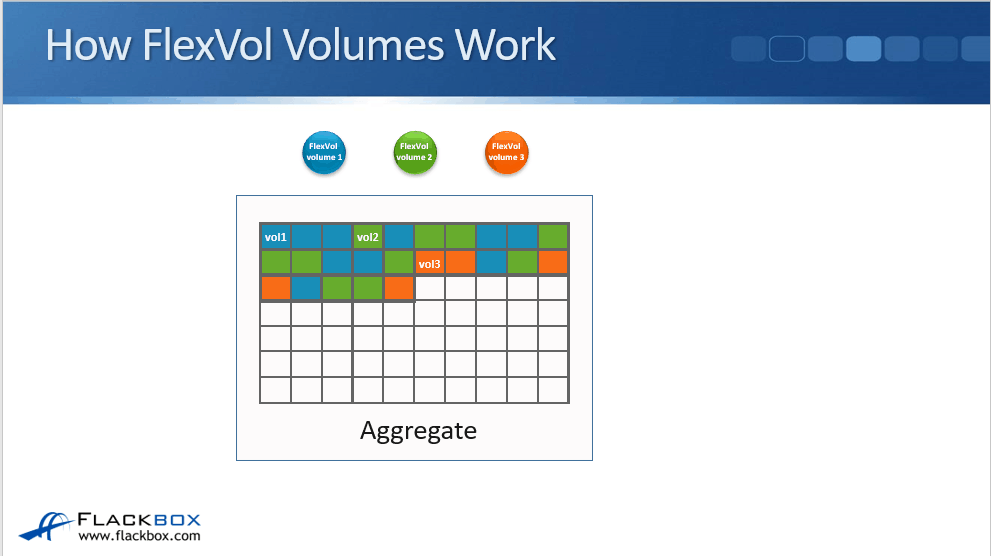
You can see that the disk space is being allocated to the volumes first-come, first-served basis. Then, we create another new volume, volume three. We start writing to that and we also write to volume one on volume two.
Again, you can see that the disk space is being allocated there first-come, first-serve. It's possible that we could actually fill up the aggregate. When that happens, none of the volumes will be able to write through it anymore.
How much space each volume got in that aggregate just depends on who was writing data at what particular time. You can, of course, limit the amount of space available to a volume when you set the size off the volume.
NetApp ONTAP uses the WAFL (Write Anywhere File Layout) file system, with the 'Write Anywhere' meaning we don't have any fixed blocks on disk. Whenever a client writes request comes in for any volume, it can be written to the next available block.
We don't have fixed blocks for the different volumes. Writes are written sequentially in a first-come, first-serve manner.
Combining Thin and Thick Provisioning
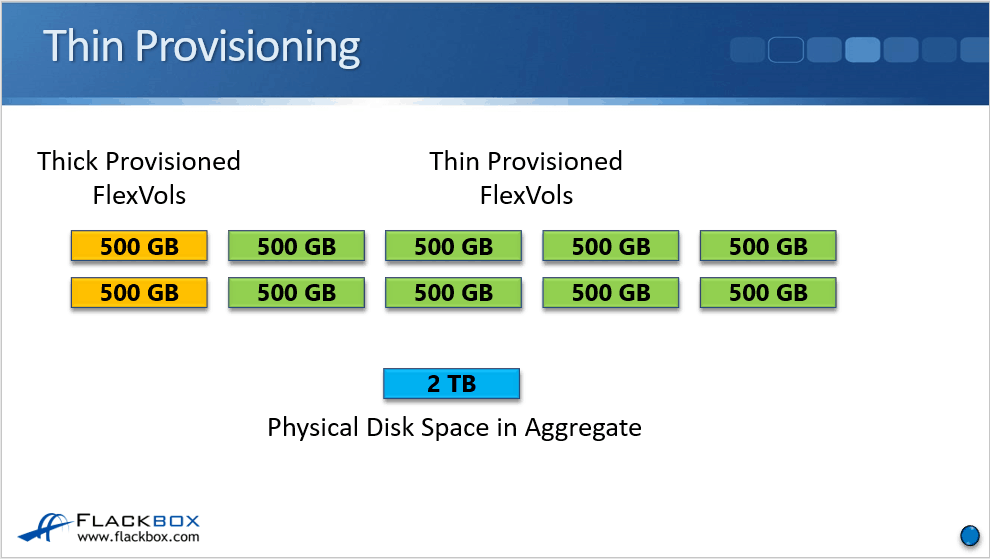
As I mentioned earlier, you can mix and match both thin and thick provisioned volumes in the same aggregate.
For example, we've got 2 TB of the aggregate, which is the actual physical space, and we have got 10 500 GB volumes. Now, two of those volumes are really important. We want to make sure that they do not run out of disk space. Therefore, we will configure those two volumes as thick provisioned.
What happens now is they actually have that 500 GB each reserved in the aggregate. That takes up 1 out of the 2 TB. The other 1 TB worth of space is going to be allocated first-come, first-serve to the eight remaining volumes.
Those eight other volumes could actually run out of space when they've only got 100 or 200 GB at the volume level because their aggregate is full. The two volumes that we thick provisioned at 500 GB are guaranteed 500 GB worth of space. Hence we're not going to run out before that.
Thin Provisioning for LUNs
Similar to the volumes, we can also enable thin provisioning for LUNs. There's a potential issue with this, caused because hosts manage the file system themselves on their LUNs. As a result, the host and the storage system may report the used space differently.
Let's see how it works. We've got a LUN in the example below.

The client writes two files to the LUN and each file consumes 25% of the LUN space. The client will report that 50% of the space is used. The storage will also report 50% of the space is used.
Then, the client writes the third file to the LUN.

The client then deletes files one and two, but it doesn't actually delete the blocks on the storage. It just marks them as being available to be overwritten, so the storage system doesn't know they’ve been deleted.

The client would now report 25% of the space is used, but the storage would still report 75% of the space as being used. Then, the client writes the fourth file to the LUN. It's also 25% of the LUN space (bear with me here, we're nearly there!).

The client will report that 50% of the space is used but the storage will now report 100% of the space is used. Most hosts will end up using all of the space in the LUN like this. At this point, it's no different from having it thick provisioned. You're not going to get any space savings.
Space Reclamation
To resolve this problem, NetApp has reclamation technology. Client-side software such as SnapDrive and SnapManager can free up the blocks they're not using on the storage system, leading to space savings from thin provisioning again.
NAS Thin Provisioning Configuration Example
This configuration example is an excerpt from my ‘NetApp ONTAP 9 Complete’ course. Full configuration examples using both the CLI and System Manager GUI are available in the course.
Want to practice this configuration for free on your laptop? Download your free step-by-step guide ‘How to Build a NetApp ONTAP Lab for Free’

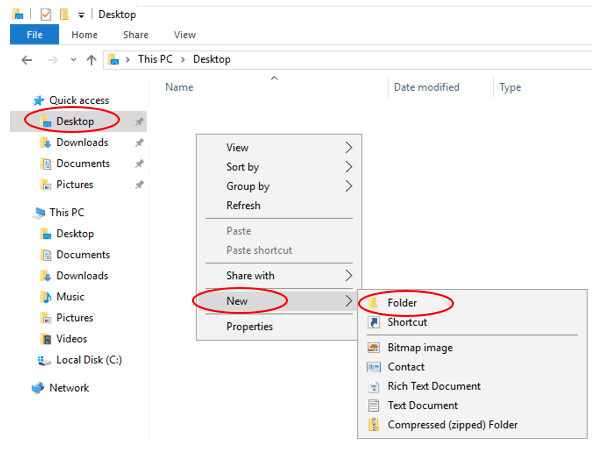
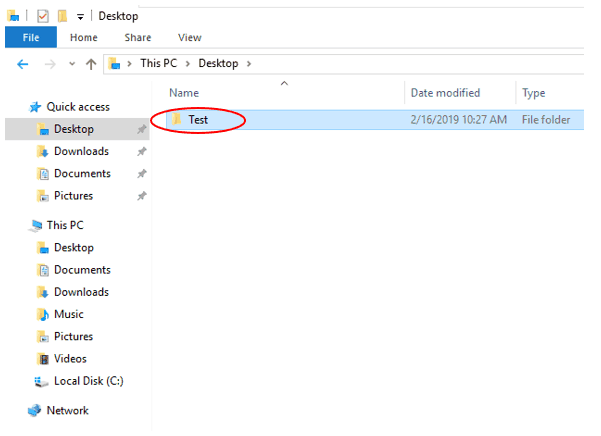
- On the WinA server, open Windows File Explorer and create a new folder on the Desktop named Test.
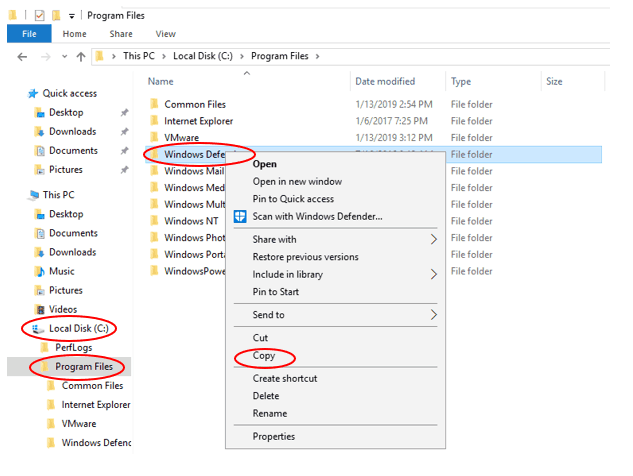
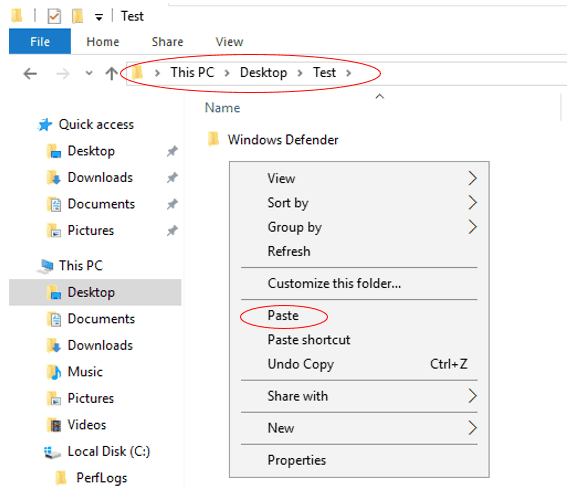
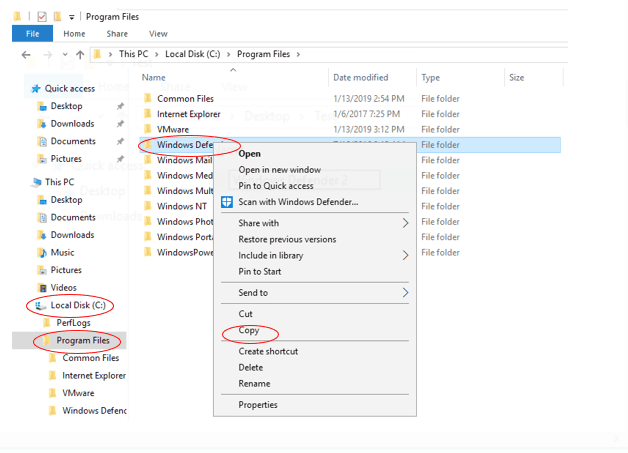
2. Copy and paste the ‘C:\Program Files\Windows Defender’ folder into the ‘Test’ folder on the Desktop.
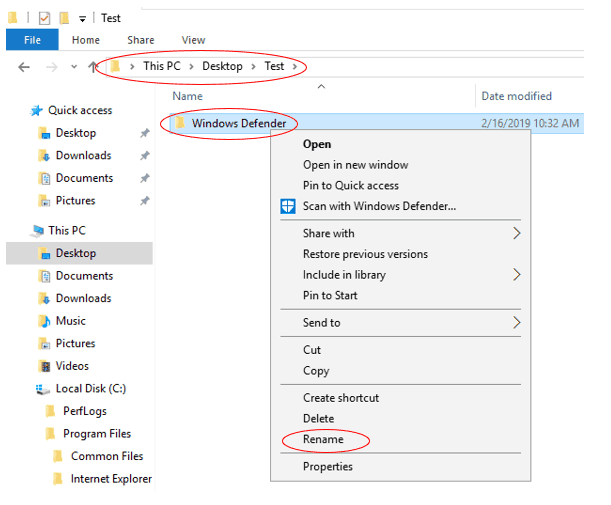
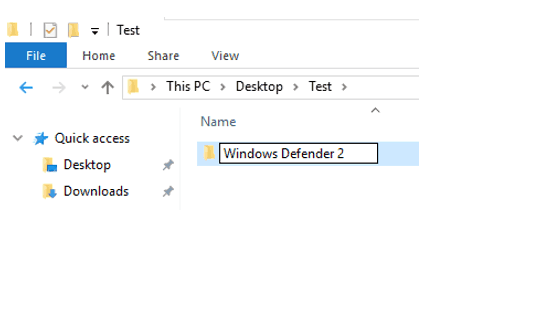
3. Rename the ‘Windows Defender’ folder in the ‘Test’ folder on the Desktop to ‘Windows Defender 2’
4. Copy and paste the ‘C:\Program Files\Windows Defender’ folder into the ‘Test’ folder on the Desktop again.

5. You should now have a ‘Test’ folder on the Desktop which contains the folders ‘Windows Defender’ and ‘Windows Defender 2’

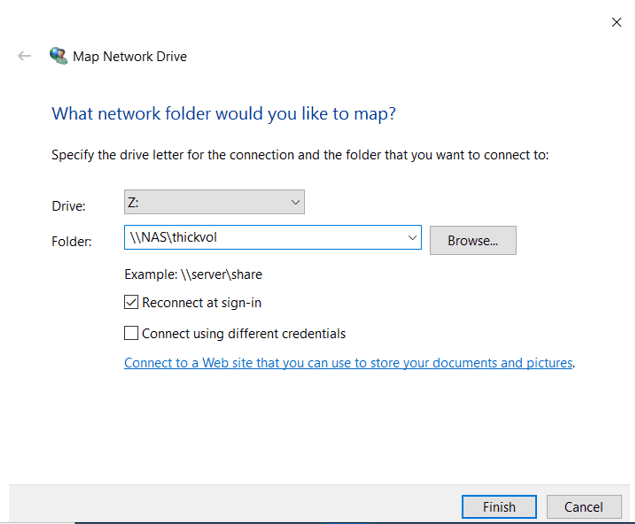
6. Create a 100 MB thick provisioned volume in the NAS SVM named thickvol in aggr2_C1N1. Mount it in the namespace directly under the root volume. You can ignore any warning message about the export policy because CIFS (not NFS) is being used for access.
cluster1::> volume create -vserver NAS -volume thickvol -aggregate aggr2_C1N1 -size 100mb -junction-path /thickvol -space-guarantee volume
Warning: The export-policy "default" has no rules in it. The volume will therefore be inaccessible over NFS and CIFS protocol.
Do you want to continue? {y|n}: y
[Job 49] Job succeeded: Successful
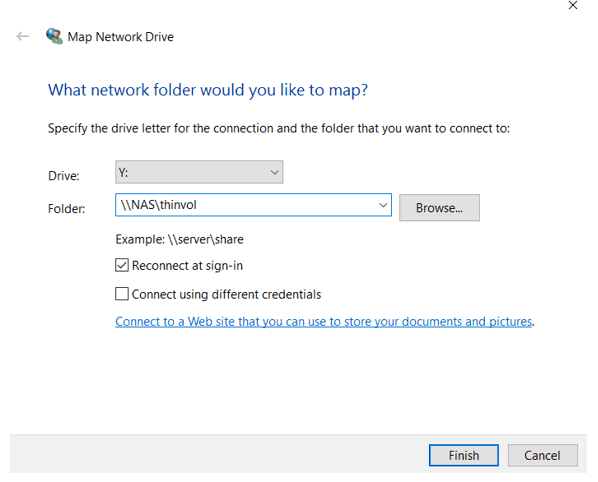
7. Create a 100 MB thin provisioned volume in the NAS SVM named thinvol in aggr2_C1N2. Mount it in the namespace directly under the root volume. You can ignore any warning message about the export policy because CIFS (not NFS) is being used for access.
cluster1::> volume create -vserver NAS -volume thinvol -aggregate aggr2_C1N2 -size 100mb -junction-path /thinvol -space-guarantee none
Warning: The export-policy "default" has no rules in it. The volume will therefore be inaccessible over NFS and CIFS protocol.
Do you want to continue? {y|n}: y
8. Share both volumes using the same name as the volume.
cluster1::> vserver cifs share create -vserver NAS -share-name thickvol -path /thickvol
cluster1::> vserver cifs share create -vserver NAS -share-name thinvol -path /thinvol
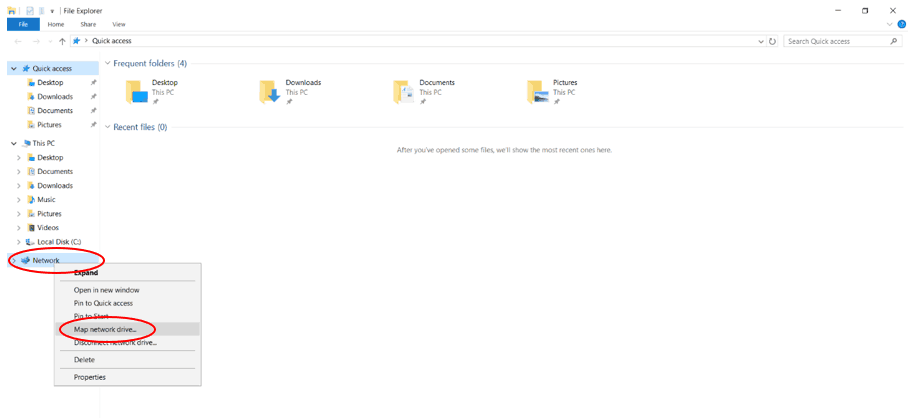
9. Log in to the WinA host as administrator and map network drives to the thickvol and thinvol
Open Windows File Explorer. Right-click on ‘Network’ and select ‘Map network drive…’
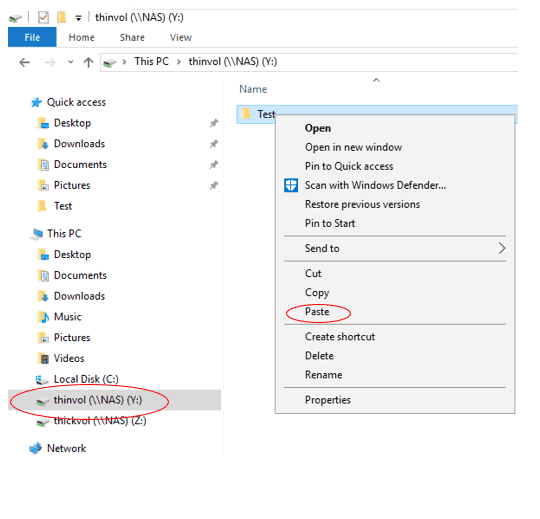
10. Copy the Test folder from the Desktop into thickvol.
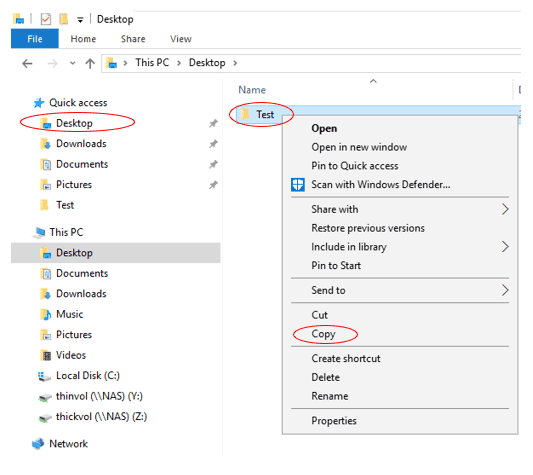
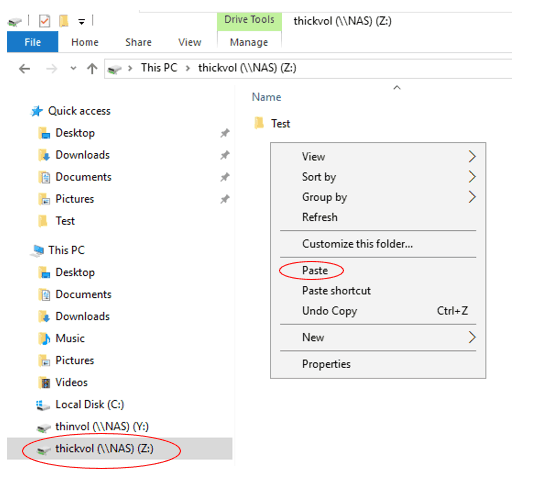
11. Copy the Test folder from the Desktop into thinvol.
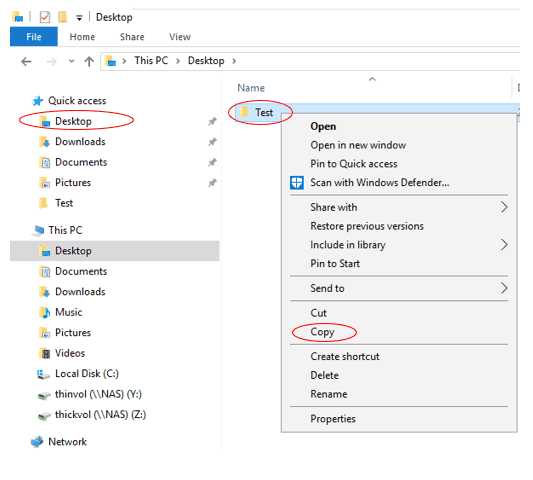
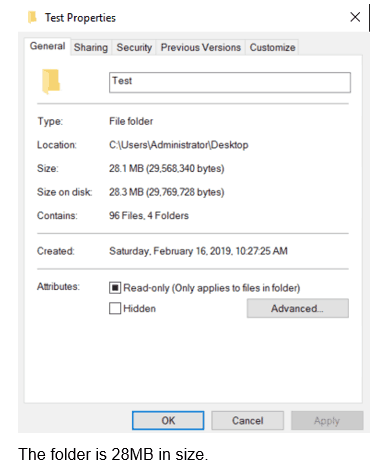
12. Check the size of the Test folder on the Desktop.
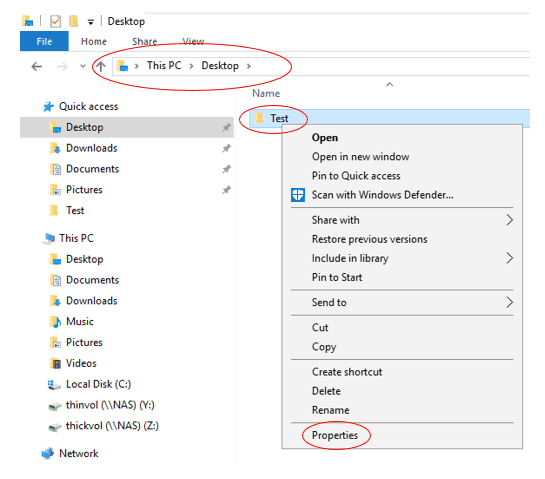
13. How much space do you expect thickvol and thinvol to be using in their aggregates? Verify this.
Both volumes are 100 MB in size and contain 28 MB data. Thickvol is in aggr2_C1N1 and thinvol is in aggr2_C1N2.
Thickvol is thick provisioned so it will reserve the entire 100 MB volume size in its aggregate. Thinvol is thin provisioned so it will use the 28 MB used space in its aggregate. (A small amount of overhead will use a little additional space.)
cluster1::> storage aggregate show aggr2_C1N1 -fields usedsize,physical-used
aggregate usedsize physical-used
---------- -------- -------------
aggr2_C1N1 101.3MB 33.20MB
cluster1::> storage aggregate show aggr2_C1N2 -fields usedsize,physical-used
aggregate usedsize physical-used
---------- -------- -------------
aggr2_C1N2 31.20MB 33.43MB
Additional Resources
Back to Basics: NetApp Thin Provisioning
Thin Provisioning from NetApp

Text by Alex Papas, Technical Writer at www.flackbox.com
Alex has been working with Data Center technologies for over 20 years. Currently he is the Network Lead for Costa, one of the largest agricultural companies in Australia. When he’s not knee deep in technology you can find Alex performing with his band 2am